The Face Manager shows you all faces assigned to a person and provides powerful tools for reviewing, confirming and training faces.
Each person in the People View is linked to face annotations in files. Some persons may have links to hundreds of faces, while other persons appear only in a few files.
When IMatch does face recognition, it assigns the most likely person to each face. While you add more persons, manually assign persons to files etc., these assignments may change - unless the assignment has been confirmed and thus locked.
Face assignments can be wrong. This does not happen too often if the IMatch AI does a good job. But it can happen. And this is where the Face Manager comes in.
It allows you to see all faces assigned to a person. And to confirm, ignore and delete faces in batch (in large quantities).
There are several ways to start the Face Manager:
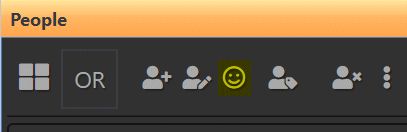
Start it from the People View with the icon or the F4 keyboard shortcut:
Or from the Person Editor via the same button:

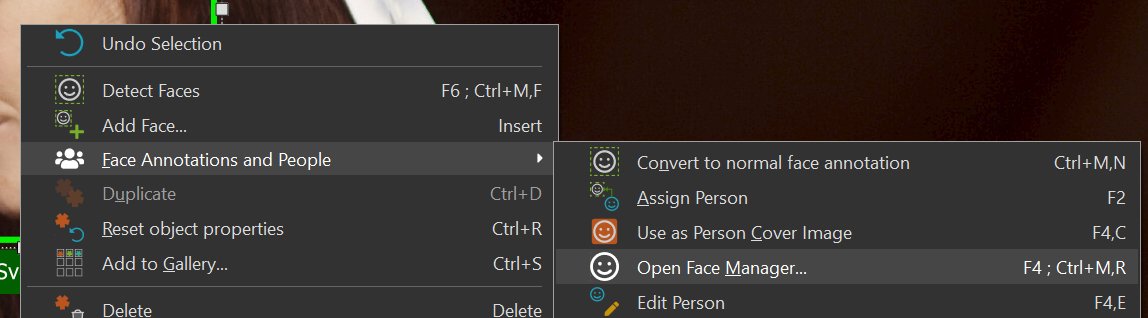
You can also start the Face Manager from the context menu of a face in the Viewer or by pressing F4 after selecting a face annotation:
And you can open the Face Manager from the context menu in the File Window.
This command is only enabled if an image with exactly one person is focused.
If the image is linked to multiple persons, open it in the Viewer and then open the Face Manager from there.
The Face Manager runs in a separate window which you can size and position freely.

With the drop-down control you control which type of faces you want to view. The following choices are available:
Show all faces | Show all faces assigned to the person (confirmed or unconfirmed). |
Show confirmed faces | Show faces assigned to the person which have been confirmed by you or the IMatch AI. These faces are no longer considered when the IMatch AI looks for matching faces for a person. |
Show unconfirmed faces | Show faces assigned to the person but not yet confirmed. This is the view which you will use most the time. Here you check the assignments made by IMatch and confirm faces. |
Show trained faces | All trained faces for this person. There should be 5 to 10 trained faces for a person. If the age of the person in your images varies a lot, try to train a face for each age frame. Do not overtrain a person by adding too many trained faces. |
The size of the thumbnails can be changed using the slider at the top. Remember that you can also resize the Face Manager window to see more faces.
To show the file name, folder name and date for the focused file, click the switch on the left. The information is then displayed in a separate section below the thumbnails.
If this is enabled, the Face Manager only shows faces from files in the current scope (files in the active File Window). This can be a very helpful filter if you already have some kind of organization for persons in your images.
For example: You have organized your files into categories based on persons. Each category contains the files of a specific person, maybe with some other persons in the same image.
You can use this pre-existing organization to speed up the face conformation process as follows:
When you open the Face Manager from an annotation in the Viewer, the scope contains all images currently loaded in the Viewer.
By default, faces are sorted by confidence (how sure IMatch is that the face belongs to the person). Enable this option to sort faces by the date & time (File.DateTime) of the file containing the face instead.
This basically produces a face timeline and allows you to see the face of a person changing over the years.
The Face Manager has been designed to process large amounts of faces quickly.
Any number of faces can be selected. Selected faces use a yellow background color. One face is the focused face and uses a red background color.
Left-click a face with the mouse to select and focus it.
Use the cursor keys to navigate between faces. Home sets the focus to the first face and End sets the focus to the last face.
Hold down Shift to select all faces between the focused face and the face you click. Holding down Shift while using the cursor keys selects all files visited.
Hold down Ctrl when clicking to toggle the selection of individual faces without resetting the selection of other files.
Use Ctrl+A to select all faces in the current view.
Use Ctrl+I to toggle the selection in the current view.
The border color for faces indicates the state of the face:

IMatch indicates manual face annotations with a dashed border to make them easily to distinguish from face annotations created by the IMatch AI.
With the buttons at the bottom you change the state of all currently selected faces. Each button has a keyboard shortcut which is shown in the tooltip for the button when you hover the mouse cursor over it.
| Confirm | C or SPACE | Toggle the confirm state for all selected files. Confirming a face locks the person to the face. The face is no longer considered for automatic person assignments by the IMatch AI. Confirming also applies the keywords and categories of the person to the images containing the faces. |
| Train | T | Toggle the trained state for all selected files. Implies confirm. Try to train 5 to 10 representative faces for each person. Train more faces if the age of the person various a lot in your images. Do not overtrain. Training too many faces can actually reduce IMatch's ability to recognize a person. |
| Delete | D | Toggle the delete state for all selected files. This state removes the face annotation and associated data when you save your changes. |
| Ignore | I | Toggle the ignore state for all selected files. Ignored faces remain in the database and keep their face annotation, but no person is assigned to these faces. |
All changes performed in the Face Manager are temporary until you save them by clicking the Save button or by pressing Ctrl+S.
| Edit | F2 | Opens the integrated Person Selector to assign a different person to all selected and unconfirmed faces. You can also use this command to create a new person via the Person Selector. |
| Cover | O | Sets the focused face as the cover image for the person. |
| View | Enter and ESC | Opens the focused file in the integrated image viewer. |
| Goto | Open the file with the selected face in the Media & Folders View or in the People View. |
Here are some tips for an efficient workflow. Especially important if you have to deal with many faces.
Switch to the unconfirmed faces view to see all faces which need work.
Use the cursor keys to navigate between faces. Use SPACE to confirm, I to ignore and D to delete faces.
Click on Save or press Ctrl+S to save your changes.
If you find a face that belongs to another person, press F2 to open the Person Selector.
Note: Changing the person becomes effective immediately. The face is assigned to the other person and removed from the view.
When you change the face state and you save your changes, the IMatch AI re-processes unconfirmed/unassigned faces in the database in the background.
The Face Manager automatically reloads the faces to ensure that what you see is current.
Double-click a face or press Enter to open the focused file in the integrated image viewer. This makes it often easier to determine if a face really belongs to the current person.
There might be a small delay before the image becomes visible when IMatch has to create a cache image first.
Use the mouse wheel to scroll through the face images. This also changes the focused face. Use Enter or ESC to close the image viewer.
Keyboard shortcuts for commands and navigation remain functional while the viewer is open. This means you can navigate as usual with the cursor keys. Press SPACE to toggle the confirm state of the image you are viewing etc.
When you apply a command, the image viewer automatically moves to the next face.
The image viewer uses the same border colors as the regular views to indicate the state of the viewed face.
More information about People and Face Annotations.