IMatch supports a range of AI service providers, both cloud-based commercial offerings and free locally installed AI services.
Click the AI service you plan to use for detailed information.
As explained below in more detail, the free software Ollama enables you to run powerful AI models on your PC at no cost (except for energy) and without privacy issues. Your images never leave your computer.
However, AI is very demanding when it comes to hardware, especially your graphics card (GPU). To run any of the modern models locally, you'll need a beefy graphics card with at least 8 GB VRAM on board; preferably, 16 GB VRAM.
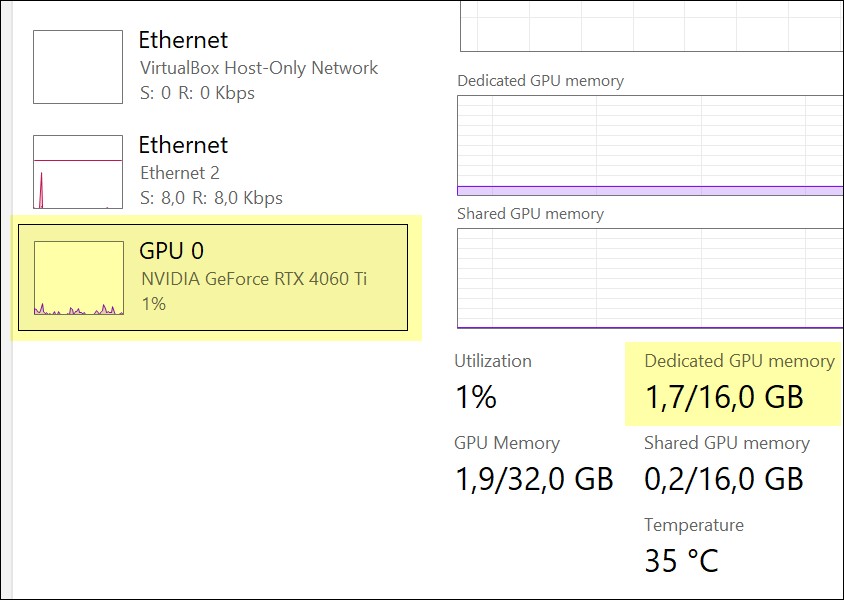
Open Windows Task Manager with Shift + Ctrl + ESC and switch to the Performance tab. Click the GPU on the left to see how much memory your graphics card has:
If this counter shows less than 8 GB, it is not really up to the task of running AI locally. At least not with the models and AI available today.
Note: Ai companies release new models at a very high frequency ("A New Week, a New Model"). The model names used in this documentation may have been declared outdated or retired when you read this help.
The AutoTagger configuration dialog always lists the currently supported models.
AutoTagger supports cloud-based AI models from companies like OpenAI, Google, and Mistral and models you can run locally using the free software Ollama or LM Studio.
| Modern AI Services These recommended services use large language models (LLMs) and prompts to produce descriptions and keywords. | |||||||||
|---|---|---|---|---|---|---|---|---|---|
OpenAI | A very good and popular service (ChatGPT) that IMatch AutoTagger can utilize to automatically add high-quality descriptions, keywords, and traits to images. Creating an API key is thankfully quite easy and the cost to use OpenAI models is affordable, even for personal use. To get started, follow the instructions on this page. Ask ChatGPT or Microsoft Copilot The above page allows you to sign up. Then follow the instructions to create an API key. See the OpenAI Models Overview for available models, costs, and rate limits. Open the AutoTagger configuration dialog box via Edit > Preferences > AutoTagger and select OpenAI as the AI. The model drop-down now lists all OpenAI models supported by AutoTagger. Create an API key for the model(s) you want to use.  Don't forget to configure your rate limits for OpenAI, which depend on your usage tier. See rate limits for more information. OpenAI frequently releases new models. We keep you informed via the IMatch release notes when we add support for new models to AutoTagger. OpenAI offers a cost-effective solution, even for personal use, and it works on any computer, without requiring a powerful graphics card or other special hardware. You can deposit $10 into your account and disable automatic renewal. This means when your balance is depleted, OpenAI will stop processing requests, and AutoTagger will display error messages. By disabling automatic renewal, you have full control over your spending. With just $10, you can automatically add descriptions and keywords to thousands of images. If you already have a 'pro' ChatGPT account, note that you'll still need to create a developer account in order to get an API key for IMatch to use. OpenAI keeps these separate. | ||||||||
Mistral AI | Mistral is a company based in France. They are known for releasing many of their AI models for free to the open-source community, to support further enhancements in AI and to make AI technology available for local use (on our PCs). Creating an API key is thankfully quite easy and the cost to use Mistral models is affordable, even for personal use. To get started, follow the instructions on this page to create an account. Ask ChatGPT or Microsoft Copilot When you have an account, you can subscribe to a plan. For initial testing, subscribe to the free plan. No credit card needed. The free plan allows you to create an API key, which you can then use with AutoTagger. The free plan has (obviously) rather severe rate limits (requests that can be made per day and tokens used), but it works well enough to try out the results you can expect from Mistral. Open the AutoTagger configuration dialog box via Edit > Preferences > AutoTagger and select Mistral AI as the AI. The model drop-down now lists all Mistral models supported by AutoTagger. Create an API key for the model(s) you want to use. 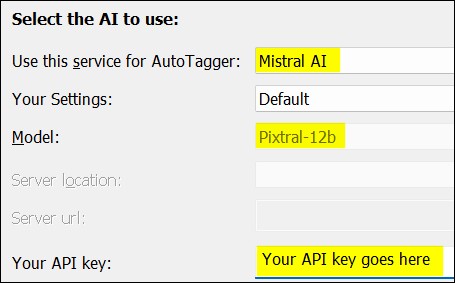 Mistral offers a cost-effective solution, even for personal use. And it works on any computer, without requiring a powerful graphics card or other special hardware. AutoTagger supports the current version of the Medium and Large models via the latest model id. When Mistral releases new model versions, AutoTagger automatically uses the new models. PrivacyMistral, as a European company based in France, adheres to the strict European data privacy rules and regulations. This can make Mistral the preferred choice for users—especially corporate users—who must follow the same rules or who consider privacy important. | ||||||||
Google Gemini | To get started, follow the instructions to create an account and get a Gemini API key. The blue button starts the process. 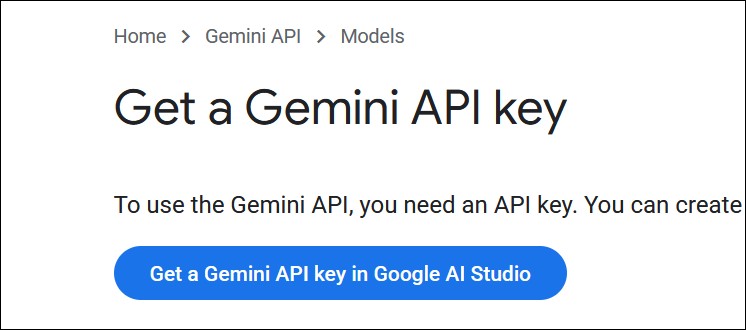 Just sign in with your Google account (or create one) and follow the instructions. Create a project and you get the API key you need to enter in IMatch AutoTagger. Ignore all the other information about "setting up your API key". AutoTagger takes care of all of that. After getting your API key, select the Gemini AI in AutoTagger, add your API key, and you're ready to go: 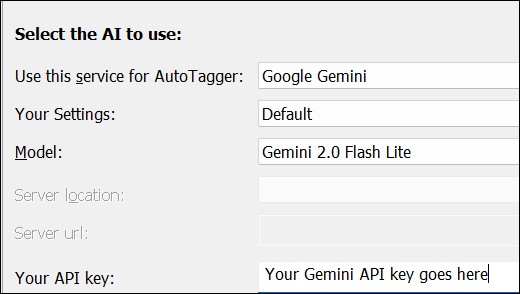 Google Gemini excels at anything related to location (places, landmarks, tourist spots, well-known buildings), animal breeds, OCR, and many other things. If you autotag typical vacation and travel photos frequently, give the Gemini AI a test drive. Also, if you are interested in bird photography, cars, planes, boats, and similar, Gemini AI with the Flash Light model (very affordable) should produce outstanding results. Search for | ||||||||
Ollama |  IMatch Learning CenterThere is a free video tutorial showing how to install and use Ollama.Ollama is an open-source and free project that enables you to run artificial intelligence (AI) applications locally on your PC, without relying on cloud connectivity. Since your images never leave your computer, there are no privacy issues. With a moderately powerful graphics card (NVIDIA preferred) and at least 6 GB VRAM, Ollama can run smaller AI models like Gemma 4 4b or Qwwen 3.5 4b efficiently. For running larger models, more VRAM (12 or more GB) is required. 1. Installing OllamaTo get started, visit the official Ollama website and download the installation package for Windows. Double-click the downloaded file to begin the installation process, which requires no administrator privileges. After installation, Ollama will appear in the Windows Taskbar and automatically start with Windows. This ensures that you can access Ollama quickly and easily. 2. Downloading a ModelAs explained in the AutoTagger Prompting help topic, Ollama requires a model to function. Fortunately, many free models are available for various applications, including image analysis, coding, and chat. For an overview of all available Ollama models, visit Ollama's Model Library page. For IMatch, only multimodal (vision-enabled) models are relevant. Installing the Google Gemma 4 ModelThis is a multimodal model released by Google in April 2026. It offers top-of-the-line vision processing, even for models reduced to 9b or 4b parameters. It supports 140 languages so you might get sensible and grammatically-correct descriptions, headlines and traits in languages other than English. The 4b variant needs about 5 GB RAM on the graphics card for optimal performance. For the 9b model, we recommend a graphics card with 12 GB RAM.
The model will begin downloading, which can take a while, depending on your internet speed. The gemma4:e4b model is approximately 10 GB in size. Once the download completes, you're ready to start using Ollama with IMatch AutoTagger. Continue with the AutoTagger help topic to learn how to add descriptions, keywords, and traits to your images automatically. After the model has been downloaded, you can close the command prompt window. AutoTagger has configurations for both the 4b and 12b variants and you can just create a new setting with the model of your choice: 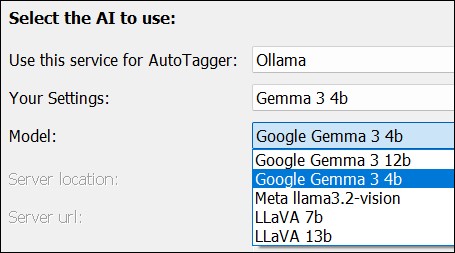 If you find the results of Gemma 3 lacking for your type of photography, try one of the other vision-enabled models available for Ollama. Installing the Qwen 3 ModelQwen is a modern model released in 2026. We recommend giving it a try and see how well it works with your images. ollama run qwen3.5:9bfor the (better) 9b version and ollama run qwen3.5:4bfor the smaller 4b model. Note: These are thinking/reasoning models, which take longer to produce better answers. According to the Ollama and LM Studio documentation, appending the term Ollama Settings in AutoTaggerIf you have downloaded multiple models, you can select any of them in AutoTagger:  This list shows all models AutoTagger supports, not just the models you have downloaded. | ||||||||
LM Studio | LM Studio is an open-source application that enables you to run powerful AI models locally on your PC. It is free for private use. Unlike Ollama, LM Studio has a comfortable user interface and is designed to be used both as an AI runner (like Ollama) and as an interactive tool to chat with the models installed in LM Studio. LM Studio is 'better' than Ollama when you also want to use AI models outside of IMatch. To download and install LM Studio on your PC, follow the easy-to-follow instructions on the LM Studio website. Here is the LM Studio documentation, which explains all features and usage in detail. Downloading ModelsLM Studio has a comfortable model management feature. Click on the Model Search button on the left and then search for Gemma 4 or Qwen 3.5 (or whatever model is current at the time you're reading this). Start the LM Studio ServerThis is the important part. The LM Studio server makes models accessible for other applications, like IMatch. At the bottom of the LM Studio app window, click on the Power User button: 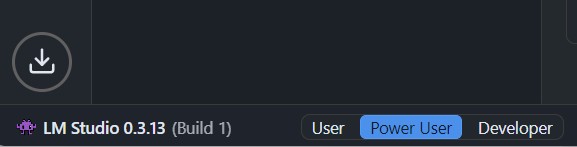 Now click on the Developer button on the left:  Enable the server with the switch (1) and then click (2) and select the Gemma 3 model you have downloaded. Use the default settings for everything.  Using LM Studio and Models in IMatch AutoTaggerAutoTagger is already configured to support LM Studio and suitable models. Not all models you can use with LM Studio are multimodal (vision-enabled). For AutoTagger, only vision-enabled models are usable, such as However, you can install any other model offered by LM Studio and use it for chatting, spelling and grammar checks, text generation, SEO, math, etc. The LM community makes suggestions regarding which models to use for each purpose. Things are changing rapidly, and new models are released frequently. Vision-enabled models are marked with this icon:  Open Edit menu > Preferences > AutoTagger and switch the AI to LM Studio. In the Model drop-down, select the Gemma 3 model available in LM Studio. We have installed the 12B Gemma 3 model in this case: 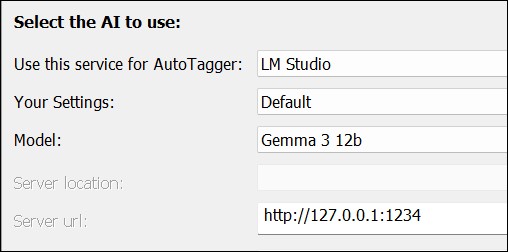 Check the prompt and any settings you need, then confirm the configuration with OK. Select one or more images in a File Window and start AutoTagger with F7. Select the LM Studio AI and the setting you want to use and run it: 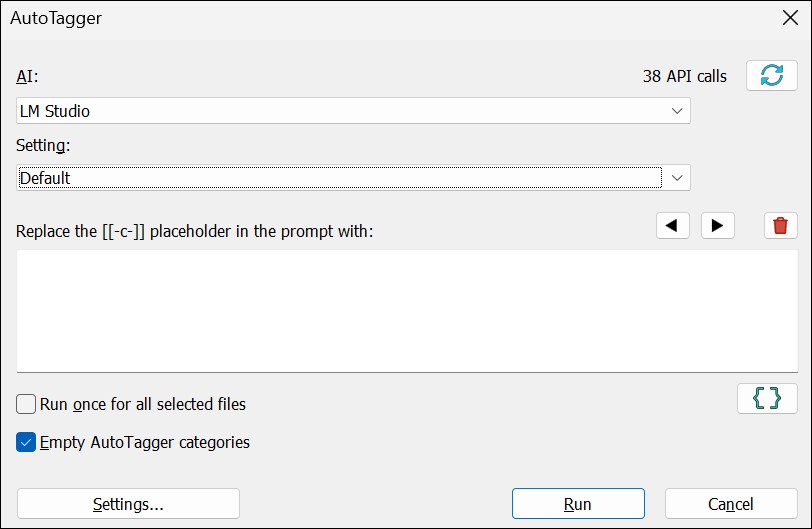 Make LM Studio Run AutomaticallyClick on the Gear icon button at the bottom right of the LM Studio app window to open the settings. Scroll down until you see this option and enable it: 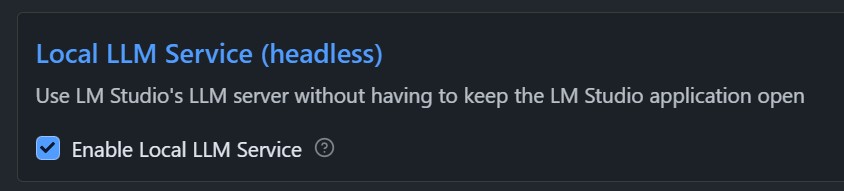 You can now use LM Studio models in AutoTagger without starting LM Studio manually. LM Studio automatically loads the model requested by AutoTagger. Ollama or LM Studio for Local AI?Ollama just works mostly in the background and is the simplest solution. Use it when you only want to work with AI models within IMatch. LM Studio allows you to chat and interact with locally installed AI models much like you would use cloud-based AI such as ChatGPT, Mistral, Copilot, or Gemini. This enables you to access AI capabilities and functions without any privacy issues or cost. | ||||||||
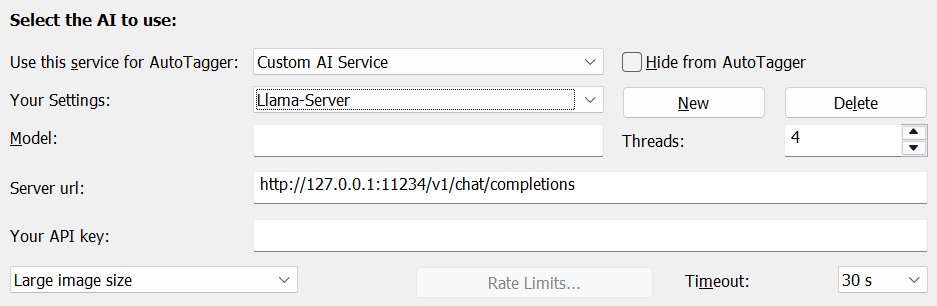
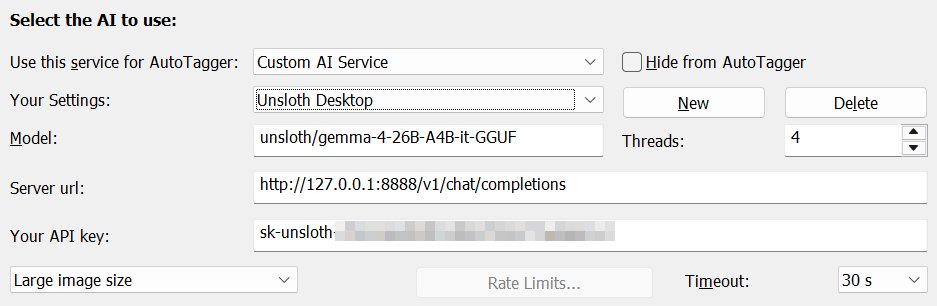
Custom AI Service | Expert Feature This is AutoTagger's most flexible AI connector. It allows you to connect AutoTagger with any local or remote AI service of your choice, provided that it supports an OpenAI-compatible endpoint like When you select this service type for an AutoTagger setting, you configure these additional settings:
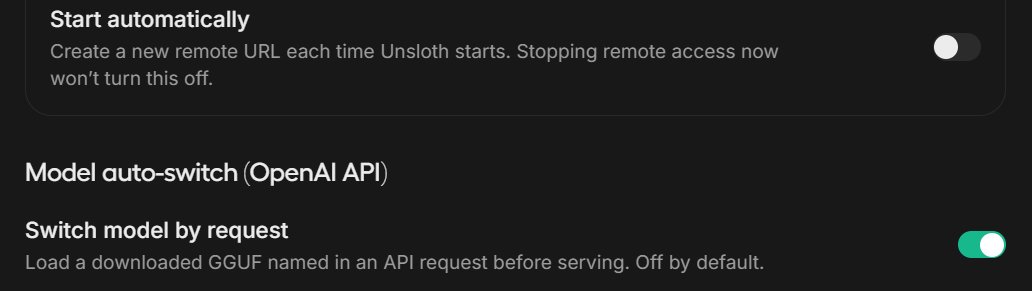
When To Use This?If you want to run AI models with a service not directly supported by IMatch, like Unsloth Deskop or similar, this is the way to make it work with AutoTagger. Usage Tips for llama-serverThe main goal of llama.cpp is to enable running local AI with minimal setup and state-of-the-art performance on a wide range of hardware - locally and in the cloud. llama.cpp is the core on which many AI solutions are built today. It is available on all major operating systems and supports a wide range of processors and graphics cards. The relevant component of llama.cpp with respect to IMatch AutoTagger is Using llama.cpp to run AI models is the solution with the least overhead, the best performance, and does not require any other 3rd party software. It's also something that requires some deeper computer knowledge, familiarity with command line applications etc. InstallationInstallation is simple. You download the latest release matching your operation system and graphic card from llama.cpp's GitHib repository. For most users, the You can install it also via the winget command in Windows: For users with a NVIDIA Graphic CardIf your PC is equipped with a NVIDIA graphics card and you want the best possible performance, use one of the Modelsllama-server can use models in GGUF format you have already downloaded, or download models on first use from Hugging Face using the LM Studio uses models in GGUF format. If you have downloaded models using LM Studio, you can use the same models with Running | ||||||||
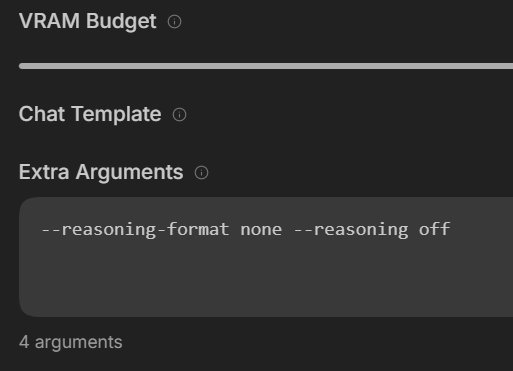
The latest generation of models like OpenAI's GPT-5, Qwen 3, Gemini 3.* are so-called reasoning models. They "think" before they answer, supposedly producing better results that way.
The thinking step is designed to help with complex problems like math, physics, and science. Not necessarily for improving descriptions and keywords, which is the use case for IMatch AutoTagger.
Before you use these (usually extra expensive and slow) models, run some tests to see if the longer response time and cost is worth it, giving you better descriptions, keywords, and traits for your images. This may be the case if you want to get exact species or landmark identification, chart analysis, and similar tasks.
For creating descriptions and keywords for 'regular' images, often the cheaper and faster non-thinking or "Small/Nano/Mini/..." models will work just fine.
According to the Ollama and LM Studio documentation, you can disable thinking by adding /no_think or /nothink to the beginning or end of your prompt or system prompt. This should reduce or even skip the thinking phase. See the documentation of your preferred cloud AI to learn how to disable or reduce thinking.
AI companies bill you per request and/or the number of tokens used. Pricing sometimes varies, depending on the model you use (more powerful models are more expensive).
Check the website of the AI vendor you use for pricing information.
All AI vendors provide billing information (requests made and tokens used in the current billing period) on their website. Keep an eye on that when you are using a subscription model with automatic renewal.
The AI vendor calculates the cost per request based on the number of tokens used for the prompt (input tokens) and the response (output tokens).
A good average is about 75 tokens per 100 characters in English text.
For example, the prompt "Describe this image in the style of a news headline" sent by AutoTagger to OpenAI produces 10 tokens (GPT-4o-mini model). The response "A close-up portrait of a majestic snowy owl sitting on a perch in a dimly lit studio, staring directly into the camera." has 26 tokens.
As of June 2026, OpenAI charges US$0.25 for one million input tokens and US$1.25 for one million output tokens for the GPT 5.4 nano model. Plus a small fee per request.
These affordable rates mean that you can process many thousands of images for a few dollars. And save days or even weeks of work.
Billing metrics will vary quite a bit. Because your prompts may be longer or you may be using traits (more input tokens) or the AI returns more elaborate responses (more output tokens). Use the billing page of the AI vendor to keep track of the actual cost accumulated over the billing period.
AutoTagger lists the number of requests made and tokens used since the last reset. However, there may be differences in how the AI service counts these metrics. Always use the info displayed in your dashboard after logging into your service to see usage and pricing data.