This topic explains how to write efficient prompts to produce high-quality keywords, descriptions and traits with AIs like Ollama and OpenAI.
AIs like Ollama and OpenAI use a user-supplied prompt to produce a result, e.g. a description for an image or a list of keywords. By writing a prompt ('prompting the AI') you ask a question or tell the AI what you want it to do. For example, look at this prompt:
Describe this image in the style of a news headline.
The above prompt produces very useful descriptions with OpenAI, Mistral, and Ollama models.
Provide a short description in one sentence.
Describe this image in two sentences. Use factual language.
Two slightly more elaborate prompts, giving the AI an idea of what you're expecting.
Another frequently used prompt. This time we ask the AI to analyze the image and to return a number of keywords describing the image:
Return five to ten keywords for this image.
This returns a list of keywords which AutoTagger then processes to add keywords to the image in your database. See the AutoTagger main help topic for more information.
A well-crafted prompt enables you to not only instruct the AI on what to do, but also influence its output in meaningful ways, such as tone, style, and length. By choosing between concise and elaborate descriptions or opting for brevity, you can shape the language that the AI uses to describe your images.
AutoTagger empowers you to enhance the AI's understanding by providing contextual information, such as specifying that the images being described were captured at a particular location. By doing so, you can help the AI generate more accurate and precise descriptions and keywords.
Prompts may vary slightly, depending on the AI and model you use. You'll learn more about prompts in the prompting section below.
Pro Tip: If you expect specific results from the AI—such as a certain description length, style, or the inclusion of buildings or landmarks visible in the image—simply ask the AI how to write a prompt that produces the results you are looking for. The AI usually has a good understanding of how to write prompts that create exactly the results you want.
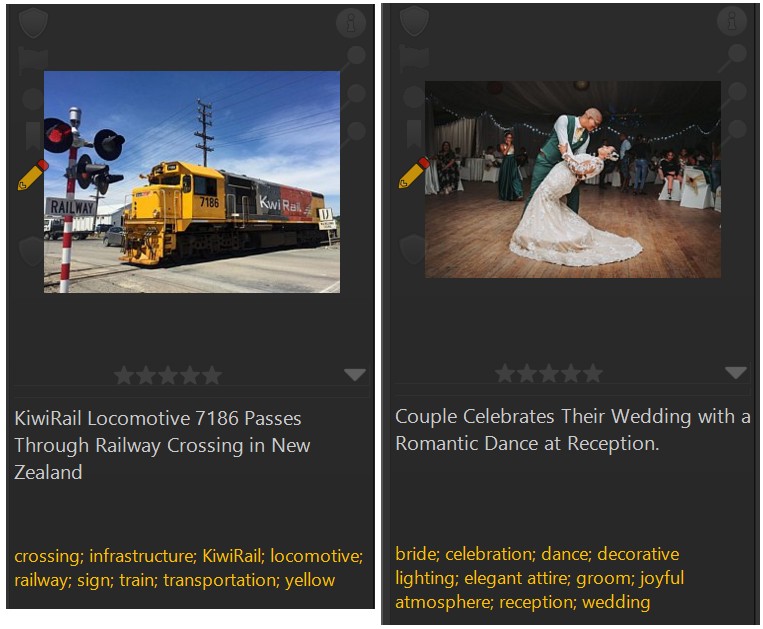
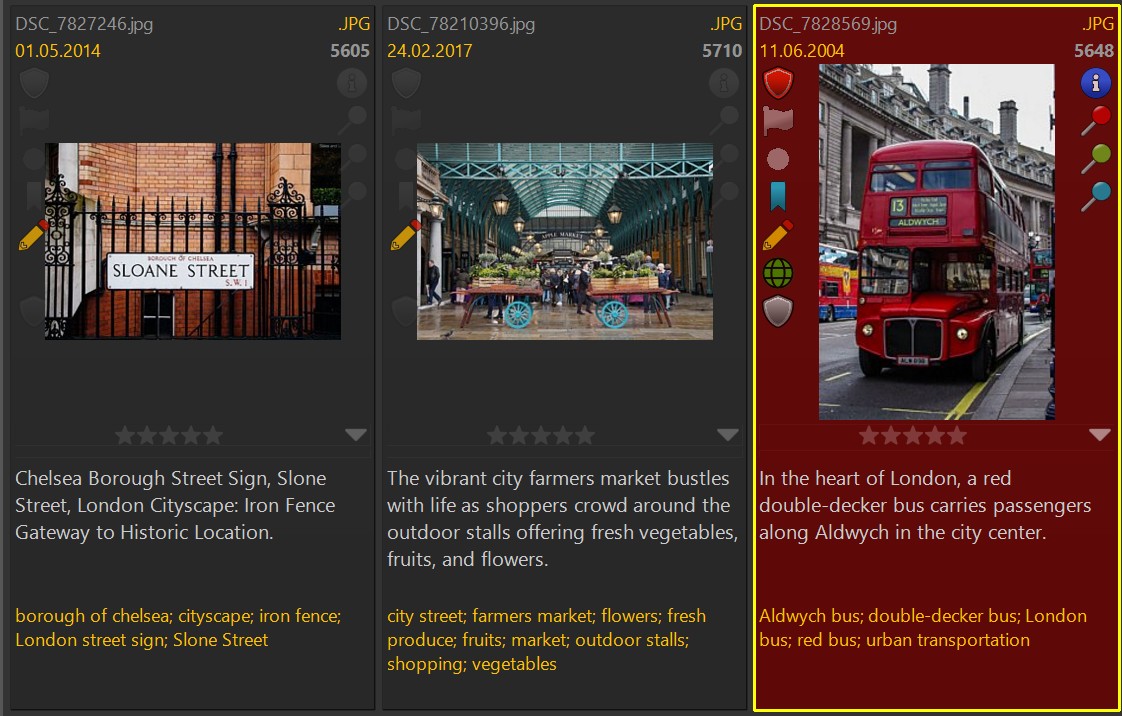
AutoTagger sends the prompt to the AI and processes the response to create descriptions, keywords and traits. The result is something like this:
Since the images now have descriptions and keywords, they are searchable and they are organized by their keywords in the @Keywords category hierarchy. Without you doing any manual work.
It is important to understand that the AI cannot provide specific descriptions for an image in the way you do. It (probably) does not know that the photo was taken at Mike's and Jenny's wedding or that the woman in the green dress standing in the background on the left is Susan, Mike's mother.
But it can produce a description that makes it clear that this is a photo taken at a wedding and that a couple dancing is the central motive etc. Which makes this image searchable using terms like wedding or dance ‐ even when you have not yet added keywords or descriptions yourself.
When you look at the keywords generated for both images, it is clear that they describe what is shown in the image. If you later perform searches for terms like wedding or bride or train or kiwi, IMatch will include these files in the result.
In the context of IMatch, keywords naming the persons in the image would be added by IMatch's face recognition.
Interestingly, the AI was able to identify the train company and train number shown in the image on the left. And this should only get better in future generations of AI.
As AI technology progresses, we may be able to add features to IMatch which enable you to fine-tune the AI and teach it new things, like the names of persons in your images, the names of locations and places often shown in your photos etc. The AI can then apply this additional knowledge when describing your images and adding keywords.
As described in detail in the AI Tags help section, IMatch offers special tags to store the results of AI. This means that you can use AI in addition to descriptions and keywords you enter manually.
The AI-generated keywords and descriptions enrich the data available for images and aid in searching and automatic organization and grouping of image files.
A model is basically the brain of an AI. To create a model, AI companies train a model with a massive amount of curated data. Training can take a long time and can cost millions of dollars. What comes out at the end of the training is a model ‐ basically a big file with billions of 'weights' (numbers), which represent what the AI has learned from the training data.
Now all you need is a computer which can run the AI software which then uses the model to do stuff.
Depending on what the model was trained for, this can be anything, from answering questions about the world in a chat, creating images from text inputs, writing program code or analyzing images.
In the context of IMatch, we're interested in models which have learned to analyze images. This includes things like object detection ('bicycle', 'car', 'beach', 'rain', 'taxi'), motive ('landscape', 'wedding', 'baseball game') and concepts like 'mood', 'lighting', 'weather', 'season' and so on.
We can utilize these capabilities in IMatch to automatically describe images, add keywords and create custom traits based on specific information we are interested in.
IMatch AutoTagger currently supports the cloud-based OpenAI and Mistral AI commercial services and the free and open source Ollama application, which enables you to run powerful AI models on your PC.
The way you prompt both services is very similar or even identical. Which of the services to use depends on several factors:
| Service | Description |
|---|---|
OpenAI |
|
Mistral AI |
|
Ollama |
|
See AI Service Providers for information on how to use OpenAI and install Ollama to run AI models locally on your computer.
Open Edit menu > Preferences > AutoTagger to configure AutoTagger options.
From the list of supported AIs select either Ollama or OpenAI. Since both AIs support custom prompts, the content type drop-downs for description, keywords and landmark display a prompt button:

Before you can use OpenAI, you have to create an account. See the AI Service Providers help topics for instructions.
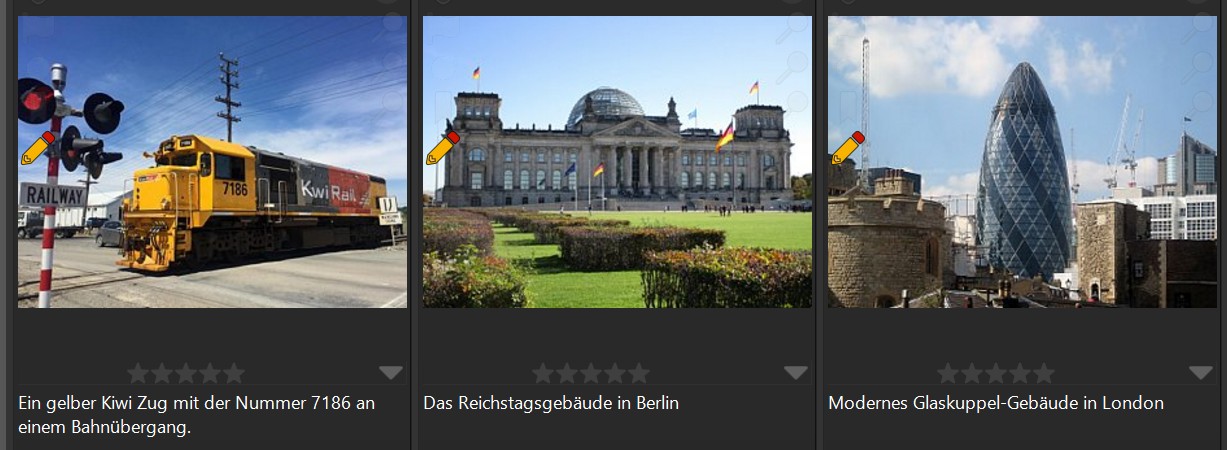
Click on the prompt button to open the prompt editor:
In this dialog box you enter the prompt to send to the AI (for the description, in this case). The prompt shown above is the default prompt used by AutoTagger. You can customize it as needed in this dialog box.
Fill only if target tag is empty | This option controls whether or not AutoTagger replaces existing data. See also Content Type Settings in the AutoTagger help topic. |
Merge with existing target tag values | For repeatable tags only (keywords and landmark, traits). This setting controls if AutoTagger replaces the contents of the target tag or if it merges new elements with existing elements (without duplication). You would enable this if you want to merge AI keywords with existing keywords or append a description to the AI.description tag. |
You can specialize prompts by including instructions for the style you expect the response to be in. To give you some ideas:
Describe this image.
This prompt produces a usable description. But it might be too long or winded for your taste. In that case, try something like this:
Return a short description for this image.
Describe this image but keep it short.
Which tells the AI that you want something a bit more to the point. Another helpful technique is to suggest a specific style by giving an example:
Describe this image in the style of a news caption.
Describe this image in the style of a news headline.
Describe this image in the style of a magazine caption.
Describe this image in the style of a travel magazine caption.
Describe this image in the style of a sports magazine caption.
Describe this image in the style of a website for cat enthusiasts.
Write a short story about this image.
Describe this image in the style of a news magazine. Include details about the location, lighting and landmarks you can identify.
Each prompt will coerce the AI to produce a description in a different style and length. When you ask the AI to describe photos you have taken while on a vacation, including an instruction like 'in the style of a travel magazine' may produce exactly the style of description that matches the content.
If the prompt uses too many words like appears or seems to try adding Use factual language:
Describe this image in the style of a news caption. Use factual language.
You can tell the AI to assume a specific role:
You are a technical writer working on a documentation. Describe the graphics you see in this image using factual language.
It can also be helpful to give the AI some examples:
Describe this image in the style of a magazine caption. For example: 'A street screen photographed in London. We see one of the iconic red busses, some passengers boarding' or 'A wedding photo, showing the happy newlyweds dancing, surrounded by their families and friends.'
Use ' instead of " for enclosing your example sentences. This works better for most AIs.
We've found a little trick that works most of the time:
Return 5 to 10 keywords describing the person's clothing. Prefix each keyword with 'apparel|'.
This trick makes the AI return apparel|leather jacket instead of just leather jacket. If the AI and model you use supports this (give it a try), you can make it produce hierarchical keywords matching your thesaurus.
You can set up different settings with different keyword prompts. For example, asking for apparel keywords in one setting, and for location/surrounding keywords in another. This allows you to use different prefixes to create different hierarchies.
And you can use the Keyword Mapping feature of AutoTagger to project flat keywords delivered by the AI into your keyword hierarchy.
Whatever works best for you.
Each image will produce distinct results depending on the AI and model used. Working with AIs today often involves an element of creativity, nuance, and experimentation when writing prompts - it's sometimes more art than science.
Prompts that work well for your images may not yield the same results for another user's images. Conversely, you might find that using tailored prompts for different subjects produces better descriptions. AutoTagger makes this easy with features like context placeholders (learn more).
After a few experiments, you'll likely discover a good set of prompts for descriptions and keywords. Save them as AutoTagger settings and select them whenever you run AutoTagger for a specific kind of images.
Prompts can ask for very specific information:
Extract the text in this image.

Which produces this response:
Start Managing Your Files. Today!

Digital Asset Management (DAM) Solutions.
For Professional and Enthusiast Photographers and Videographers.
For Scientists, Librarians, Historians, Artists and Collectors.
Rock-solid. Powerful. Flexible. Standard-compliant. Affordable.
Making it DAM easy.

IMATCH
IMatchAnywhere
Support

The Digital Asset Management System (DAM) for Windows

Access IMatch from Anywhere with Your Web Browser

We Love Our Products. We're Here for You!
You can also use a prompt like this to read e.g. the front page of PDF files you manage in IMatch and to add the text and keywords to your database.
Explain the chart in this image.
This prompt can be used to add descriptions of charts shown in images to your database, to allow you to search for the information contained in the charts.
OpenAI has a Prompt Engineering page with many tips for better prompts. A lot of it can be applied to the visual models like LLaVA running in Ollama.
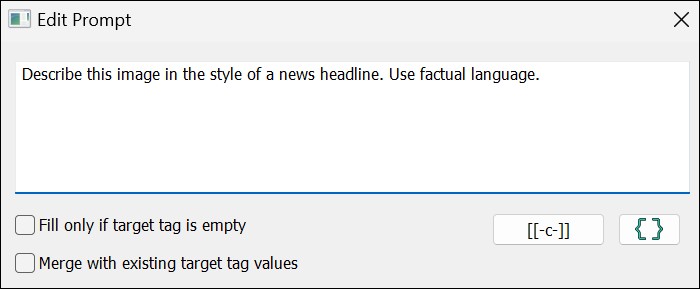
The French Mistral model and OpenAI's model have been trained with many European languages. If you want the description in German, for example, change the prompt to:
Return a short headline in Deutsch for this image.
The same works also for keywords and traits, of course:
Return five to ten keywords in German for this image.
You can even request keywords in multiple languages, with a prompt like this:
Return five to ten keywords each in both German and English for this image.
You can create separate settings for each language you work with and then run the setting for the language you need at the moment.
If you run both a setting for e.g. German and English keywords successively, IMatch merges the keywords automatically, unless you enable the option to replace existing contents.
This gives you a lot more flexibility when you work in multiple languages.
Note that not all AI models available today can produce consistent output in different languages. It depends on how the model was trained and the language you want to use. In general, bigger models are often better at multiple languages. Bigger as in too big to run on my local PC.
That being said, the free Lama Vision model runs in Ollama and can produce descriptions and keywords in languages different than English.
You can create AutoTagger settings which ask the AI for a description, a set of keywords, landmarks and maybe a number of your custom traits. The more information you ask for, the longer the AI will take to respond. And, for fee-based AI services, the cost will be slightly higher, because both the prompt and the response are longer.
An often useful approach is to create multiple settings, e.g. one for creating a description and one for keywords. Or, multiple settings, asking for different types of keywords, e.g., location keywords, keywords for clothing, food, vehicles, ...
You can select a group of images and run multiple AutoTagger settings for them as needed. Maybe one 'Default' setting you always use, and then some additional specialized settings for generating different types of keywords or explaining different aspects of an image.
Even on moderate hardware, simple prompts run in maybe a second or two. The same is true for cloud-based AI services. You get faster answers with shorter prompts.
Especially if your photos show complex motives like vehicles, planes, animals or similar, dedicated settings with precisely built prompts can lead to much better results.
Basically, this setting controls how creative the AI may become when responding to the prompt. You can set the creativity in the AutoTagger configuration to a value between 0% and 100%. The higher the setting is, the more creative the AI can be when interpreting the prompt. The creativity setting is applied to all prompts in the setting.
A creativity setting between 20% and 80% works best for most subjects.
If you don't get usable results, try to change the creativity setting to another value, e.g. go down or up by 5 or 10 percent. This often has a substantial effect on the outcome.
Different models react differently on the creativity setting.
If you have picked a model, run AutoTagger a couple of times for the same set of images with different creativity settings. This will show you how the model reacts to creativity for the motives in the images you are working with.
Not all models support the Creativity setting. If a model does not support this setting, it is disabled in the configuration dialog box.
The seed setting can be used for experiments. By default, seed is 0, which means that a new seed value is created randomly every time AutoTagger performs an AI request. Setting the seed to a specific number allows, to some extent, to reproduce previous AutoTagger results. The creativity must be set to 0%, too.
For normal use, leave the seed set to 0 and the creativity between 20% and 80%.
The following descriptions and keywords were created with OpenAI (GPT4o-mini model in fall 2024) using the prompt:
This image was taken in London, United Kingdom.
Describe this image in the style of a news caption. Use factual language.
This image was taken in London, United Kingdom.
Return ten to fifteen keywords describing this image.
If you identify known landmarks or places in the image, return them as keywords too.
We give the AI some context by including the phrase This image was taken in London, United Kingdom. as part of the prompt (we know where the image was taken, the AI now does too).
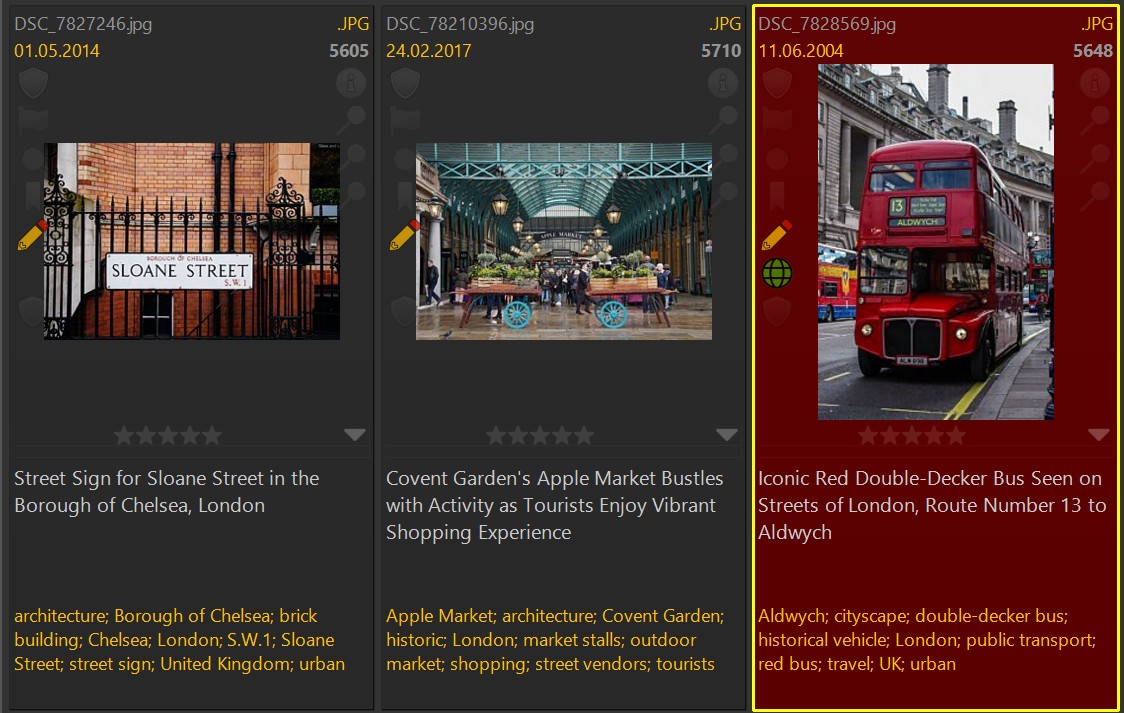
For comparison, auto-tagging the same 3 files with the free Ollama software (LLaVA:13b model) running on a notebook produces these results:
This example shows one thing that is common across all AI services and models. The larger the model is, the more it 'knows' and the more detailed the results are.
To make it possible to run an AI model on a 'normal' PC or notebook, it has to be reduced in size/precision. This process is called quantization. The popular and free LLaVA model for Ollama comes in several sizes, each requiring a different minimum amount of fast memory (VRAM) on the graphics card. The 7b variant runs fine on a graphics card with 6 - 8 GB VRAM. The 13b model is better but requires a graphics card with 16 GB VRAM. The 34b variant needs 48GB or more VRAM, and that's way outside of what's available for consumer graphic cards in 2025.
The large models, AI companies like OpenAI provide, are very good, but also require massive amounts of specialized hardware and computing power in dedicated data centers. Luckily, we can rent a bit of that power when we need it and then we pay only for what we use. Processing 1,000 images (description and keywords each) with OpenAI costs a few cents, depending on the model used and the prompt and response length.
AI technology is progressing at breakneck speed and we will be able to run huge and powerful models on dedicated 'AI processors' on our computers in the future. Or somebody figures out a way to make AI models use a lot less RAM and processing power without sacrificing the quality of the results.
AI models are somewhat mysterious, unfathomable, and random. At least for now!
What we mean by this is that, using the same prompt, image and settings, the results returned by the AI may vary. You often get slightly different descriptions and keywords for the same image when you run AutoTagger for it again. This is the nature of how AI works these days and outside of the control of IMatch.
This also means if you don't like a description created by the AI, you can run AutoTagger again to produce a variation. Maybe increase or reduce the creativity setting by a few percent.
If you have a set of very similar images with the same motive, run AutoTagger with the Run Once option enabled.
This feature queries the AI only for the focused image and applies the AI results to all other selected files. This results in identical descriptions and keywords for all selected files.
No AI is perfect (and probably will never be). Whether you use an AI to create an image from a prompt, for checking text for spelling errors and to improve grammar or you ask the AI to describe an image, it will sometimes fail.
From time to time, the AI returns nonsense when you ask it to describe an image. Or it hallucinates and describes something that does not actually exist in the image. These are kinks we currently have to live with. The AI companies work hard on resolving such issues and for newer models this is far less of a problem than for models created just a year ago. From experience, this happens rarely in the IMatch context.
It often helps to dial down the creativity to about 30% - 40% to rein in the AI when it hallucinates.
The behavior varies by AI and model used. In our experience, it often helps to make the prompt more precise, leaving the AI less 'wiggle room' in the response. For example, the phrase ...return the word 'Animal' vs. the phrase ... only return the word 'Animal' can make a difference.
This is one of the features that set IMatch apart from other, simpler, applications.
When using a context placeholder in your prompt, you can conveniently add or modify text before running AutoTagger. This placeholder feature provides a convenient way to introduce additional context or user-inputted text into your prompts, without requiring changes to the original setting within AutoTagger.
Click this button to insert the context placeholder:

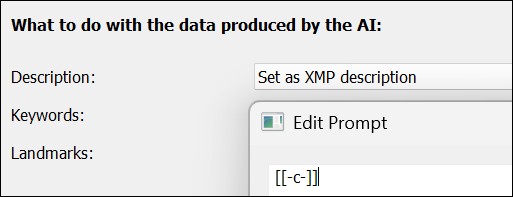
Let's see how it works. Consider this prompt:
[[-c-]]
Describe this image in the style of a short news headline. Use factual language.
When you run this setting with this prompt in AutoTagger, you can provide context information easily:

Entering context information when running AutoTagger.
The prompt actually sent to the AI becomes:
This image was taken in Paris, France.Describe this image in the style of a short news headline. Use factual language.
This gives the AI context to work with. It will 'know' that the images being processed were taken in the city of Paris, France. This allows the AI to produce better descriptions and keywords by considering this fact.
When you later run AutoTagger on a folder containing images taken in Las Vegas, you would let the AI know via the context:

This image was taken in Las Vegas.Describe this image in the style of a short news headline. Use factual language.
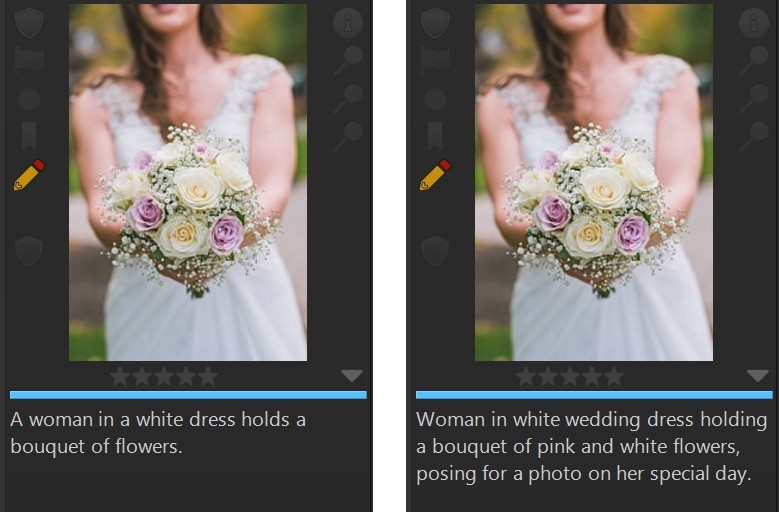
Consider the following image. For the results shown on the left, we did not provide any context and the "Describe this image in the style of a news headline." was used as-is. For the result on the right, we provided the context: "This is a wedding photo." via the context placeholder.
This image shows people at the Heathrow airport, waiting for their plane to depart.Describe this image in the style of a flyer provided to tourists.
This picture was taken during a bike tour with my friends in the Swiss Alps.Describe this image in the style of a traveling magazine.
If you don't enter any context information in AutoTagger, the context placeholder [[-c-]] (and the immediately following new line and space) is replaced with nothing and the prompt simply becomes:
Describe this image in the style of a news headline.
Finish the context information you enter with a . to ensure the AI sees it as a sentence.
The context placeholder feature makes prompts more flexible and versatile. You can provide context directly in the AutoTagger dialog box, while keeping the prompt in the settings unchanged.
If you set up a setting which, e.g., fills the XMP description tag, and the prompt only consists of the context placeholder, whatever context you enter when running AutoTagger will become the prompt.
This little trick allows you to create a prompt for the current situation or demands whenever running AutoTagger.
IMatch allows you to use variables in prompts. This makes prompts more flexible and versatile, in a similar fashion to context placeholders. Including variables in a prompt enables you to reuse information already in the database, to provide context and guidance to the AI.
For example, including the description in the prompt can improve the quality of the keywords produced by the AI:
{File.MD.description}.
Return ten to fifteen keywords for this image.
Or, if the description was created by the AI and stored in the AI.description tag, you would use:
{File.MD.AI.description}.
Return ten to fifteen keywords for this image.
The dot . following the variable is important, it finishes the sentence. Add it, unless your descriptions end with a .
You can also do it the other way round:
This image has the following keywords: {File.MD.hierarchicalkeywords}.
Describe this image in the style of a news magazine caption.
Or, when the keywords are in the AI tag:
This image has the following keywords: {File.MD.AI.keywords}.
Describe this image in the style of a news magazine caption.
The data you reference via the variable must already exist in the database at the time the prompt runs. You cannot refer to data that is created by the current prompt.
For example, your AutoTagger settings use prompts to create a description and keywords. You cannot reference {File.MD.description} or {File.MD.AI.description} in the prompt for keywords, since these tags are not filled at the time the keyword prompt is processed.
IMatch processes all prompts used in a setting in one AI request, to improve performance and reduce cost. It then transfers the data produced by the request into the target tags in the database.
If you want to use the description of an image in a keywords prompt or a trait, create two settings. One with a prompt for the description and one for the prompt filling the keywords.
Then run the description setting first for a selection of files and the keywords setting afterwards. This ensures that the description is filled before the keywords and trait prompts reference it.
Another example for using variables to include already existing data to guide the AI would be location information. If you have invested time in performing reverse geocoding or manually entering location data, you can leverage that valuable data to guide the AI and provide context:
This image was taken in {File.MD.city},{File.MD.country}.
Return ten to fifteen keywords for this image.
This prompt includes the name of the city and country, when the location data is available for the image, e.g.:
This image was taken in WC2B 4BG London,United Kingdom.Return ten to fifteen keywords for this image.
The AI will consider this information to produce better, more targeted keywords.
We can improve this and make it work even when there is no location data by applying a bit of clever variable logic:
{File.MD.city|hasvalue:This image was taken in {File.MD.city},}{File.MD.country|hasvalue: {File.MD.country}.}
Return ten to fifteen keywords for this image.
The hasvalue function checks if the variable is not empty and if not, it returns the text following the :
We use this to conditionally output the city name followed by a comma. And the country name followed by a dot.
If there is no city name and no country name, the prompt just becomes:
Return ten to fifteen keywords for this image.
A good way to include names of persons in an AI description is to list them via a variable. You can either include the variable in the prompt, or provide them via the context placeholder as needed. Here we use it in the prompt itself:
These persons are shown in this image: {File.Persons.Label.Confirmed}.
Describe this image in the style of a magazine caption. Use factual language.
This usually makes the AI include the persons names in the generated description. Note that we use the .Confirmed variant to only supply the names of confirmed persons.
If you plan to process a mix of images with and without persons, you can use the hasvalue variable function to include the persons in image context only when there actually are persons in the image:
{File.Persons.Label.Confirmed|hasvalue:These persons are shown in this image: {File.Persons.Label.Confirmed}.}
Describe this image in the style of a magazine caption. Use factual language.
If there are no persons in the image, the prompt is just:
Describe this image in the style of a magazine caption. Use factual language.
Maybe you don't want descriptions including the full name of the person, but only the first name. You can achieve this with this variable:
{File.Persons.Label.Confirmed|splitlist: ,first}
This splits the confirmed label, using the blank (space), and uses the first element. For a name like John Alexander Smith-Byrne, this variable returns John.
If your images contain multiple persons, you can handle this by combining the foreach formatting function with splitlist:
{File.Persons.Label.Confirmed|hasvalue:These persons are shown in this image: {File.Persons.Label.Confirmed|foreach:{value|splitlist: ,first}, }}
This variable outputs the first name of each confirmed person in the image, separated with a comma. The AI will consider the name and produce a neat description like:
Tom, Susan and Millie playing outside in the snow.
which you can further control by giving the AI more information about your preferred description length and style.
For some motives, it might be useful to provide the AI with the date and time the photo was taken. You can do that via a variable:
This photo was taken on {File.DateTime}.
Describe this image in the style of a magazine caption. Use factual language.
You may have to change the format if the AI does not understand the default formatting, for instance: {File.DateTime|format:YYYY.MM.DD}.
The AI does not have any information about things or events taking place after the model was created.
If possible, you can utilize person names, location data etc. you have already in your database. Consider this prompt:
{File.Persons.Label.Confirmed|hasvalue:The person shown in this image is: {File.Persons.Label.Confirmed}.}{File.MD.city|hasvalue: The photo was taken in {File.MD.city}.}
Describe this image in the style of a magazine caption. Use factual language.
If the file contains one or more confirmed persons and has a city name in the IPTC location data, the prompt resolves to something like:
The person shown in this image is Peter Miller;Sandra Miller. The photo was taken in Los Angeles.
Describe this image in the style of a magazine caption. Use factual language.
This gives the AI a lot of context to work with, and it will (usually) mention both the persons and the location in the description and keywords.
Keep in mind that commercial AIs calculate cost based on the prompt length, among other things. Make the prompt as detailed as needed, but as short as possible.
This is a rather unique IMatch feature that combines a prompt and a custom AI tag in the IMatch.AI namespace. Traits can be used to query the AI for specific attributes, like mood, lighting, weather or if the image shows objects like animals, buildings or vehicles.
If you work with photos of scientific nature, you may want to ask the AI to identify the species or breed of a specimen. Or maybe ask about the style of artwork shown, architectural details about buildings and so on. What can achieved that way depends on the model you use and your prompt.
The main purpose of traits is to automatically organize your files by things and attributes relevant to you.
IMatch ships with a Metadata Panel Layout named AI that displays the three default AI tags At.description, At.landmarks, and At.keywords. If you create custom AI Trait Tags, you can add them to this layout to see them in the Metadata Panel, or create your own Metadata Panel layout.
You can display and format AI tags like any other tag in File Window Layouts.
You can use AI Trait Tags like any other tag via their corresponding variables variables everywhere variables can be used.
Imagine you want to group all images showing animals into a category. This is a good example for a trait.
You write a prompt like this:
If there are animals (cats, dogs, horses, fish, birds etc.) visible in this image, respond with the text 'Animals' else return an empty response.
and you tell AutoTagger to store the results of this prompt in the custom tag AI.Animals. The tag is created automatically if it does not exist.
AI tags work like any other metadata tag, except that they are stored in the database only and can be created and deleted by the user.
The result of running this prompt on a set of images is that each processed image will have either the value Animals in the AI.Animals tag, or the tag will be empty. This allows for numerous different uses:
AI.Animals tag to group images showing animals together{File.MD.AI.Animals} everywhere you can use variables in IMatchMaybe you prefer a prompt that returns 'No Animals' when the AI does not detect any animals in an image. Just change the prompt:
If there are animals visible this image, only respond with the text 'Animals' else respond with the text 'No Animals'.
This prompt differs from the initial prompt. It assumes the AI knows what an animal is and it uses the word only to make it clear to the AI that it should not return any other text than the two text options requested in the prompt.
Depending on what question you ask in your trait, you might have play with the prompt a bit to get reliable results. This of course also depends on the model used. We expect specialized models to become available in the AI world sooner than later.
If you create a data-driven category based on the AI.Animals tag, it classifies your images into files with animals, files without animals and other. Other contains all files not yet processed and files where the AI returned none or a different response than requested.
Identify the breed of the dog shown in this image.
Return the scientific name of the insect shown in this image.
These are other examples for traits. You can store the results for instance in a AI.breed and AI.ScientificName tags, or whatever name you prefer. Once the AI has filled the tag, you can search for its contents, use it in data-driven categories etc.
Lets say you are more interested into organizing your files by criteria like Vehicles, Buildings, Wedding, Indoors, Outdoors, ...
The process is the same. You create a new trait with a prompt and a tag, for example:
If this image was taken outdoors, respond with the word 'Outdoors'. If the image was taken indoors, respond with the word 'Indoors'. If you are unsure, respond with the word 'Unknown'.
You use the tag AI.IndoorsOutdoors (the name is your choice) to store the trait results. This automatically organizes your files based on where they were taken.
What can be achieved with traits is only limited by AI capabilities and your prompt. Classify images based on if there are cars or boats visible, if it shows buildings or mountains, grass, sky or sunshine. Maybe ask the AI to return a word describing the lighting, mood, complexity, composition or list to the dominant colors...
For example:
Return a comma-separated list with the dominant colors in this image. Only return the color names, no other text.
This makes for a great trait, e.g. AI.Colors, to organize your files by their dominant colors using a data-driven category.
More ideas for traits:
Describe the mood of this image in one word.
Describe the lighting of this image in one word.
Return a comma-separated list of the largest objects in this image.
The following prompt is a bit specialized:
Return a JSON array with the largest objects in this image.
If you request a comma-separated list, the AI responds with a string (text), e.g. 'sun, beach, vacation'. If you explicitly request a JSON array, the AI returns (in almost all cases) a valid array in JSON format: ['sun','beach','vacation']
AutoTagger detects this and adds one separate entry for each element in the returned array to the target tag (repeatable tag). This affects features like searching with AND, OR and NOT.
All AI tags are designed as repeatable tags.
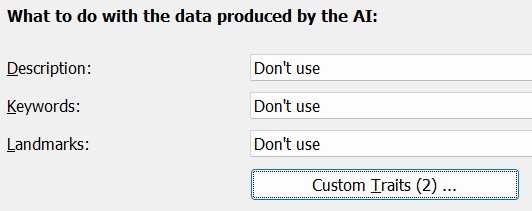
Open the AutoTagger configuration via Edit menu > Preferences > AutoTagger and click on the Custom Traits button:
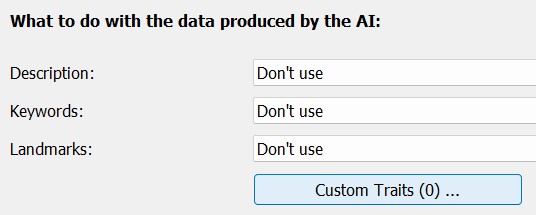
This button is only available for AIs supporting custom prompts.
This opens the Edit AI Traits dialog box.
When there are no traits yet, IMatch offers a list of trait examples you can choose from. We've used the sample trait Vehicles in this case. IMatch automatically filled in the AI tag name and the prompt:
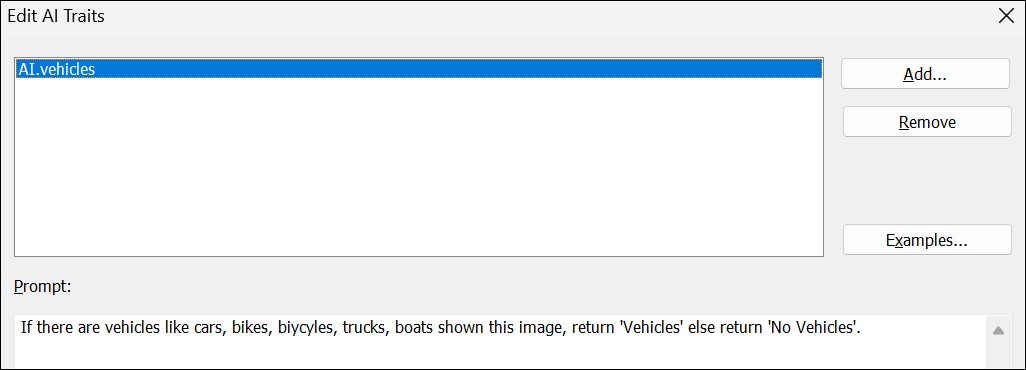
The AI Traits Editor
You can now edit the prompt to your liking or add more traits. Confirm the changes with OK.
When you close the dialog box with OK, IMatch creates the AI tags referenced in your traits if they don't exist and stores the traits in the current setting.
From now on, whenever you run this setting with AutoTagger, the Vehicles and other traits in the setting are processed and the AI responses stored in the AI tags in the database.
Trait tags automatically become tag Shortcodes and you can access them in variables using {File.MD.<trait name>}, e.g. {File.MD.AI.buildings}.
AI tags are stored in the database, but not written to metadata in files. If you want to persist trait tags in metadata, use a regular XMP tag for the trait, not an AI tag. Or, if you want to be more selective, use a Metadata Template to copy the contents of trait tags into regular XMP tags on demand.
You can combine traits with standard AI tags like description and keywords in one setting. AutoTagger processes standard AI tags and traits the same.
A more granular approach would be to create separate settings for traits. In this case you disable the standard AI tags and apply only traits in the setting:
An AutoTagger setting with only one or two traits runs faster than an 'everything' setting which processes 5 or 10 traits.
To delete a trait, open the Traits Editor and and click on the Delete button next to the trait you want to delete.
If the AI tag associated with the trait is not used in any other AutoTagger setting, IMatch asks you if you want to delete the trait AI tag and all contents from the database.
Trait tags work like any other tag, with two enhancements: IMatch creates AI tags for traits automatically and trait tags are only stored in the database, but never written back.
To see and manage all available AI tags, go to Database menu > Tools > Manage AI Tags.
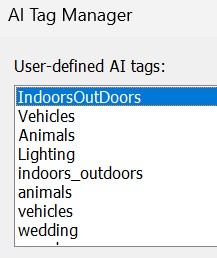
The dialog box lists all AI tags in the database. From here you can rename and delete AI tags (and their contents from the database).
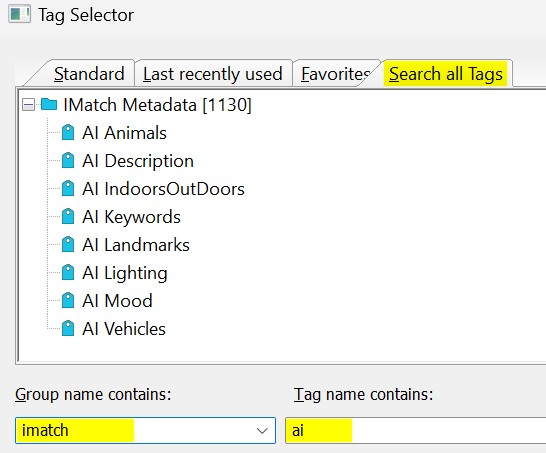
You can use trait tags like any other tag, e.g. show them in a Metadata Panel Layout or in a File Window Layout. To find AI tags, search the tag group imatch for the term ai in the Tag Selector dialog box:
If you now think: "Yeah. But I can do that myself, by looking at each image and filling a tag in the Metadata Panel." And you're right.
But the general idea of traits is to let the AI do the grunt work and free your time for more important things.
Here are some ideas for traits that may be useful for you.
If this image shows vehicles (cars, bikes, bicycles, boats, busses, planes etc.) respond with 'Contains Vehicles', else return 'No Vehicles'.
If this image shows a building, respond with 'Contains Building', else return 'No Buildings'.
If this image shows trees, respond with 'Trees', else return 'No Trees'.
Describe the lighting in this image in one word.
Describe the mood of this image in two words.
If this image contains a blue telephone box, only return the word 'Who' else return nothing.
Describe the emotional state of the person in this image based on their facial expressions and body language in one word.
Describe the emotional state of the person in this image based on their facial expressions and body language. Return a JSON array of words only, nothing else.
If you find a good prompt, let us and other users know via the IMatch user community.
Sometimes it's helpful to give the AI some examples of what you mean, which is why we've included the (cars, bikes, bicycles, boats, busses, planes etc.) part in the prompt above.
There are no rules. Try it first without providing additional examples, especially when you use a cloud-based AI like OpenAI. They consider the prompt length when calculating the cost of a request (because longer prompts need more computing power), and if a shorter prompt works for your trait, use it.
We have seen above that we can utilize existing content in the database in prompts using variables. There is more we can do with this.
We can, for example, translate existing keywords into German:
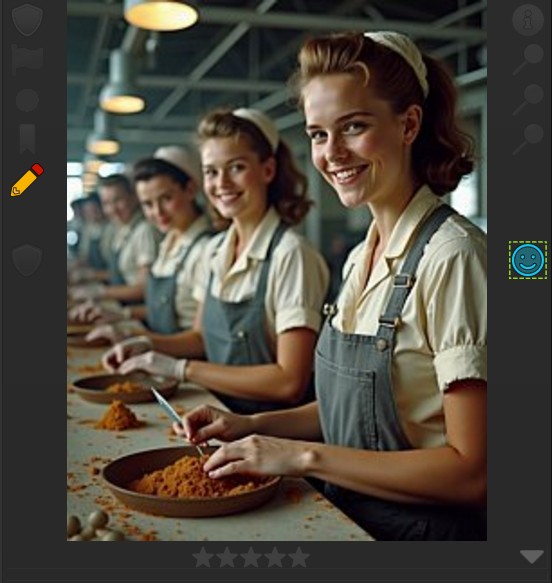
Translate the English keywords in this list ({File.MD.hierarchicalkeywords}) into German and return the resulting keywords.Starting with these keywords: cooking; women; food preparation; vintage style; kitchen; teamwork; smiling; aprons; baking; cuisine OpenAI returns the following German keywords: kochen; Frauen; Lebensmittelzubereitung; vintage Stil; Küche; Teamarbeit; Lächeln; Schürzen; Backen.
If you enable the prompt option to merge new keywords with existing keywords, the file ends up having both English and German keywords.
In the same fashion you could use prompts like:
Spell check and improve the following description: "{File.MD.description}" and return the result.Translate this description from English into German: "{File.MD.description}" and return the result.to improve or translate existing descriptions or other data available in your database and store it a AI Trait or XMP description or keywords. Add more details to your prompt if you want the AI to transform the description into a specific style or length.
Note that the results of translations vary in quality and style. If you rely on it, consider using a specialized AI like DeepL for this demanding task.
Modern models can often be coerced to return very specific keywords by giving detailed examples. For example:
[[-c-]]
Return up to 20 keywords describing this image.
Create the following keywords:
1. identify the hair color and create a keyword in the following format: "hair color|[hair color description]"
2. identify the eye color and create a keyword in the following format: "eye color|[eye color description]"
3. identify the hair style and create a keyword in the following format: "hair style|[hair style description]"
4. Estimate the age of the person and create a keyword in the following format: "age group[age description]"
5. identify the apparel and create a keyword in the following format: "apparel|[apparel description]"
6. identify the facial expression and create a keyword in the following format: "facial expression|[facial expression]"
7. Only if you can identify the location with confidence, add a keyword in the following format: "location|[identified country]|[identified city]|[identified street or place]"
This prompt produces hierarchical keywords like hair color|blonde or hair style|short bob. Use it as an example for your own prompt experiments.
Sometimes it can be helpful to use different settings, with different prompts and maybe different image sizes.
A general setting that maybe fills description and keywords. And one or more dedicated settings, prompting the AI for different things.
Maybe you want to perform OCR occasionally, letting the AI read text in an image and fill a custom traits tag. Or you want the AI to perform deeper image analysis, e.g. assessing focus, sharpness or lighting in detail. Which may require to send a larger image size to give the AI more details to work with.
Running the genral setting and then, when needed, one or more specialized settings on images where you need the additional info does the trick.
If your motives vary a lot (landscape, city trip, underwater photography, fashion, food, weddings), maintaining a curated set of per motive AutoTagger settings lets you get the best possible results from your AI of choice.
As AI technology improves and becomes more common and PCs come with super-fast built-in AI processors (NPUs), letting an AI help with tasks like image classification, keywording and descriptions will become very common. We think. Don't quote us on that.
IMatch utilizes AI today. And we'll make sure IMatch users will benefit from future improvements in AI technology.