One of the main features of the Metadata Panel is the ability to create your own panel layouts, which show exactly the information you want to see in...
One of the main features of the Metadata Panel is the ability to create your own panel layouts, which show exactly the information you want to see in exactly the way you want to see it.
Information on how to edit metadata in your files is available in the Metadata Panel topic.
To edit Metadata Panel layouts or add a new Metadata Panel layout, click the Edit Layouts button in the Metadata Panel toolbar to open the Metadata Panel layout editor.
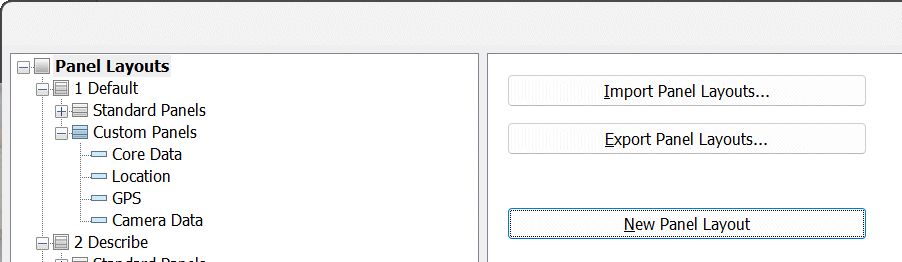
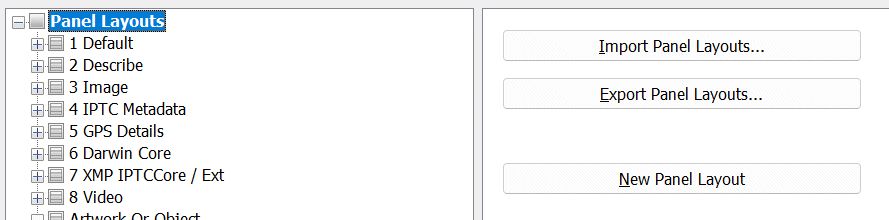
The left side of the dialog box displays all available panel layouts in the form of a tree. In the example above, there are four layouts in total: Browser, Default, GPS and IPTC. The IPTC layout is expanded, showing its contents. Each panel layout contains two parts, Standard Panels and Custom Panels.
To add a completely new panel layout, click on the 'Panel Layouts' node at the top of the tree on the left. Open the context menu (right mouse button) and choose New. Alternatively, you can click on the New Panel button on the right. Click on 'Custom Panel' and then on 'New Panel' on the right to open the corresponding panel editor.
Right-click on the nodes in the tree for additional commands.
The sections labeled "Standard Panels" consist of sets of standard panels you can optionally include in your layout, like Collections or the Camera Dashboard.
Click on the panel name in the tree control on the left to see more options on the right. These options allow you to show or hide the specific panel, control for which file formats it is displayed, etc. Some standard panels have additional configuration options.
The section Custom Panels is where you create your own Metadata Panels. Custom panels show data from one or more metadata tags.
IMatch ships with a set of pre-made custom layouts, covering typical home, pro-photographer and news business workflows.
The Default layout works very well for most photographic use cases and the Browser layout shows all the data IMatch has imported from your files.
To create a new panel or customize an existing panel, click on the Custom Panels node in the tree on the left. Open the context menu (right mouse button) and choose New. Alternatively, you can click on the New Panel button on the right. Click on a custom panel to open the corresponding panel editor.
The Panel Editor allows you to set whether and how a panel is displayed by using the drop-down list at the top of the panel editor window. Here you can choose 'Show Always', 'Hide' or display it only for certain file classes. An optional second box allows you to display the panel for specific file formats only.
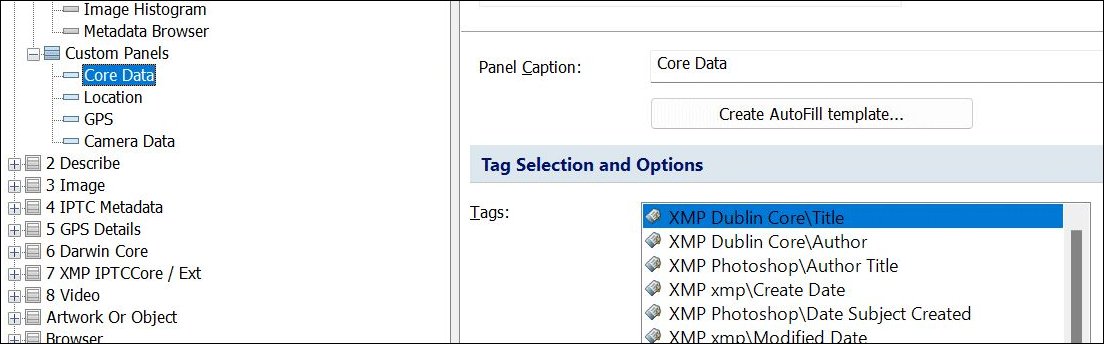
The Panel Caption input field is used to name the panel. The default name is 'New Panel'.
The Tags list shows all tags contained in your custom panel. Use the + and - buttons to add and remove tags from your custom panel, and the up and down arrows to change their display order.
With Ctrl+CursorUp or Ctrl+CursorDown you can move items quickly up and down in the list.
The + key opens the Tag Selector dialog box, which allows you to select from the many tags available in IMatch. The Tag Selector dialog box provides choices among groups of tags and searching among tag names. New users in particular may wish to first select from tags listed in the Standard tab.
See Structured Tags below for information about how IMatch works with sets of related tags.
Select a tag in the Tag list to configure it:
| Property | Description |
|---|---|
Caption | By default IMatch uses the short tag name, but you may override this with a more meaningful caption. |
Description | An optional multi-line description. You can use this property to record usage hints or fill-in instructions. This can be very useful to improve data quality, especially if multiple users are filling in metadata. If a description is available for a tag, the Metadata Panel displays a small "I" icon in the caption of the corresponding tag and the tooltip shows the description in addition to the standard tag name. 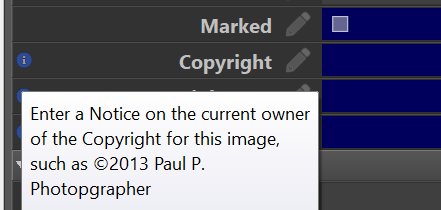 The Metadata Panel displays the description in the tooltip, and shows a small blue "I" icon when a description is available. 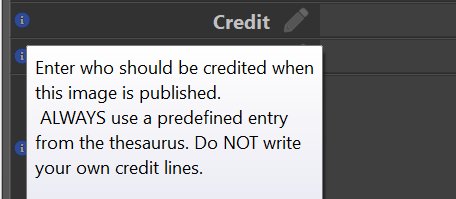 This feature can be used to include instructions for the user entering the metadata. The IPTC provides usage hints for most of the tags in their namespaces. |
Hide if empty | If this option is enabled, the tag is only shown when it has data. |
Use raw value | Display and edit the raw tag value. See below for details. |
Apply Windows number format | If the raw value is displayed, IMatch can apply the number format configured in Windows to tags of type real (floating point) and integer. For example, a GPS altitude of 123.456789m can be formatted as 123.46 by combining use raw value and this option. |
Full width | This option stretches the value field (right column) to fill the entire width of the Metadata Panel. The caption (left column) is displayed above the value field. This option is useful if you display tags which contain much text, e.g. IPTC abstracts or ID3 lyrics. |
Show scrollbar | If a tag has more than one line of text, you can always scroll using the standard keyboard commands. If you also want a scrollbar to scroll with the mouse, enable this option. |
Minimal height | The number of rows to show for the tag. Enter a value of 2 or more if the tag holds longer text. |
Fit to content | This option automatically fits the row height to the length of the text contained in the tag (respecting the minimum height set for the tag) |
Text Color | Allows you to set a custom text color. Using custom text and background colors allows you to highlight tags with special meaning, giving you extra visual clues to find information fast. |
Background Color | Allows you to set a custom background color. |
For many tags, ExifTool provides both a formatted value and a raw value. In most cases it is preferable to use the formatted value because ExifTool does a great job in converting raw numerical data into human-readable form. It uses a great deal of internal logic to perform this job. Typical examples for this type of conversion are:
| Metadata Tag | RAW Value | Formatted Value |
|---|---|---|
| GPS Longitude | 8.525201 | 8 deg 31' 30.72" |
| ExternalFlashFirmware (Nikon) | 1 1 | 1.01 (SB-800 or Metz 58 AF-1) |
| ExposureProgram | 7 | Shutter speed priority AE |
| ShutterSpeedValue | 0.00625 | 1/160 |
As you can see, the formatted value is usually more readable and understandable and therefore the default setting for the Metadata Panel.
For some tags, however, you may want to display and edit the raw value. Consider the GPS Longitude value in the table above: the formatted value uses degrees, minutes and seconds for display. This notation is not as precise as the raw floating point value. If you want to manually input GPS coordinates, it is often required to edit the raw value directly.
If you use the raw value for tags of type floating point or integer, IMatch can format the value according to the number formats configured in Windows for your user account. This usually gets rid of too many decimal places etc. Enable the Apply Windows number format option to activate this.
Not all tags support raw values. If you set the raw option for such a tag, the Metadata Panel will show an empty value.
For testing purposes, you can add the same tag in both the raw and the formatted variation to a metadata panel layout.
(into different custom panels). Or use the Var Toy App to display the corresponding variables in both the raw and the formatted form:{File.MD.XMP::exif\GPSLongitude\GPSLongitude\0} => 8 deg 31' 30.72"
{File.MD.XMP::exif\GPSLongitude\GPSLongitude\0|value:raw} => 8.525201Note that the formatted and raw/numerical values may differ until the file is written back. ExifTool produces the formatted value for tags when IMatch ingests metadata (during the initial ingest, when the file is changed or when metadata is written back). IMatch in some cases (e.g., for GPS coordinates) works with and modifies the raw value and this may result in an empty formatted value or a mismatch between the raw and formatted value until metadata is written to the file.
These options allow you to set a different text and/or background color if a tag has a certain numerical value or contains a specific text. This option may be useful for things like highlighting images taken at a certain ISO setting, showing an author name in color etc.
If you display the Author tag in your Metadata Panel and you want to highlight it with a red background when the name contains Mario, you would configure the tag as follows:
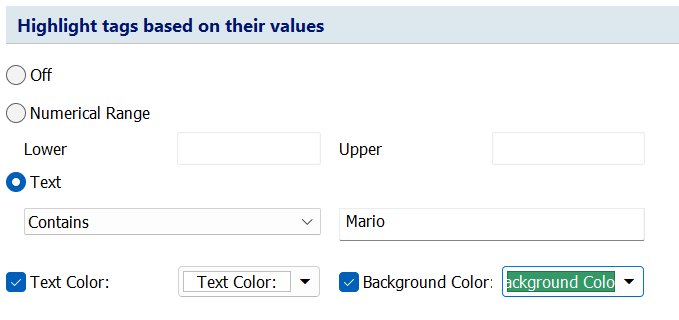
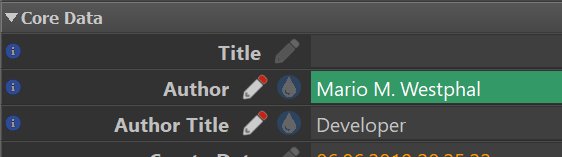
When displaying the Author tag, the Metadata Panel now looks at the value of that tag. If the value contains Mario, the rule is applied and colors the background in red:
Highlighting Empty Tags
Another typical use for conditional formatting is to highlight empty tags. This can be used as a visual clue for users to indicate tags which need to be filled. To highlight empty tags, use a regular expression like this:
^$
This expression matches all empty strings and the chosen text- and background colors will be used to display tags without values.
If you use AutoFill, this button allows you to create a new AutoFill template from the tags used in the current custom layout.
This is a very comfortable and quick way to 'cover' all tags you have used in a custom layout with an AutoFill template.
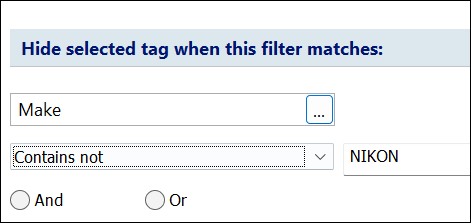
These options allow you to hide tags based on data contained in other tags. If the filter matches, the tag is hidden from the Metadata Panel. You can create individual filters for each tag you want to include in your panel layout.
You want to show certain EXIF maker notes, but these are only valid for a certain camera brand. You set up a filter for the camera make tag and compare it to a string, e.g. NIKON. If the camera brand is not NIKON, the tag for which you defined the filter will be hidden from the Metadata Panel.
Another typical use case is tags which should be shown only for certain file formats, e.g. tags only useful for video or audio files.
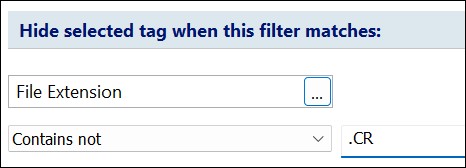
A tag filter that hides the selected tag when the file extension does not contain .CR.
If the tag is a repeatable tag that can contain multiple values (i.e. hierarchical keywords), the Metadata Panel concatenates all values before applying the filter.
The context menu available in the tree on the left allows you to manually move custom panels up and down. They appear in the Metadata Panel in the same order you create in the tree.
Close the dialog box with OK to store your changes in the database. If you close the dialog box with Cancel, all changes are undone. When changes are saved, they are available for the current database.
You can export panel layouts to use them in other IMatch databases or to share them with co-workers or friends. IMatch uses the extension .immdl for stored Metadata Panel layouts.
Select the top node in the tree on the left to access the import and export functionalities for panel layouts. These commands store panel layouts to a file on your disk or load existing layouts from a file. This enables you to save your layouts, exchange them with other people or import panel layouts into another database. You can also use this function to back up your Metadata Panel layouts into an external file.
Exporting layouts allows you to share layouts you have created with other users, or to make backups before you experiment with layout options. By default, IMatch exports all layouts.
You can export individual layouts with these steps, e.g. to share them with other users.
If you only want to export a few of your layouts, use the following procedure:
When you import Metadata Panel layouts, you can either replace all existing layouts with the layouts in the import file, or you can merge the imported layouts.
If you choose to merge, IMatch adds all layouts from the import file to your existing layouts. If this would cause duplicate names, the imported layouts will be renamed by appending a number.
IMatch ships with sample panel layouts for IPTC data, GPS data, a browser, layouts for MP3, Office and PDF files etc. You can load them from the standard Presets folder.
Some tags are part of a set or structure. One example is the IPTC Extension Creator structure, which consists of three tags:
Creator IdentifierCreator NameCreator RoleIPTC ArtworkOrObject structure, which consists of 17 tags in total:ArtworkTitle, ArtworkStylePeriod, ArtworkSourceInvURL, ArtworkSourceInventoryNo, ArtworkSource, ArtworkPhysicalDescription, ArtworkLicensorName, ArtworkLicensorID, ArtworkDateCreated, ArtworkCreatorID, ArtworkCreator, ArtworkCopyrightOwnerName, ArtworkCopyrightOwnerID, ArtworkCopyrightNotice, ArtworkContributionDescription, ArtworkContentDescription and ArtworkCircaDateCreated.All tags of a set should be filled together and many structured tag sets are also repeatable, meaning that each set can have multiple sets of values (multiple values per tag) per file. There can be multiple creators for an image or an image may show multiple artworks from different artists and sources.
IMatch prevents you from adding multiple values to non-repeatable tag sets.
You could add the tags you want to fill from these sets into a custom Metadata Panel layout. But that would require you to use ; to separate multiple entries (e.g., ArtworkTitle) and to manually ensure that each tag has the same number of values. Doable.
It is much easier to create a custom panel for a tag set:
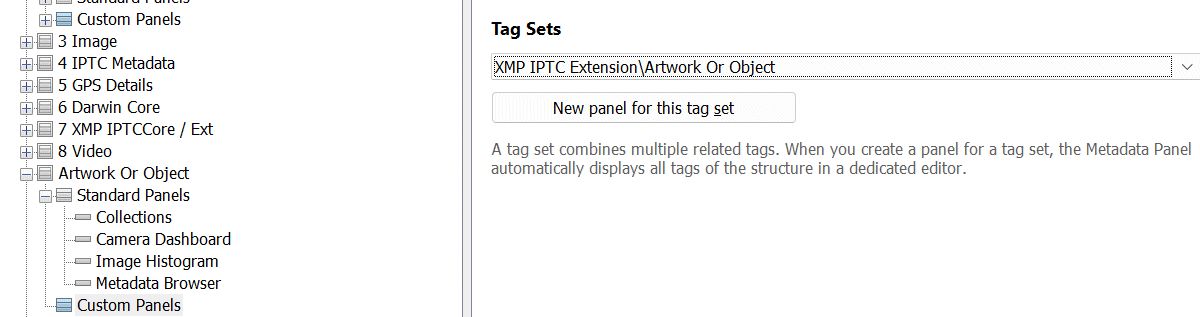
IMatch creates a special tag set custom layout from the selected tag set. This layout contains all tags that are part of the structured tag.
If you don't want to see or fill all tags of the structure, remove the tags from the list.
We did this for this example and removed rarely used Artwork tags, leaving only (similar to what you see e.g. in Adobe Photoshop™):
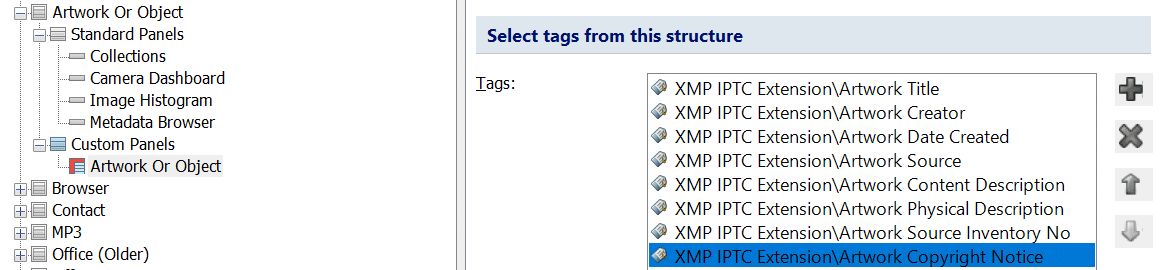
For structured tag panels, the + button allows you to choose from all tags in that structure:

Depending on your situation or the requirements of clients, not all tags of a structure have to be necessarily filled.
Panels for structured tags look and behave differently than normal custom panels:
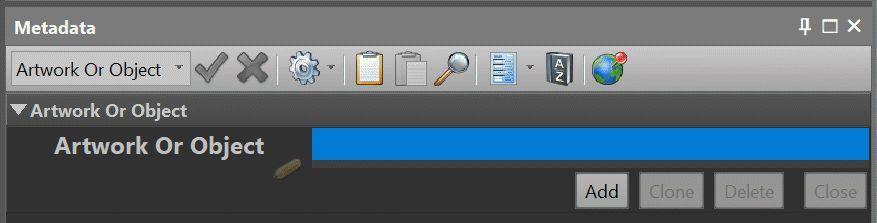
A panel for a structured tag in the Metadata Panel.
By double-clicking the empty entry (highlighted in blue in the screenshot above) or by clicking on the Add button we can now add a new set of values for this structured tag:
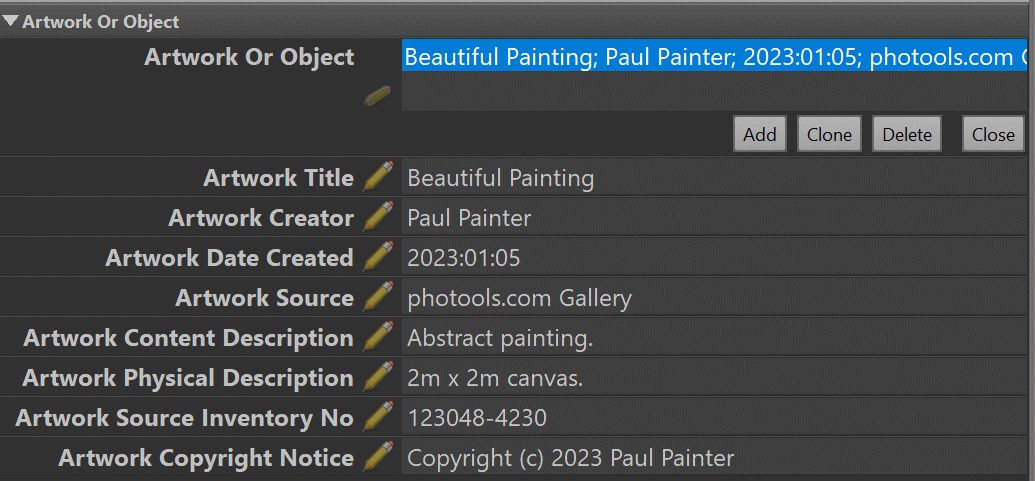
If the image shows additional artworks, add another set of values by clicking on the Add button again (or double-click on the empty entry).
When you click Add, the new set of values is inserted above the currently selected set.
This behavior allows you to insert new sets anywhere to establish a specific order.
The same works for other structured tags of course. Here we've used the IPTC Extension Creator tag and added 3 sets of values:
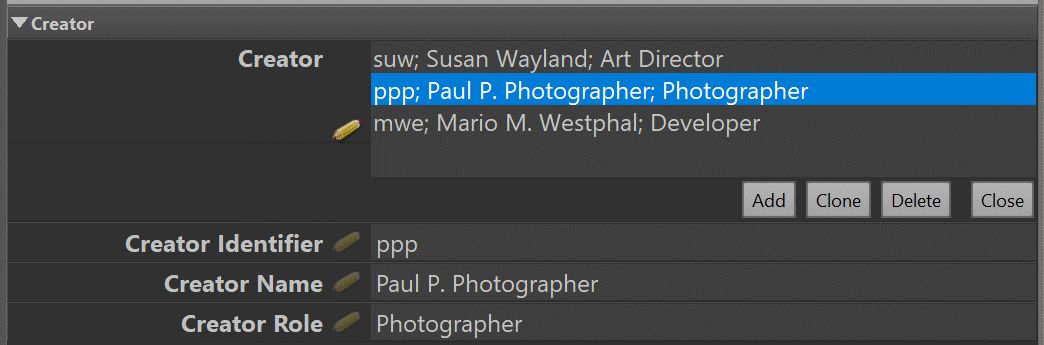
Each individual tag of structured tags is also accessible directly. This allows you to display and edit these tags unlinked from their structure, access them in variables, etc. If these tags have multiple values, they are separated with a semicolon ;.

Using individual tags that are part of a tag set in a Metadata Panel layout.