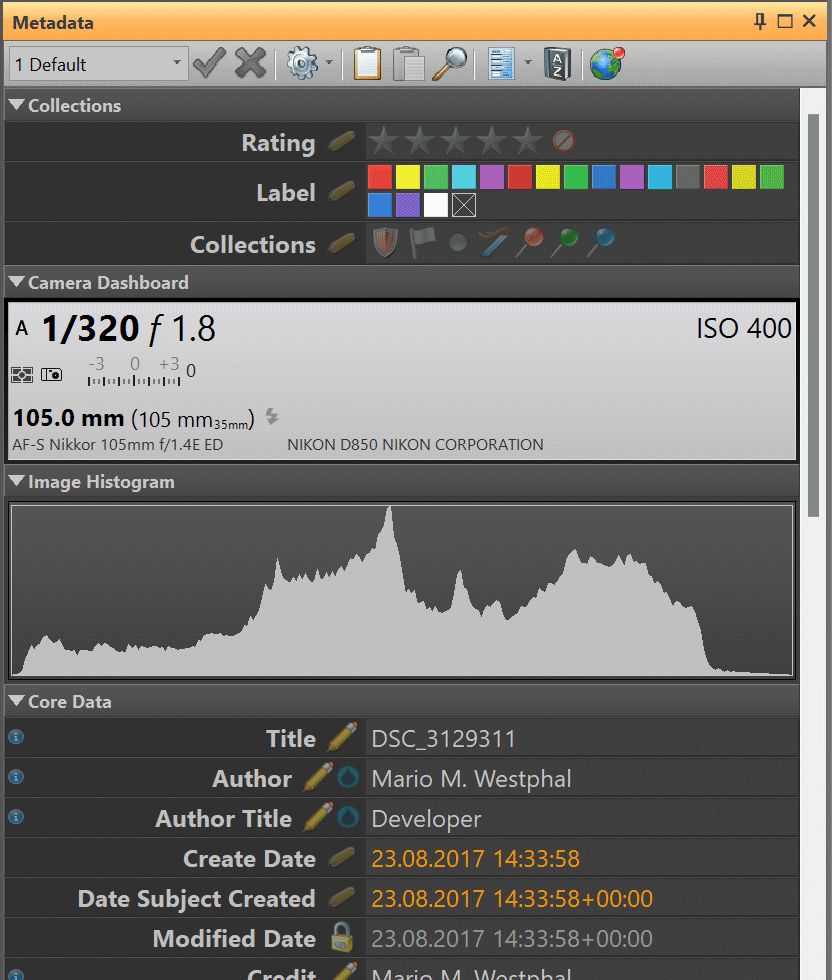
The Metadata Panel showing the Dashboard, Collections, and Image Histogram sub-panels.
The Metadata Panel allows you to view and edit metadata. It can be customized in many aspects to perfectly fit your requirements and workflow.
To display the Metadata Panel, press F9,M or use the corresponding menu command View > Panels > Metadata.
You can also press Ctrl+E, M to open it from the File Window and start editing.
The Metadata Panel and the Keywords Panel are the main features to display and edit metadata.
The Metadata Panel consists of one or more sub-panels. Each of these sub-panels either displays arbitrary metadata or implements a specialized view/edit feature. IMatch comes with four default sub-panels. Each can be customized, and you can create additional custom sub-panels.
The Metadata Panel showing the Dashboard, Collections, and Image Histogram sub-panels.
| Panel | Description | ||||||||
|---|---|---|---|---|---|---|---|---|---|
Camera Dashboard | This sub-panel displays the most important shooting data information, including F-Number, Shutter Speed, ISO and modes. This panel will be empty if the currently focused file is not an image. The amount of information displayed varies between camera models.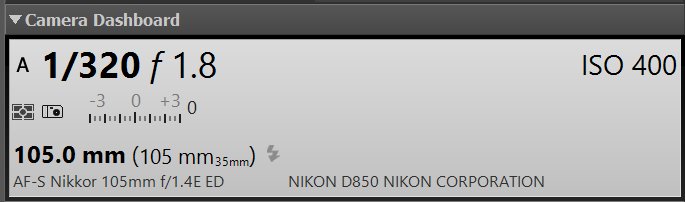 Since every camera vendor uses its own set of symbols and varying metadata tags to carry shooting data, creating a dashboard which works for all camera models is not easy. The dashboard uses a set of generic icons which should be identifiable for all users to indicate the most important shooting data. All other information can be gathered from the detailed metadata IMatch displays for your files.
| ||||||||
Collections | This sub-panel displays XMP ratings, labels and all collection icons.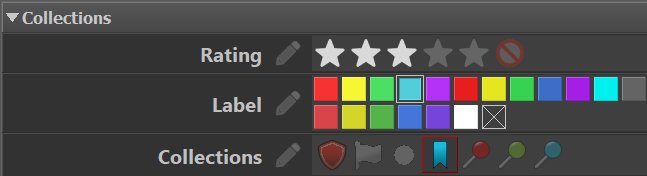 | ||||||||
Image Histogram | This sub-panel displays a histogram for the currently selected image. | ||||||||
Metadata Browser | This sub-panel displays all available metadata for the currently selected file(s). Especially for RAW image files, the metadata browser may need to load and display hundreds of metadata tags. This may slow down IMatch and also cause short delays when switching between images in the File Window. In most cases, a custom Metadata Panel that shows only the tags you really want to see is the better choice. The browser is a good way to find out about all the metadata in your files, and then create a custom panel with only the information you really want to see. You can edit all tags that already exist in your files in this panel. To add/edit tags not yet in the file, use a Custom Panel, see below. | ||||||||
Custom Panels | The ability to create custom panels allows you to see exactly the tags you want and in exactly the way you want to see them. These panels support many layout options and you can mix tags from all groups freely. To set up input forms for metadata, Custom Panels are the tool of choice. If none of the default panels suits your needs, you can use a custom panel to show exactly the combination and sequence of metadata fields you need for editing. |
You can freely combine these panel types and add any number of custom panels in Metadata Panel layouts.
The number of available tags depends on the settings you have made in the Tag Manager.
By default, IMatch does not import all metadata from your files, but extracts only the most frequently used tags. Especially RAW files may contain hundreds of data items per file which are of no general interest. Importing them would only increase the database size unnecessarily.
Select the file(s) for which you want to edit metadata in a File Window. Choose a Metadata Panel layout that includes the data you want to edit, or create a custom metadata panel layout.
The Browser Metadata Panel layout shows only the tags actually contained in the currently selected file. You can only edit these tags in the Browser layout. To add contents for tags not already in the file, choose another layout, e.g. 'Default'.
Click into the value column of the tag you want to edit to activate the editor.
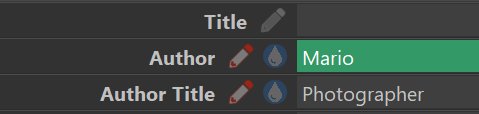
Editing the headline of the current file. The value column has changed into an editor after left-clicking it.
Edit the existing text or type in new text. Use the menu commands from the drop-down menu to access thesaurus data, clipboard values, editing history etc.
Click somewhere outside the value column to close the editor and commit the changes. You can also press Enter or use the Tab or Shift+Tab key to move to the next field and commit the changes.
To begin a new line for multi-line fields (e.g., the description), press Ctrl+Enter.
Finished editing the headline. The Pen icon has changed to indicate that this tag value was changed.
See below for more information about the various icons used by the Metadata Panel.
Use Tab or Shift + Tab to move to the next or previous tag. This finishes editing the current tag and automatically starts editing the next/previous tag. Using these keys allows you to quickly navigate between fields in the editor without using the mouse.
Use Ctrl+PageUp and Ctrl+PageDown to move to the previous or next file in the File Window without leaving the Metadata Panel. This works only when no editor is active, so click somewhere outside or press Tab once to finish editing.
IMatch displays the number of characters in the caption while you are editing tag contents.
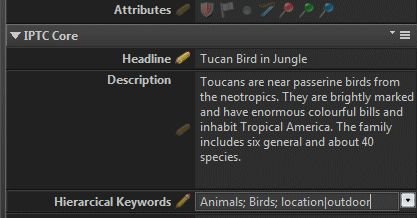
For keyword tags (XMP flat and hierarchical keywords, legacy IPTC keywords), the Metadata Panel displays the number of keywords permanently in the caption. This is convenient for photographers who have to follow strict rules about text lengths and keyword count.
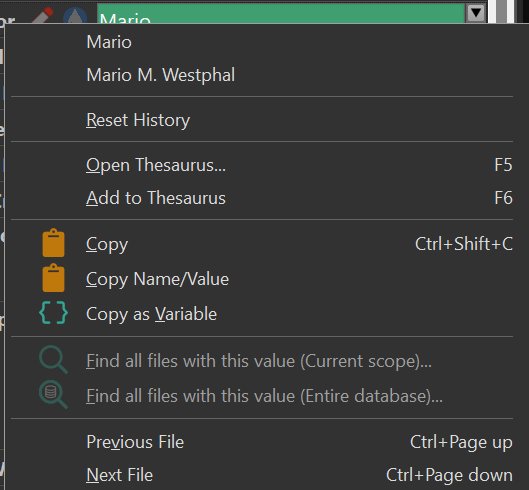
Right-click the caption to open a context menu with useful commands.

The Copy commands allow you to copy the caption and/or value into the Windows clipboard. You can then paste the data into another metadata tag or another application. The Find all files with this value... is explained below.
The Open in Browser... command is available for all tags which have an URL or email data type or which appear to contain a web address in the form http:// or www.*.
You can also move to the next and previous file from directly from this menu.
IMatch uses a number of different icons in the Metadata Panel to indicate certain conditions.
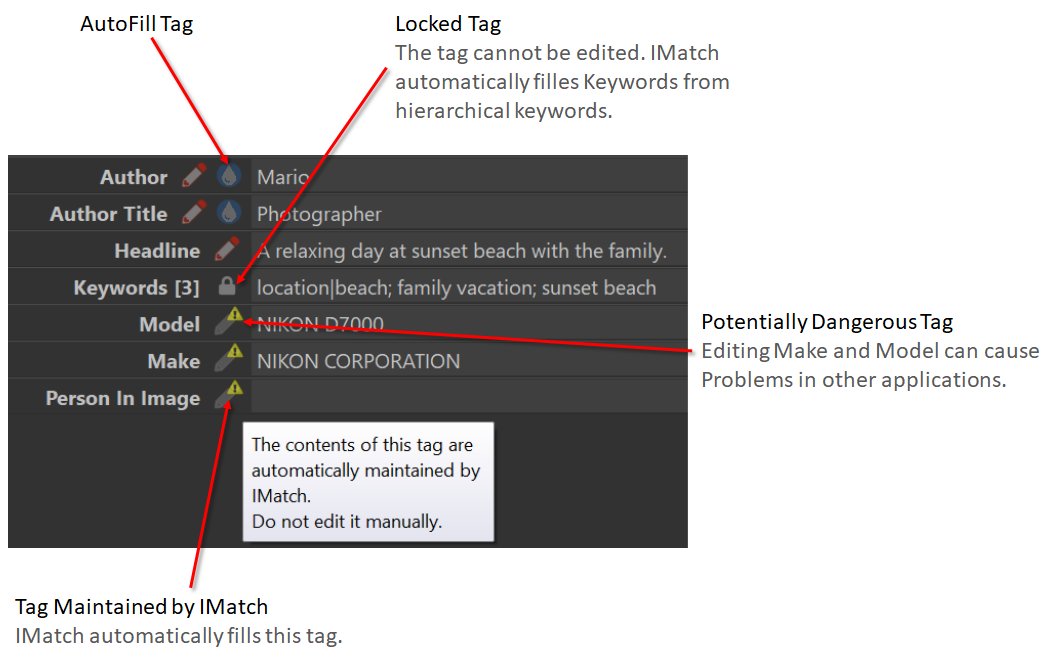
| Pen Icon | This indicator shows if a tag has been modified, modified but not yet been written to the file or not modified. You can also use the Pen icon to mark a field explicitly as modified to force a write-back of that field to the file. This is useful when you're editing multiple files at once to write the data (sync) to all selected files. If multiple files are selected, clicking this icon marks the tag as modified and applies the value of the focused file to all selected files. This is an easy way to apply the same tag value to several files at once. You can also Undo changes made to a tag in the current editing session by clicking on the Pen icon. |
| Lock Icon | Read-only tags show a lock icon. A tag can be read-only for several reasons. Some tags cannot be written at all. The IPTC Keyword and XMP:dc:Subject keyword tags are read-only in IMatch because you always edit the hierarchical keywords in the Keywords Panel and let IMatch take care to map these keywords into the other keyword tags. See the Keywords Panel for details. |
| Mapped Lock Icon | If you have enabled Metadata Working Group compliance under Edit > Preferences > Metadata 2 or you let IMatch promote data from XMP to IPTC and EXIF data, these IPTC and EXIF tags cannot be edited directly in the metadata editor. Changes made to IPTC or EXIF tags would be overwritten by IMatch when it maps the corresponding XMP tags at write time. The Metadata Panel will display mapped IPTC and EXIF tags, but not allow you to edit them. Edit the corresponding XMP tags or Standard Tags instead. |
| Warning Icon | Editing some fields may be potentially harmful. These tags are displayed with a special warning icon. One example for potentially harmful tags is the EXIF make and model tag. You can add or change the camera model name stored in EXIF, but doing so and doing it wrong may confuse your RAW processor or may render the image file unreadable in other software. RAW processors use the camera model string to identify the image format, and if you enter a wrong information, problems will happen. However, it may be useful to be able to edit this information if your RAW processor does not recognize the camera model string (yet). IMatch allows you to do that, but with caution. |
To save your changes to the database, click on the green checkmark button in the Metadata Panel toolbar or press Ctrl+S.
Click on the red X button (or press Ctrl+Z) to undo your changes and revert to the contents stored in the database.

If you click into another window or panel or select another file in the File Window, the Metadata Panel automatically confirms pending changes.
The toolbar at the top of the Metadata Panel gives you access to the most frequently used commands.

In addition to the layout selector drop-down and the Save/Undo icons explained above you have:
| Commit and Cancel | You can click these buttons to commit (Ctrl + S) your changes or cancel them (Ctrl + Z). |
| Gear | This button opens the layout editor where you can create and manage custom Metadata Panel layouts. |
| Copy | Copies the panel contents into the Windows clipboard. You can paste the copied data into the Metadata Panel of another file to copy metadata between files or you can paste the panel data into other applications as text. See below for more info. |
| Paste | This command is available if the Windows clipboard contains Metadata Panel data. |
| Search Bar | Opens the search bar. The search bar allows you to search the Metadata Panel contents for text. |
| Metadata Templates | Direct access to all your metadata templates and the template editor. |
| Thesaurus Manager | Opens the Thesaurus Manager where you can edit the thesaurus contents for all metadata tags. |
| Reverse geocoding | Performs reverse geocoding for all selected files. |
The Copy button in the toolbar allows you to copy the contents of the Metadata Panel layout into the Windows clipboard.
The data is copied in an internal IMatch format and also in a universal text format with tag name => value pairs. The internal format is used by the Metadata Panel when you paste data into files and the text format is very useful to transfer tag values into other applications.
To copy metadata and other data based on variables into the Windows clipboard, use the Copy Data App included in IMatch.
After clicking on Copy, the Metadata Panel displays a form that enables you to select all or non-empty tags with a single click:
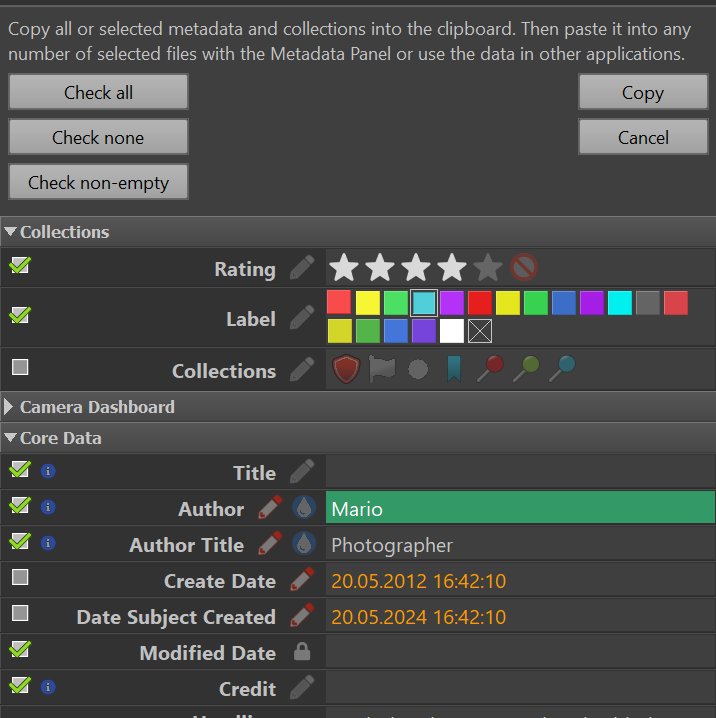
You can select or de-select individual tags to specify precisely which tags you want to copy. All tags and collections with a green checkmark will be copied into the clipboard when you click on the Copy button in the form.
If you have made a selection before, you can hold down Ctrl when clicking on the Copy button in the toolbar.
The form is skipped and the data is copied into the clipboard, using the last selection.
The Metadata Panel remembers your selection for each layout. This allows you to create different layouts with different selections to copy different sets of tags, if needed.
When you press Ctrl + C, the selection form is shown when there is no previous selection. Else the data is copied directly into the clipboard. To make the selection form show via the keyboard, press Alt + Ctrl + C.
After copying data into the clipboard in the Metadata Panel, you can paste it into one or multiple other files.
Select the files to paste data into in a File Window, click into the Metadata Panel to make sure it is the active window and press Ctrl + V to paste the metadata.
You can use Ctrl + E, M to make the Metadata Panel active, if you prefer keyboard over mouse.
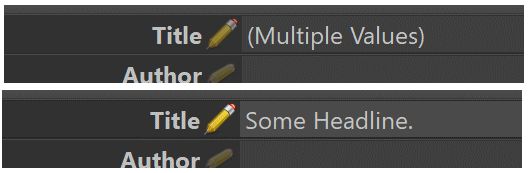
When you select more than one file, the Metadata Panel merges the information shown, using the focused file as the base. All tags for which the selected files have different data will be indicated with the special (Multiple Values) caption.
This allows you to quickly tell if and which tag values are different between the selected files.
If you enter a new value for a tag, this new value will be written to all selected files.
If you click the Pen icon in front of a tag value, you mark it as modified. The value of the focused file will be shown and written to all selected files.
This is an easy way to synchronize metadata between multiple files.
Using the Pen icon to mark a tag value as modified. This syncs the data across all selected files.
This merge is only performed when there are less than 1,000 files selected. It would take too long to retrieve, compare and merge the metadata otherwise. IMatch displays a message box in this case.
When at least one of the selected files is currently processed by IMatch (metadata is being written or the file is scheduled for Importing/Rescan), the Metadata Panel will not allow you to edit the data. Instead it disables the panel and shows the text overlay Updating... to inform you that the data of the file is currently processed in the background.
When you are editing a value and the editor is active, you can click on the drop-down button on the right side of the editor to open a context menu with additional commands and options. The number of available commands depends on the tag.
Additional options menu for a text tag.
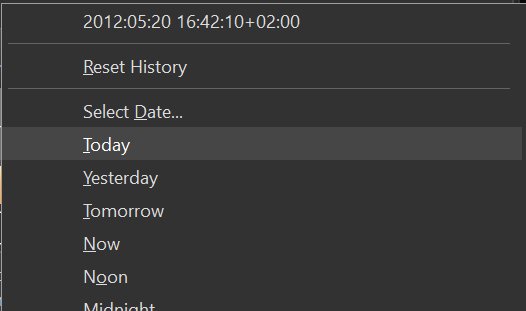
Additional options menu for date/time tag.
For most tags you have these options:
History | The Metadata Panel remembers the last couple of values you have entered for tags. These values are displayed at the top of the context menu. Just click on one of these entries to copy them into the tag value. |
Reset History | Use this command to clear the history for this tag. |
Open Thesaurus | Opens a list with all entries from the universal thesaurus for the current tag. |
Add to Thesaurus | Adds the current value of the tag to the thesaurus. Use this command to store frequently used values in IMatch's universal thesaurus. This is especially useful for things like copyright notices, descriptions, usage terms and the like. After adding entries you can edit them in the Thesaurus Manager. 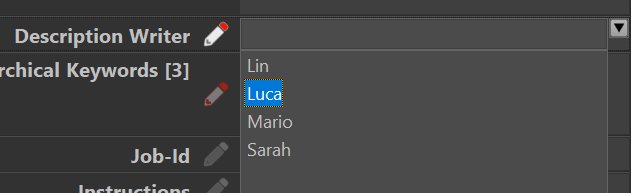 Thesaurus drop-down with some entries for the Usage Terms tag. |
Copy | Copies the value of the current tag into the Windows clipboard. |
Copy Name/Value | Copies the name and value of the current tag into the Windows clipboard. |
Copy as Variable | Copies the variable representing the selected tag into the Windows clipboard. You can then paste it into the VarToy app or any other IMatch feature which supports variables. |
Find all files with this value... | This command searches the entire database or the current scope (File Window) for files with the same value in the currently selected tab. The result of the search is opened in a new result window. |
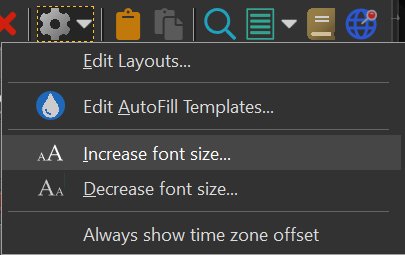
If you edit metadata often or for longer periods of time, you may find it easier to increase the font size in the Metadata Panel. This makes it easier to read the information and puts less strain on your eyes.
To increase or decrease the font size, click on the arrow button next to the Configure button in the toolbar.
The larger font size is also applied to the contents of the input fields in the Keywords panel.
All other font sizes used by IMatch are based on the font sizes used by Windows itself. These depend on your screen resolution, theme and settings you make in the Windows Control Panel. IMatch automatically adapts to the font sizes and screen metrics used by Windows.
IMatch automatically adapts to Windows text scaling. See Windows Text Scaling for more info.
By default, IMatch hides time zone offsets for date & time values if they match your local time zone. This reduces clutter and makes timestamps easier to read.
When you click on a date & time value, the full timestamp is shown, including the time zone offset.

Time zone offset hidden, since it matches our local time zone (Germany)
If you always want to see the time zone offset, you can enable it via an option available in the Gear icon drop-down menu in the Metadata Panel. The display then changes to

Under some conditions you may want to undo changes after they have been committed to the database.
To reload the metadata from the original image, select the image in a File Window and choose Rescan now from the file's context menu while holding down the Ctrl key. This opens a dialog box with additional options. Here, choose Reload Metadata.
This procedure reloads only the metadata from the file into the database, replacing the cached metadata. Check your settings under Metadata 2 and make sure the protect unwritten metadata setting is disabled. Else IMatch will not update the modified tags.
When you change metadata in the metadata editor and apply these changes, IMatch first writes the modified tags back to the database. This is very fast, even for dozens or hundreds of files. Files with changed metadata display a special Pen icon in the File Window:
Pen Icon: File with metadata changes not yet written to the file.
The Pen icon tells you that the file has modified metadata but this metadata was not yet written to the file on disk. You can click the pen to write the changes to the file immediately.
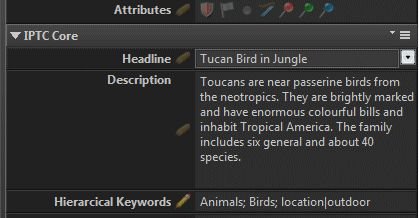
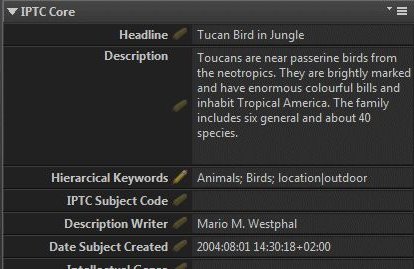
The Pen icon used in the Metadata Panel also changes to indicate which tags you have modified. In the image below, the value for Headline was not changed (same as in the file), but you modified the contents of the Description tag. This feature allows you to see exactly which tags were changed.
After IMatch has written the changes to the file, all pens will revert back to their default style.
Writing data to files is usually much slower than writing data to the database. Often you can postpone this step completely, e.g. if you only work with IMatch and you don't need to update metadata in the files to exchange the data with other applications or services.
Depending on your background processing settings, IMatch immediately starts writing changes back to files or it keeps the data in the database until you explicitly command it to write out the changes at a later time.
If you have enabled background metadata write-back, IMatch puts files with modified metadata into a processing queue and processes the files in that queue in the background. You can monitor this process via the Info & Activity Panel. When you exit IMatch, the background processing queue is saved and IMatch automatically continues to write-back to files the next time you start it.
Updating the database is very fast. If you change the rating or label for 500 files, IMatch is done with it in less than one second. But updating the XMP record in 500 files to write out the new label or rating can take several minutes and causes a lot of disk activity.
If you have disabled background updates, you can make IMatch write pending metadata at any time via the commands provided in the Commands > Metadata Write-back menu. You can also trigger the write-back by clicking on the Pen icon shown in the File Window for files with pending metadata updates.
See Metadata Write-back for additional details about writing metadata and automatic migration between different standards like XMP, IPTC or EXIF.
At the time the data is written to the file on disk, IMatch also performs tasks like migrating data between different metadata formats (e.g. copying changes from XMP to IPTC) according to the settings you have made under Edit > Preferences > Metadata 2.
No propagation between tags in different standards takes place until the data is written to the file on disk.
This means that when you change the value for an XMP tag, the corresponding IPTC or EXIF tag will not show the new value unless the data was written to the file. Only after the data has been written and migration is complete does the Metadata Panel show the correct data for all tags. The only exception is keywords. IMatch automatically updates the keyword tags in the Metadata Panel for all standards when you work with the Keywords Panel.
This is not a problem if you use only Standard tags in your custom layouts and you don't mix classic IPTC/EXIF data with XMP. You should just be aware of the fact that IPTC/EXIF data is considered stale if there are unwritten changes to XMP data and you have enabled propagation/migration between XMP and IPTC/EXIF.
Propagation of metadata based on your File Relation Definitions is also processed during the write stage. IMatch has to copy data between physical files to perform propagation, and this requires that the master file is updated on disk first. You don't see file propagation in the user interface until the files have been written.
The exceptions to this rule are rating, label and collections, which are processed separately from the other metadata.
One of the major features of the Metadata Panel is the ability to create your own layouts. This allows you to set up different panels with different tags for different file types, or for different phases in your workflow. You can create a layout which shows only basic shooting data and another which shows full IPTC and XMP data.
See Metadata Panel Layouts for information on how to work with custom panel layouts.
The Metadata Panel in IMatch has been designed to support as many different workflows as possible. By creating your own Metadata Panel layouts you can achieve exactly the look and amount of information displayed you need for a certain step in your workflow.
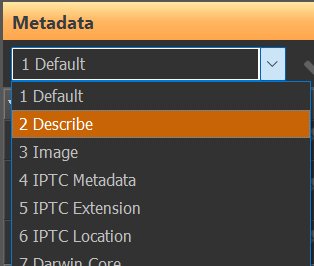
To select one of the available panel layouts, choose it from the drop-down list in the Metadata Panel toolbar:
All Metadata Panels display information using two columns: on the left is the name column and on the right the value column. The value column contains the data extracted from the file.
A custom panel with a number of tags. The caption column displays the tag name (or your custom title) and the value column on the right displays the contents of the tag.
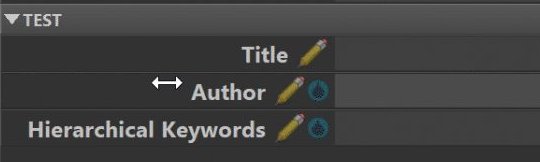
You can change the width of the caption column with the mouse. Move the mouse cursor over the caption until the mouse cursor changes into a left-right arrow. Then click and move the mouse to change the caption width.
The optimal width depends on the length of the names of the tags included in the layout and the language used. Each layout has its own caption width.
You can also change the width directly in the Metadata Panel layout editor. Click on a layout on the left:

IMatch includes several standard Metadata Panel layouts, which cover the most frequent use cases. You can see them all by opening the layout selector box in the ribbon.
The names of the layout vary based on the selected user interface language during the first start of IMatch.
| Layout | Description |
|---|---|
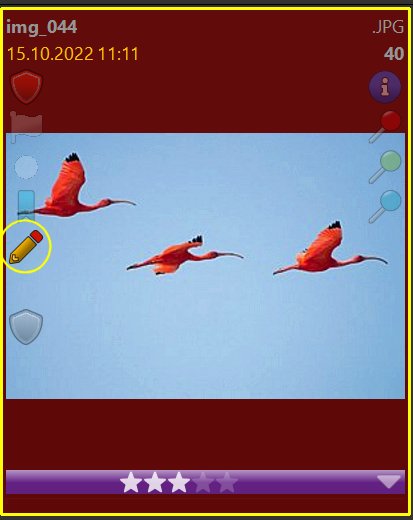
Default | This layout displays (and allows to edit) the rating and label, common metadata tags like title, headline, description and the two important Create Date and Date Subject Created timestamps. See How IMatch Uses Date and Time Information for related information. 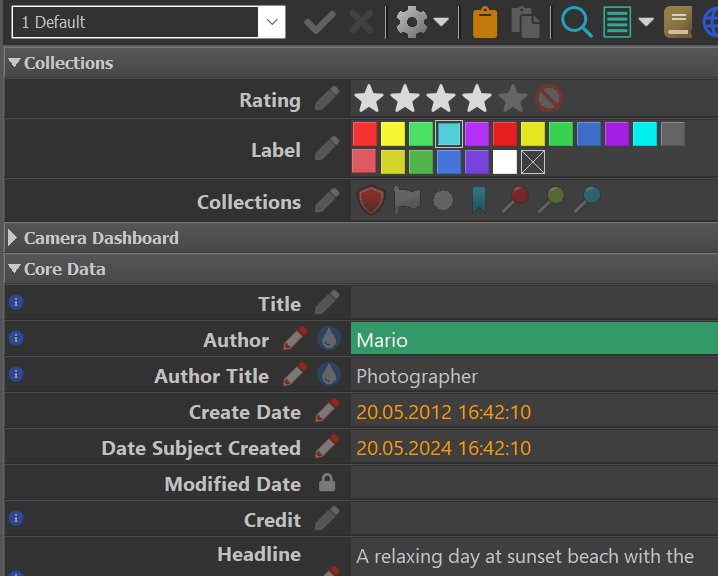 Metadata for a typical file as displayed with the 'Default' Metadata Panel layout. |
Browser | This special layout displays all metadata tags IMatch has imported from your files. IMatch by default does not import all metadata tags. For example, it skips most of the maker notes and other technical data not intended to be viewed by humans. If you need to view the contents of a specific tag (usually a camera- or vendor-specific metadata value) and you don't see it in the browser layout, you can use the Tag Manager to tell IMatch to import this specific tag (or several) in addition to the default tags it always imports. |
Describe | This layout concentrates on the most frequently used metadata tags for describing images. |
Image | This layout displays technical data like the image histogram, the camera dashboard and all other metadata tags maintained by IMatch for the file. |
IPTC Metadata | If you work with IPTC metadata, this layout displays all relevant tags. |
GPS Details | Shows all GPS data and related information. |
Darwin Core | Darwin Core metadata. Frequently used in scientific environments. |
XMP IPTCCore/Ext | Displays all tags from the IPTC Core and IPTCExt schemas. Often used by professional photographers and image agencies. |
Video | For viewing frequently used metadata tags for video files. |
| For viewing frequently used metadata tags for PDF documents. | |
MP3 | For viewing frequently used metadata tags for MP3 audio files. |
These default layouts handle most typical usage scenarios and workflows. If none of these layouts suits your needs, or you want to include additional tags: no problem!
IMatch allows you to modify the standard panel layouts and to create your own layouts. By creating your own panel layouts you can configure the Metadata Panel to show all the tags you want to see, in the order in which you want to see them. If you want a clean XMP-only panel or you prefer mixing XMP data with EXIF maker notes, all this can be done easily with a custom layout.
See Metadata Panel Layouts for information about how to edit existing panel layouts or create your own custom panel layouts.


