
Metadata AutoFill enables you to create and maintain sets of tags and values for these tags. You can then apply these values in the Metadata Panel, filling multiple tags at once with minimal effort.
This animation shows how AutoFill works in the Metadata Panel.
We enter part of a author name, pick from the suggested authors and AutoFill adds data to a whole bunch of related tags for us:

See Metadata for Beginners for basics about metadata and tags.
If you always fill the same tags with the same values, AutoFill will be helpful to you.
For example, if you often fill both Author and Author Title, and maybe also add the author's name as a hierarchical keyword.
If you have only a handful of authors, you can manage this with a few Metadata Templates. But if you have 20 or more authors, it becomes rather unwieldy.
The IPTC Creator Contact Info record consists of eight tags that make up the full address of a creator. If you have only one or a few creators, Metadata Templates will work just fine. But if you have dozens of creators, things become more difficult.
Many IMatch users fill location data from a large but fixed list of locations.
Scientists regularly fill many tags in the XMP Darwin Core namespace, again from a large but fixed set of contents.
AutoFill makes all this much easier and more comfortable.
An AutoFill template defines:
AutoFill templates can contain any number of tags and you can add any number of rows (sets of tag values) to an AutoFill template.
Here is an AutoFill template for the tags Author, Author Title and Hierarchical Keywords:

And here is another example for an AutoFill template, this time for a set of location tags:

Each column in a template represents a metadata tag and the rows contain the values for these tags.
To create and manage AutoFill templates, use the Edit menu > Edit AutoFill Templates command. The keyboard shortcut is: Alt+E, P.
For convenience, you can also open the editor directly from the Metadata Panel:
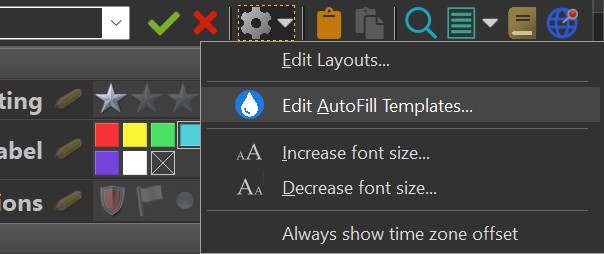
This opens the AutoFill Template Manager:
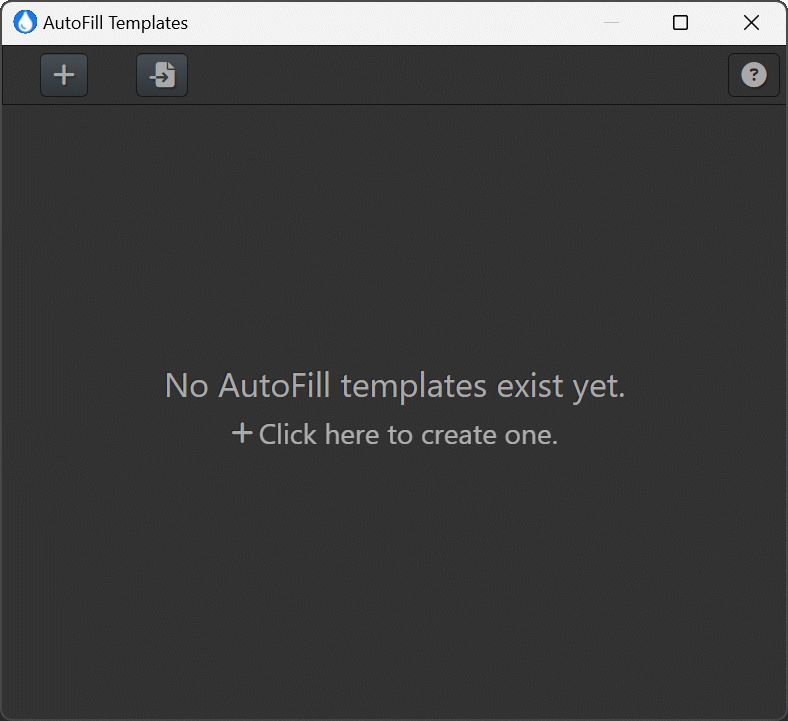
When you open it for the first time, there are no templates.
Click on the link in the middle of the window or the button in the toolbar at the top to create a new AutoFill template.
This opens the AutoFill Template Editor, prompting for a name for the new template:
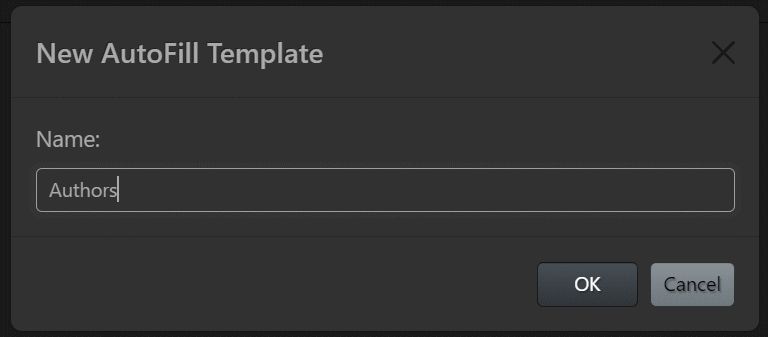
Choose a unique and meaningful name. Shorter names are better.
After creating the new template, we can add tags to it. Click the blue button to add more tags to the template. The AutoFill Editor will open the standard Tag Selector.
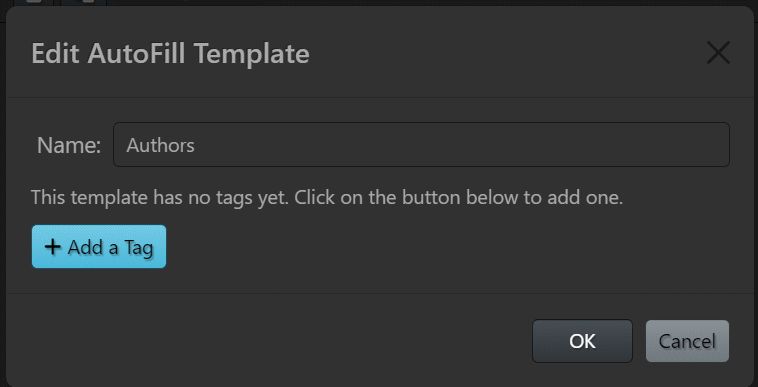
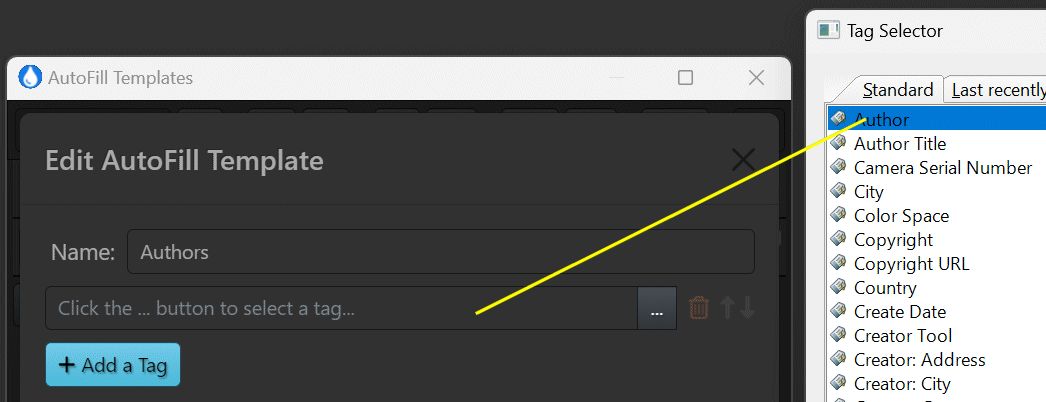
You can change the name of the template in this dialog by simply modifying the name shown.
For this example, three tags were added: Author, Author Title and hierarchical keywords.
Note that the Append option for the hierarchical keywords tag is enabled.
This tells the AutoFill template to append the keywords from the template to existing keywords. Else existing keywords would be replaced with the AutoFill value.
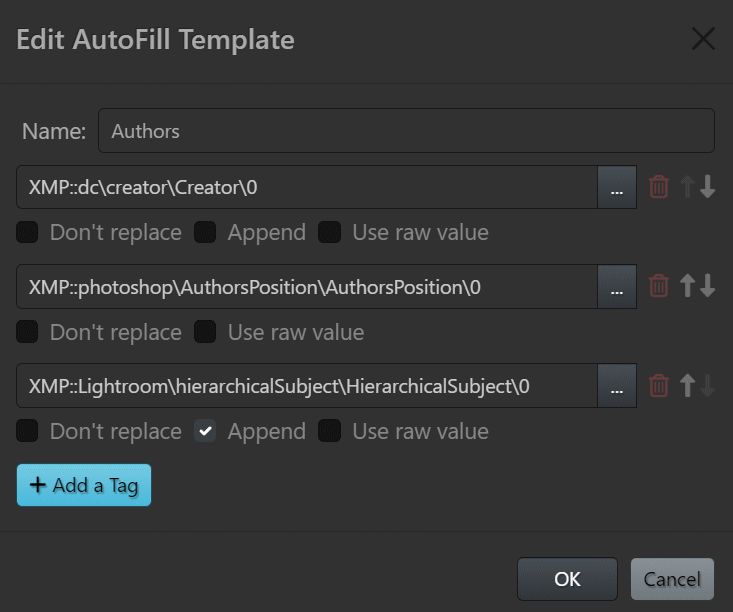
The button deletes the tag from the template and all associated values.
The and buttons are used to change the order in which the tags appear.
The value rows in an AutoFill template are sorted by tag value, from the left (first tag) to the right.
This allows you to control the sort order by changing the tag order.
Click OK to confirm your changes to the template. The dialog closes and you're back in the AutoFill Editor.
After you have saved the changes with the green Save button and closed the AutoFill Editor window, have a look at the Metadata Panel.
The tags you have added to the AutoFill template show the AutoFill icon in the Metadata Panel:
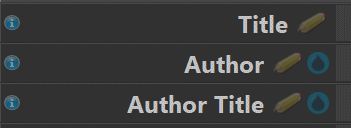
All tags referenced in an AutoFill template show the AutoFill icon.
You can also create AutoFill templates from custom Metadata Panel Layouts.
If you have created custom Metadata Panel layouts for specific sets of data, converting them into a matching AutoFill template requires only a few clicks.
In addition to the tag key, each tag element in a template offers several additional properties:
| Property | Description |
|---|---|
Don't replace | Enable this option if you want to apply the AutoFill value only when the file has no value for that tag yet. If this is not enabled, existing tag values are replaced with the AutoFill values. If the tag is part of a structured tag, this option is automatically synchronized across all members of the same structured tag. |
Append | This is for tags with multiple values like hierarchical keywords. If enabled, the values from the AutoFill template are appended to the existing values. Else the existing values are replaced with the AutoFill values. If the tag is part of a structured tag, this option is automatically synchronized across all members of the same structured tag. |
Use raw value | This option controls if the AutoFill template fills the formatted tag value (default) or the raw tag value. In most cases, keep this unchecked. One of the rare exceptions are GPS coordinates (lat/lon/alt), which expect values in their raw component (decimal degrees instead of degrees, minutes and seconds). If you want to fill GPS coordinates with an AutoFill template, use |
Changes become permanent when you save the template with the green Save button.

AutoFill template with a single (empty) row of values.
To add tag values, enter them in the input fields for the tag.
Click on the Add Row button or press Shift + Ctrl + Ins to add a new row of values.
Use the and buttons at the end of each row to duplicate or delete rows.
You can change the column width and the row height via the Editor Options.

For tags that can hold multiple values, like hierarchical keywords for instance, separate the values with a semicolon:
banana;location beach;motive|vacation
You can use IMatch Variables in AutoFill values. This opens all kinds of powerful automation features and dynamic data generation on-the-fly.
Consider this example:
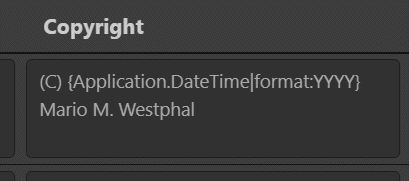
The value for the Copyright tag uses the variable {Application.DateTime|format:YYYY} to insert the current year whenever the AutoFill template is applied.
Example: If the template is applied in the year 2025, AutoFill inserts the value (C) 2025 Mario M. Westphal into the Copyright tag.
Create and test your variables in the VarToy app and then copy them from there into your AutoFill templates.
Rows are sorted by their tag values, from the left (first tag) to the right. This allows you to control the sort order by changing the tag order.
If there is more than one AutoFill template, select the template you want to edit in the drop-down list in the toolbar. Then click on the button in the toolbar.
Use the button to create new templates, and the button to delete templates.
Enter a search term into the search bar at the top to find all rows containing this term, in any of the values.
AutoFill is integrated into the Metadata Panel and here you apply AutoFill template values to metadata.
Metadata tags which are used by an AutoFill template display the AutoFill icon:

The AutoFill icon indicates tags which are referenced by an AutoFill template.
If you start typing into such a tag field, IMatch suggests values from the linked AutoFill template:
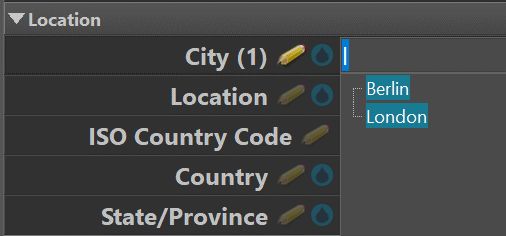
When you click one of the suggested values, IMatch display a dialog box where you can select from all rows in the template which match the selected value.
In this example, we selected the city London, and there are two matching rows in the AutoFill template:

After selecting a row with a double-click, the values of the row are copied into their corresponding metadata tags:
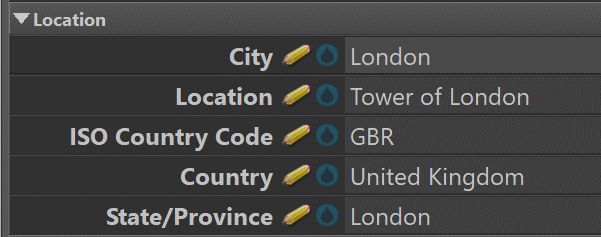
When there is only one matching value in the template, displaying this dialog is optional.
IMatch displays a prompt when this happens for the first time, explaining this. When you select the Automatically apply unique values in the future option, IMatch automatically applies the AutoFill from then on.
You can reactivate this prompt under Edit > Preferences > Metadata 2: AutoFill
You can use any tag referenced in an AutoFill template to search and apply templates values:
Here we entered text into the ISO Country Code tag field (instead of City) and selected USA from the list of suggestions.
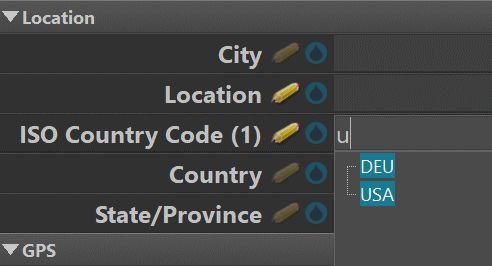
IMatch now offers all template values where the ISO County Code tag matches USA:

Usually you would use the most selective tag when entering text.
In the example above, entering 5th into the Location tag field would produce only one suggestion and clicking on that suggestion would apply all other AutoFill values immediately.
If you click the AutoFill icon of a tag in the Metadata Panel:

IMatch opens the AutoFill selector dialog box showing all available values for that AutoFill template:

You can then select a row of values with a double-click it and IMatch fills all tags in that template with the values of that row.
If the tag has already a value in the Metadata Panel, you can Alt + click the AutoFill Icon. This opens the AutoFill selector dialog showing only values matching what's already in the tag.
This is very useful if you want to apply AutoFill templates to files which already have data for one or more of the tags included in the template. A quick way to set or update all other tags referenced in that AutoFill template.
If a tag is referenced by multiple AutoFill templates, the AutoFill selector dialog displays a drop-down list with the names of these templates at the top. Choose the template you want to work with.
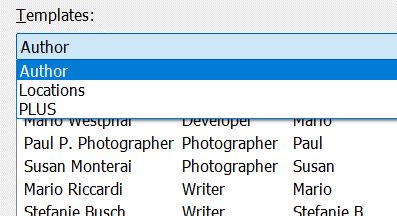
If you type text into an AutoFill tag in the Metadata Panel and there are multiple AutoFill templates with values for that tag, IMatch displays the name of the template in brackets in front of the value:

Using the same tags in multiple AutoFill templates should be used sparingly, e.g. only for especially versatile tags like hierarchical keywords.
If a tag has values in one or more AutoFill templates and also in the Thesaurus, the auto-suggestion considers both sources and uses different colors to indicate where the auto-suggestion comes from:
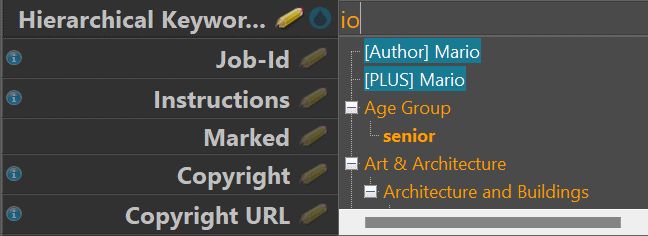
AutoFill suggestions (blue) and Thesaurus suggestions (orange).
The AutoFill Template Editor supports the Windows clipboard to make it easy to transfer data and to reuse existing data stored in other applications, spread sheets, databases etc.
Use the button to copy all rows in the currently selected template into the Windows clipboard. The AutoFill template editor copies each row, separating values with a tab stop and delimiting each row with a carriage return / line feed pair.
This format is pretty much universal and allows you to reuse the data virtually everywhere.
When you paste data from the clipboard, data is appended to the existing rows in the template.
To paste data from the Windows clipboard, click the button. For this to work, the following requirements must be met:
tab stop (0x09hex)carriage return / linefeed pair (0x0D,0x0Ahex) or a single line-feed (0x0Ahex)The AutoFill template editor displays a warning message when these conditions are not fulfilled.
When the number of columns detected in the clipboard matches the number of tags in the template, the comments for the inserted rows are set to empty. If the pasted data has number of tags + 1 columns, the first column is stored into the comment.
You can to use the paste command to reuse existing data stored in a spread sheet document, CSV file or database table. All you need to do is to copy that data into the Windows clipboard and then paste it into an AutoFill template.
AutoFill templates are not designed to manage massive amounts of data with tens of thousands of rows.
The AutoFill Editor has been designed to work well on all screen sizes and resolutions. In addition, you can control several aspects of how row values are presented. Click on the icon to open the options:
Zoom | The overall zoom ratio. Squeeze more information into the available screen estate or zoom in for an easier to read text. |
Column width | This option controls the width of the columns (all columns have the same width). |
Row height | If your AutoFill template contains tags with 'longer' values (e.g. the description tag), you can use this control to increase the row height to see more text without having to scroll each column. Text wraps automatically into multiple lines. |
Show comments | This check box toggles the comment column on and off. |
Each row in an AutoFill template has an optional comment. Comments are useful if your template contains multiple very similar rows, which may just differ in a GPS coordinate or in a tag that's outside of the visual area. And for other purposes you can come up with.
To show the comments column, enable it in the menu.

The comment column in the AutoFill Editor.
IMatch shows the comments in the AutoFill selector dialog box:
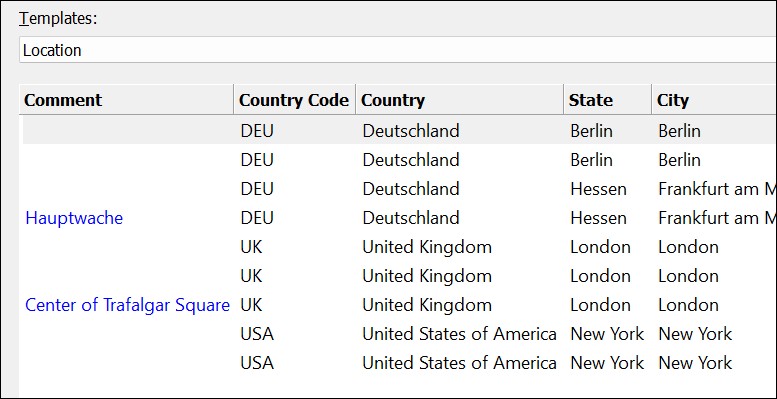
Comments can be very helpful if you have many similar rows in your template and you want to name or describe them to easier identification.
You can create Favorites from AutoFill template rows. Depending on your workflow preferences, having the ability to apply frequently used AutoFill elements with a single click or keyboard shortcut may come in handy.
If you work with multiple databases and you want to transfer AutoFill templates, it is usually quite easy to use the Windows clipboard to transfer the data (see above).
If you want to share AutoFill templates with others (e.g., in your photography group, company or science community), you can export your AutoFill templates into a JSON-formatted text file. This text file can then be imported into other IMatch databases.
If you import AutoFill templates from a JSON file, and the importing database already has templates with the same name, the incoming templates are renamed to a unique name by appending a number.
There is no merge option to merge existing data with data from the JSON template file into the same template.
If you need this, use the Windows clipboard. Copy the data from template A into the clipboard and then paste it into template B. This will append the data. You can then delete template A.