
Working with Annotations in the Viewer.
Annotations enable you to place text, comments, notes, graphics, icons and other elements on your image files in a non-destructive way.
Annotations are graphical objects which can be used to attach additional information to a file. This includes shapes like arrows or lines, text, logos, watermarks, vector graphics and other types of objects. There is also a special annotation type to tag faces.
Annotations are an active part of your database. IMatch displays them in the Viewer and Preview Panel, but also utilizes them for features like Collections, Batch Processing and the Slide Show. Since annotations are maintained in dedicated collections, you can use annotations in category formulas as well.
Annotations are non-destructive. They are rendered on top of the underlying image without changing the pixel data.
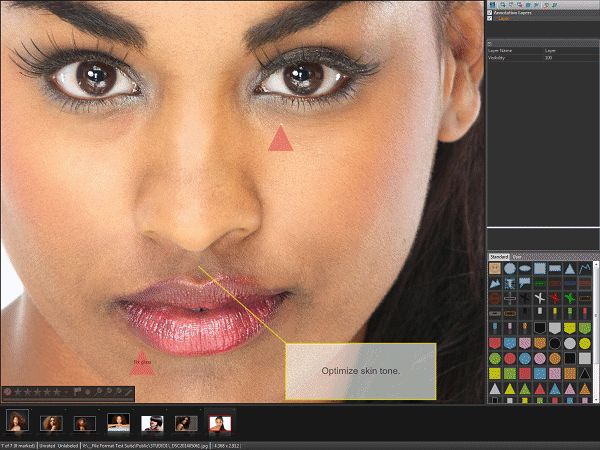
The screen shot below shows the Viewer with the Annotation panel visible. This panel enables you to edit the annotations for the image currently displayed in the viewer.
The image currently selected in the Viewer has several annotations. One stamp annotation in the upper left corner to protect the image from being accidentally published. Several red/yellow arrow marks to indicate areas to retouch, and a bubble text overlay with some instructions for the viewer.

Working with Annotations in the Viewer.
Since annotation objects are vector-based, they always retain their given proportions in relation to the image size, independent from the zoom level you select. If we zoom into the lower right corner to get a better look at the details, we see the annotation object in its real, 1:1 size:
Annotations are arranged in layers and you can show and hide them with a mouse-click. The example below shows a car photo with annotations made by an insurance agent:
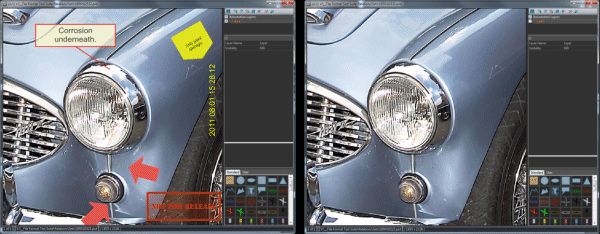
The right image shows the viewer with the annotation layer disabled. In this mode, you see only the image itself.
Face annotations are used by IMatch to indicate faces detected by the face recognition feature.
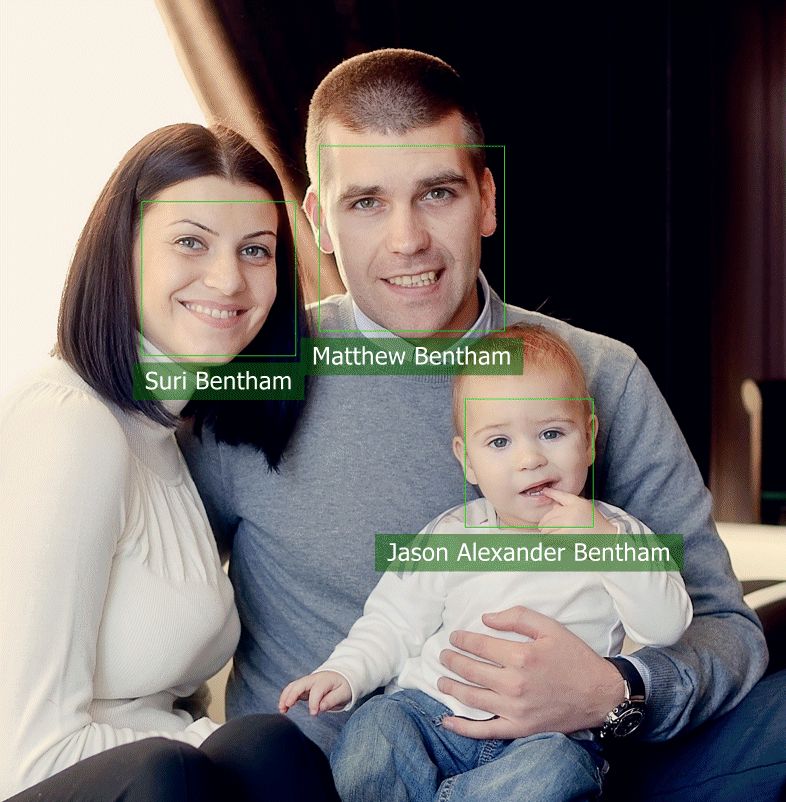
An image with Face Annotations in the Viewer.
See the People for detailed information.
You can use IMatch Variables in the text property for annotations. This allows you to use all available metadata to annotate files, to render this metadata virtually on top of the underlying image.
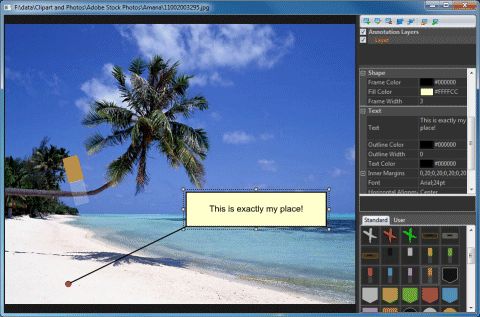
In the example below, a text annotation with the original date and time from the XMP/EXIF record is used. Of course you could also use other IPTC or XMP metadata, e.g. the headline or description. The text in such annotations is 'live' - whenever you edit metadata in IMatch, annotations using this data will update automatically.

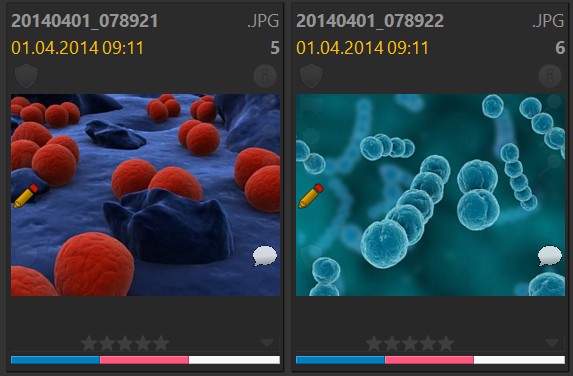
If a file has Annotations, the File Window displays a special text bubble icon and a tooltip:
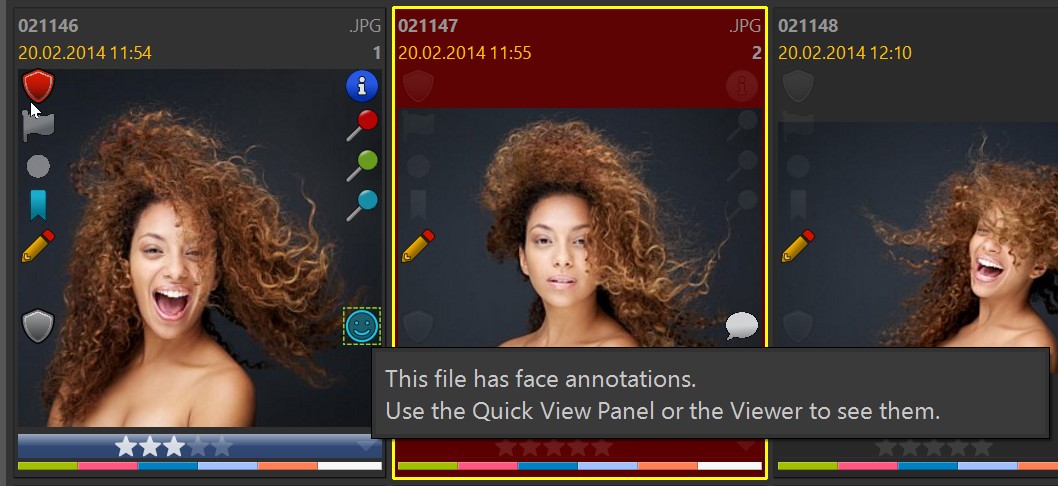
If a file has one or more face annotations, File Windows use a different annotation icon to make this clear:
IMatch currently supports these types of annotations:
A dynamic object is a simple object like a rectangle, a line or a circle. These objects support attributes like fill color, frame color, often text attributes too. IMatch constructs and draws these objects dynamically at runtime.
The text annotation object is a rectangular area with an optional fill and frame color. You can control the font size, face name, color, fill color and many other attributes. Text annotation objects support IMatch Variables, which allows you to include live metadata in text annotations (and all other annotation types which support text).
A stamp is a vector object or pixel image that resides on the hard disk. These stamps are loaded at runtime and can be placed and freely re-sized. This type of annotation is ideal for prefabricated logos, icons, watermarks, studio signatures, etc.
IMatch comes with a set of general purpose stamps you can use in your images. You can add your own stamps too. All available stamps are displayed in the Annotation Gallery.
If you set/leave the color (frame color, fill color etc.) empty, the corresponding annotation element becomes transparent.
This allows you to draw transparent shapes with only a border, filled shapes without a border, outlined text, ...
If you create an annotation object for a file, IMatch automatically creates an annotation container to hold this annotation and all other annotations you might create for that file. When a container is created, it automatically contains one default annotation layer.
Annotations are laid out on layers. You can stick to the default layer or create any number of additional layers. A layer can be shown or hidden and you can control the overall transparency of annotation objects on each layer. This allows you to put different types of annotations on different layers and to show or hide them as needed.
Face annotations are usually stored on a dedicated layer (e.g., 'Persons'). The name of this layer can be configured under
Click on the Text annotation object icon  in the Viewer Gallery to insert a text object. A standard text annotation will be placed at the center of the image. The new object is automatically selected and its properties are displayed in the property window in the Annotation panel.
Annotations use a specific coordinate system. Both the width (X axis) and height (Y axis) run from 0.0 to 1.0.
An annotation object positioned in the center of the image is at coordinate 0.5 / 0.5 ("half the width and half the height").
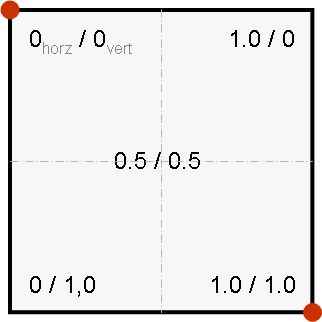
The Annotation Coordinate System
The size of an annotation object is defined as a scale relative to a standard or default size for the object. If you set horizontal and vertical scale of an object to 2.0 it is displayed twice as large as the default size.
Left-click to select an annotation. Hold down Shift to select multiple annotations. Clicking an annotation while Shift is pressed toggles the selection state. Use Ctrl + A to select all annotations on the current layer. Click outside an annotation object to de-select all.
You can use the resize grabbers and the green rotate grabber to resize the object or rotate it.
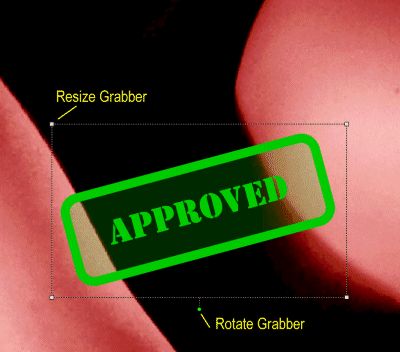
Hold down Shift while dragging any of the grabbers to scale the text box proportionally. This is specially useful if the annotation object was rotated.
Annotations are automatically aligned on an invisible grid. This makes it easier to position multiple annotation objects or to align them. To temporarily disable the grid alignment, hold down the Shift key while moving the object with the mouse. You can also directly enter the location and scale of the object in the property grid in the Annotation panel.
The rotate grabber rotates the images in increments of 15°. If you want to rotate at different angles, hold down Shift while moving the rotate grabber or enter the desired angle in the property grid.
You can also enter the position, rotation and scale properties in the property panel.
To delete an annotation, select it and press Del. If you accidentally deleted an annotation object, use the Undo command in the main menu bar or the context menu of the Viewer.
You can copy and paste annotation objects between layers and even between files using standard Copy and Paste operations.
Open the Viewer by selecting an image in a file window and then press Enter to send the file to the viewer.
To work with annotations, make sure the Annotation panel is visible in the Viewer (press T, A on the keyboard).
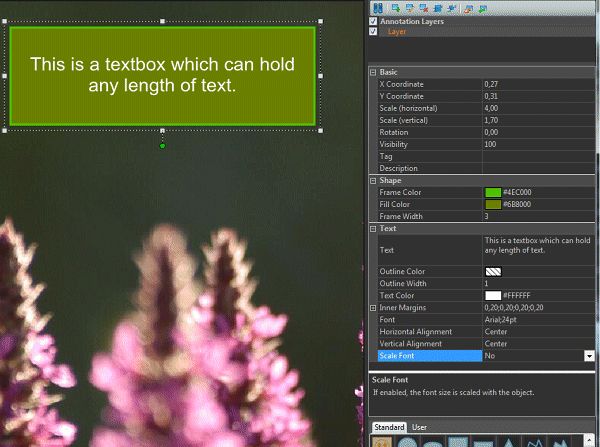
The Annotation panel with the annotation property window and the Annotation Gallery
To temporarily hide all annotations, use the Pause button in the Annotation Panel toolbar or the corresponding keyboard shortcut A, E. Alternatively use the Display Options > Show Annotations command from the right-click context menu in the Viewer.
Hiding all annotations (especially for face annotations) can be useful if you have many persons in the same image and the face rectangles and labels overlap the actual faces you want to see.
The face annotation tooltips always work, even when the annotation is hidden! When you hover the mouse cursor over a face, the Viewer displays the person label.
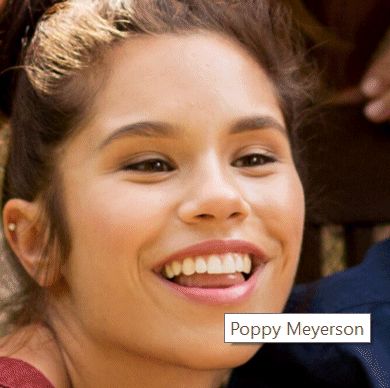
A tooltip showing the person label, even when annotations are temporarily hidden.
To edit the properties of an annotation object, you select the object by clicking on it with the mouse and then change the properties of the object in the property grid in the Annotation panel.
The number of available properties depends on the selected annotation object. For most objects you can enter the position, rotation and size, a frame and fill color. If the object supports text you can modify a number of text-related properties.
If you click on a property, the help window below the property grid displays a short help text for that property.
The tag property is a short text, like a keyword or a short description. IMatch uses these tags in the Annotation Collections to further group annotations, one tag per annotation object.
For example, if you use the "Red Arrow" stamp object in 10 files, all these files will show up in the corresponding "Red Arrow" collection, under the "No Tag" label. If you enter tags for some of the objects, the "Red Arrow" collection will show child collections for each of the tags you have used.
The Annotation Gallery displays all available Annotation objects. To insert one of the objects into the selected image, click on the corresponding icon in the gallery.
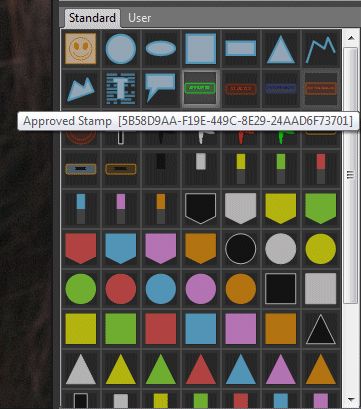
The Annotation Gallery
The new object is inserted in the middle of the image using default size and properties. If an annotation object is selected when you insert a new object, the new object is inserted nearby the currently selected object. You can now start changing the object properties, move it around and scale the object.
If you make modifications to an object you can save the object and all its properties for later reuse. Use the Add to Gallery... command from the context menu of the object to save it under a name. The object will be added to the User tab in the Annotation gallery.
To remove a user object, right click on it and choose Delete from the context menu.
Annotation objects in IMatch are not "just" graphical objects you can draw on top of images. IMatch manages annotations in the database and makes them available for a variety of features. One of these features is the Annotation Collection.
IMatch builds and maintains dynamic collections for all the annotations you have used in your database. On the top-level of these collections, IMatch manages one collection for each Annotation Type. On the levels below that, IMatch drills down the collections based on the annotation variant and tag.
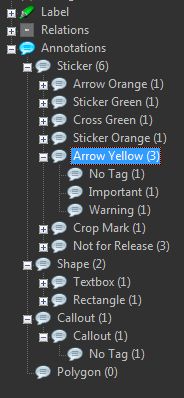
The Annotation Collections
The Collections make it extremely easy to find, for example, all files to which you added a "Needs Edit" annotation or a Yellow Arrow annotation. If you used tags in your annotations you can even differentiate between different variants of the same annotation object.
But that's not all. Since collections can be used in Filters, in category formulas and in Variables, annotations are fully integrated into these important features.
To display annotations in the quick view panel, the corresponding option under Edit > Preferences > Application must be enabled. You can also change this setting via the context menu in the Quick View panel.
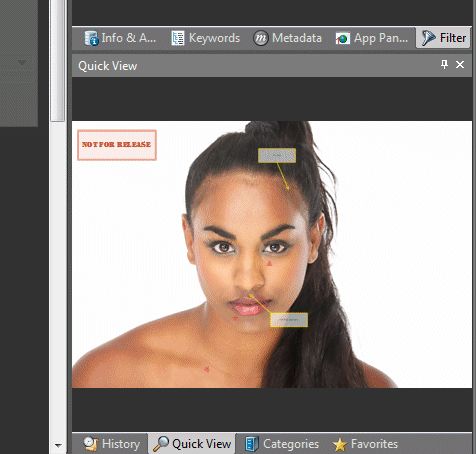
Viewing Annotations in the Quick View Panel