
The image spreads over two pages, in this case two A4 pages (21 cm x 29.7 cm).
Here are some useful ideas and tips to get you started.
If you want to print an image across two pages, you can do this as follows:
The image spreads over two pages, in this case two A4 pages (21 cm x 29.7 cm).
If you use lead-in (front matter) pages in your photo book, you may want your page numbers to start at 1 for the first 'real' page in your book.
This can easily be accomplished by using a negative offset for the page number variable IMatch Design & Print offers:
{Print.Document.PageNumber|math:sub,4}If you use the above variable (e.g., in a footer or header) it will subtract 4 from the actual page number as counted by IMatch. The following layout uses four lead-in pages and starts counting with 1 on the fifth printed page:

A neat effect is to use a semi-transparent background color for the text container. For the following example we added a freely positioned container on the right page, with the following settings:
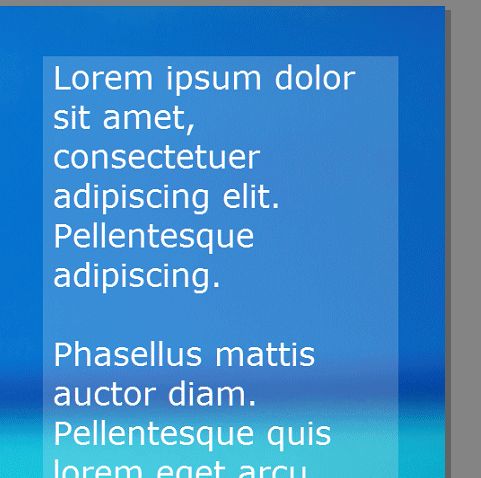
When you use a fill color for a Text container, it's always a good idea to add some cell padding to add some space between the text and the container borders. 0.2 cm or 0.1 in is a good starting point. Usually you need less padding at the top and bottom because of the font spacing.
IMatch allows you to add a border around the image (independent of the size of the surrounding container) and a border around the container itself. This can be combined with the Inner Padding container property to create some neat effects. For the following example we used these settings:
We used the Eyedropper tool to set the fill and border colors from colors contained in the image itself. This usually produces quite pleasing results.

By changing the border colors, widths and the inner padding you can produce many variations of this tip:

The flexible page grid is your friend when you plan to create more than simple 'one image per page' layouts. As soon as you start to add text, or varying layouts and image sizes, using a matching grid will make your job easier. Not only can you align things on the grid, the grid also makes multi-column layouts much easier.
On an A4 page (21 cm x 29.7 cm) with a 1 cm margin we created a 6 x 6 grid with a 0.5 cm cell spacing:

The 6 x 6 base grid.
Then we added various File and Text containers and used the column span and row span properties to let the containers occupy more than one cell as needed.

A number of different layouts, quickly created using the base 6 x 6 grid.
Since each container uses the 'snap to grid cell' mode, we can change the grid (or the page margins) and the containers will automatically adapt.
Play around with grids a bit, especially if you plan to create magazine-style layouts.
A layout often used by wedding photographers, or event photographers who print on-site, are layouts where the same image is printed multiple times, in different sizes. The help topic for Dynamic Templates explains how to achieve this easily with Dynamic Templates. There is also a sample.
In the following section we explain some other aspects, e.g. how to use metadata, custom font families, XAML text or QR codes. Lots of tips coming!
Look at the following two-page wedding photo:

The same image is printed three times, on two pages. The full-size image on the left usually goes to the bride & groom, the other two photos to the in-laws.
Note how the images on the right page are oriented. We used the Fill/Rotate and Center Fit Mode to achieve this effect. This template works whether the images are portrait or landscape.
The photools.com Studios (fictive) text logo consists of a section in bold font, and a section in non-bold:

To implement this, we used a Text container with the XAML option enabled. This way we get detailed control over font settings, and we can mix different font styles in the same text block. The markup we used for this example is:
<TextBlock FontFamily="Tahoma" FontSize="12pt" Foreground="#a0a0a0"><Bold>photools</Bold>.com Studios</TextBlock>
The <Bold> tag allows us to render photools in bold, while the rest of the text is rendered in the normal font weight.
For more information about XAML support in IMatch, please see the XAML help topic.
If you have to follow specific CI guidelines, e.g., for font families, you can do that as well. Use the FontFamily= Attribute. For instance, in print we use a font family named Humnst777 to render the photools.com logo. For the .com part, we use a dedicated light variant of the font family.
In XAML we can implement this as follows:
<TextBlock FontFamily="Humnst777 BT" FontSize="12pt" Foreground="#a0a0a0">photools<Span FontFamily="Humnst777 Lt BT">.com</Span> Studios</TextBlock>
In this example we render the text in "Humnst777 BT", except the .com part, which is rendered in "Humnst777 Lt BT". We use a <Span> tag for this purpose. Using a <Span> also allows us to change the font size or Foreground color, to render text in different sizes and colors within the same text block.

The text logo rendered using two variants of the Humanist font.
Note the .com fragment, which is rendered in a lighter font.
The footer is another Text Container. We use variables to print the XMP title and the image creation date and time. This allows us to easily link the printed page to the bridal pair. The content of the text container is simply:
{File.MD.title} ({File.DateTime})Each photo project gets a unique project code. This allows us to track each project in the archive. In IMatch, we fill the XMP Job ID for this purpose. The Text container printed at the bottom of each page displays this project ID:
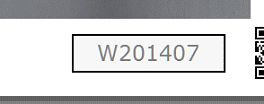
The project ID is printed at the bottom of each page
The content of the text container is determined by the following variable:
{File.MD.XMP::photoshop\TransmissionReference\TransmissionReference\0}You can also use the corresponding Metadata Shortcode, which makes things a bit more readable:
{File.MD.jobid}A QR code container allows us to print machine-readable information. In this case, we use this to provide a link to the online photo gallery for this wedding. The QR code is filled by this variable:
https://www.photools.com/galleries/jobid={File.MD.jobid}If the QR code is scanned with a smartphone, the user can directly open the web gallery for this wedding.
This is a contrived example for this tutorial. The above URL does not exist.
In the right page margin we display some additional info, e.g. the URL of our website. This is a normal Text container with the Angle property set to 90° left. This way the text is displayed rotated and readable.
Sometimes you need to access metadata of a file on another page. Maybe you want to render a file from the group on the header page. Or you want to display the title and description of a file printed on a 'front' page on the back page.
The special dynamic print variables make this possible.
To add a header or footer to your pages, just place one or more Text Containers where you want to display header and footer information.
If you want to have different headers and footers on odd/even pages, either use a two-page template with different pages for odd and even, or use variables and the Hidden container property to show/hide the header and footer containers dynamically. The same method can also be used to show different headers and footers on Group Headers and Footers and regular pages, for example.
To display page numbers, use the corresponding variables in your Text Container, e.g., {Print.Document.PageNumber} or {Print.Document.TotalPages}. Using variable formatting functions you can control the number format, including the ability to use Roman numerals.
You can insert the special Header & Footer Container for a start (Ctrl+N). This special type inserts both a header and a footer Text Container on the current page. Then customize these containers to your liking.