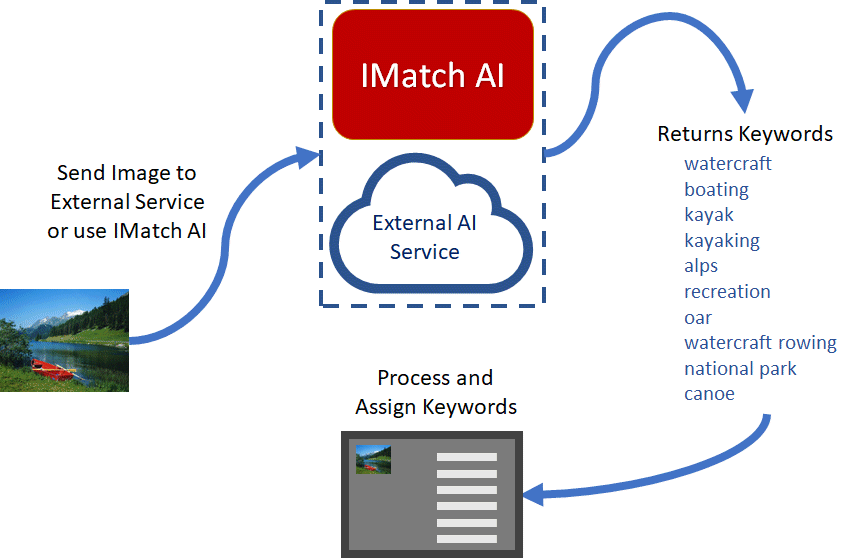
AutoTagger automatically adds keywords to your images ('tagging') using artificial intelligence (AI) services provided by IMatch or by one of the supported service providers. It can add keywords to hundreds or thousands of files in batch mode or you use it in manual mode, reviewing the keywords suggested for each image before applying them.
When you use the AutoTagger on a set of images, IMatch sends small renditions of the images to a service provider. The provider returns 'tags' or 'labels' for image, which AutoTagger then processes and transforms into regular hierarchical keywords.
When you use the IMatch AI as the service provider, your images are processed locally and never leave your computer.

No AI is perfect ‐ far from it. Each service has its pro's and con's and produces better or worse results for different kinds of motives.
Some provider offer specialised models, e.g. for food, fashion, wedding photography or flora and fauna. Other providers can detect known places and landmarks in your images and even return the matching GPS coordinates to AutoTagger.
The IMatch AI integrated in IMatch runs locally on your PC, is free and privacy-friendly. It might not always produces results as good as the commercial vendors who charge for every image processed. But we're working on it
AutoTagger can quickly process hundreds or thousands of files, adding 5 to 20 keywords to each file in almost no time. This immediately makes your files searchable and groups related files together in the @Keywords category hierarchy.
This can be a massive time saver when you have many files without any keywords or other useful metadata.
For institutional or corporate IMatch users, this may be the best or only way to process large amounts of files, without spending months to categorize and tag each file individually.
Even if you usually add keywords by hand, running your images through AutoTagger will add 10 or 20 additional keywords you may not add yourself. More keywords means easier finding images by a greater variety of search terms.

AutoTagger can process hundreds or thousands of files fully automatically in batch mode, applying the rules and settings you have specified. In manual mode you can review and edit the keywords suggested by the service for each image before applying them.
What differentiates AutoTagger from similar tools in other software are its keyword mapping features and the ability to interface with the IMatch Thesaurus to automatically convert the flat keywords delivered by the external service into fully hierarchical keywords.
Several features can transform and unify keywords supplied by the external service. This allows you to reformat the suggested keywords to match the case and syntax you normally use.
All these features allow you to integrate the results produced by the AI with your normal keywording schema and controlled vocabularies.
If the service you use delivers GPS coordinates for known landmarks or sites, AutoTagger can apply these coordinates to the images processed and, via automatic reverse geocoding, add location data like country, city and location to your files.
The IMatch AI does not use cloud services and processes your files locally on your PC.
It causes no privacy issues and no data leaves your computer.
AutoTagger optionally employs cloud-based services provided by external companies like Google or Microsoft (cloud services).
When you process files with the AutoTagger, it sends small versions of the processed images to the cloud service. This is required in order to allow the cloud service to analyze the image so it can provide keywords and other results to AutoTagger.
There may be privacy issues with using cloud-based AI services in your country (for example because of EU's GDPR). Especially if the images you process contain identifiable persons. Make sure you understand and respect all applicable laws regarding the upload and processing of data to 3rd parties, cloud services in different countries.
The service details and privacy statements of each supported provider are listed below in the supported services section.
The 3rd party computer vision AI service providers require payment if you exceed your free monthly quota. At the time of writing, the typical cost is about 2.00 US$ per 1,000 analyzed images. Most services offer a free monthly quota of 1,000 or more analyzed images.
Assuming these rates, automatically adding keywords to 50,000 files will cost you approximately 100 US$, depending on the service used and the options you choose.
Compare this cost to the time saved. Adding 5 to 20 keywords to 50,000 files manually will take several weeks...
If you use AutoTagger with the IMatch AI, there are no costs. IMatch AI is an integral part of IMatch.
The IMatch AI is the default service provider for AutoTagger. You can just press the green Configure button at the bottom to start working with it.
If you plan to use AutoTagger with one of the external service providers, you first must open an account with the service. The service will give you an API Key (similar to a password) which you have to enter in the service configuration in AutoTagger.
See the service configuration topic below for more information.
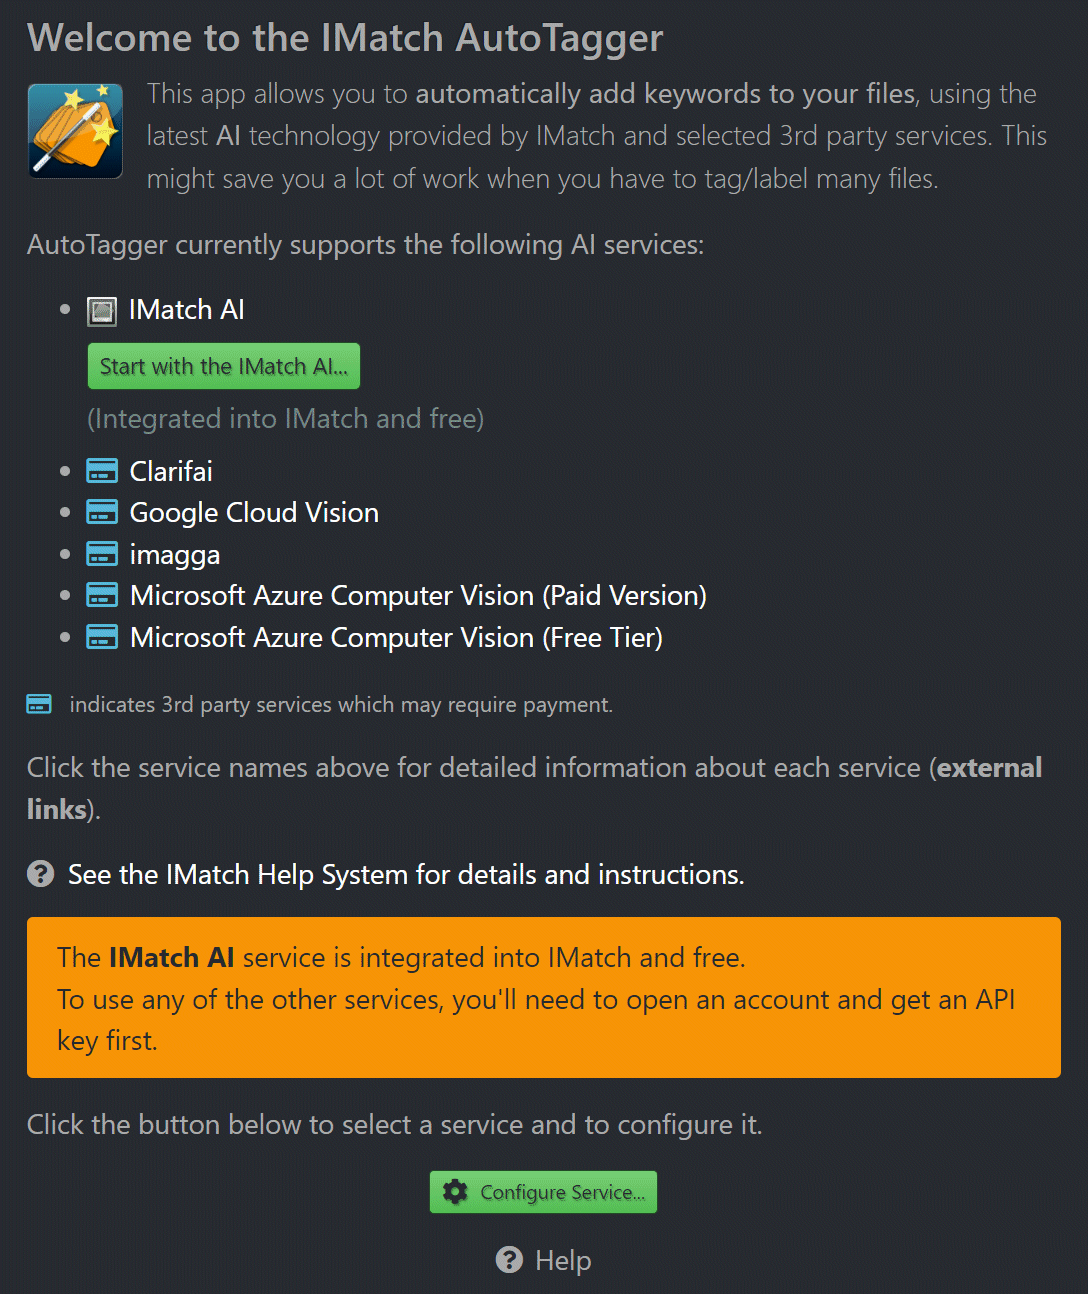
Until a service is configured, the default startup page of AutoTagger appears.
When you start AutoTagger from the App Manager or the Command Palette, it comes up with the home page. Here you can choose whether to process all currently selected files automatically or if you want to process and review each file individually.
The manual mode is best when you still need to adjust AutoTagger settings to your preferences and requirements. Once configured, the fully automatic batch mode usually works great.
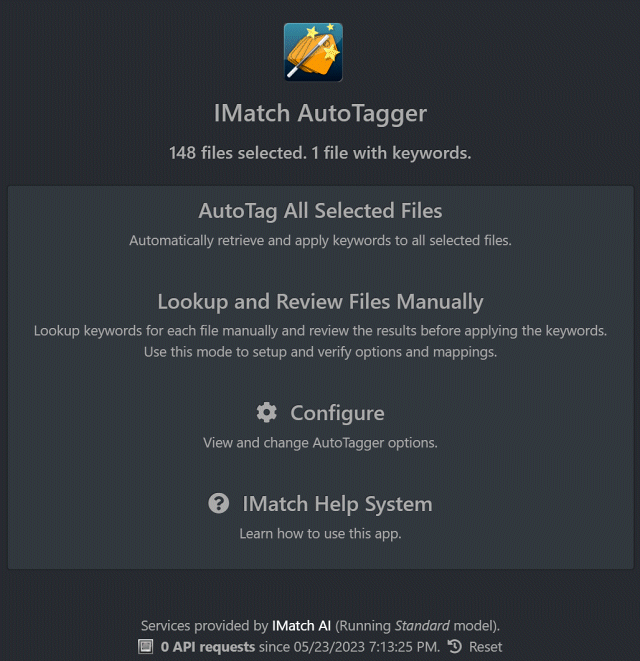
AutoTagger start page
For this walk-trough, we select the manual mode. This opens the review page.
The review page displays thumbnails of all currently selected files at the top in a film strip. You can scroll the thumbnails in this list by clicking and dragging or by using the scroll bar at the bottom of the film strip.
To select an image and to make it the active image, click on the image or use the arrow buttons to navigate to the next or previous image. The active image is indicated with a yellow border.
If you click on the green Suggest Keywords button, AutoTagger send a small rendition of the active image to the IMatch AI or the active cloud service and processes and displays the returned keywords. When keywords are available, the orange Apply Suggested Keywords button is enabled.
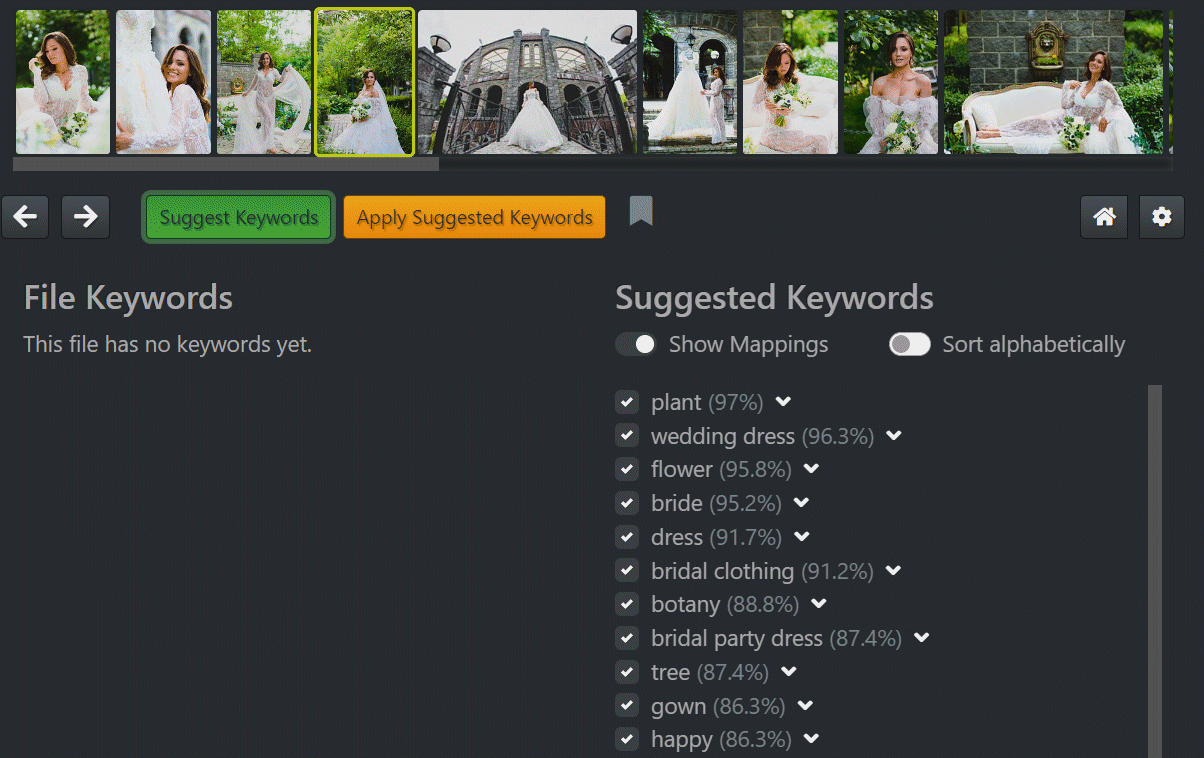
When you use the IMatch AI, the first request takes a few extra seconds for loading the selected IMatch AI model.
Once the model is loaded, classifying an image takes the IMatch AI less than half a second.
S | Suggest Keywords for the current image. |
A | Apply suggested keywords to the current image. |
N | Go to next image. |
P | Go to previous image. |
B | Toggle Bookmark. |
You can click the bookmark icon or use the B keyboard shortcut to toggle the bookmark for the current file. this can be useful if you want to mark files for a later review while working in the AutoTagger.
IMatch displays the processed keywords as a list of check boxes. If you don't want to apply a specific keyword, uncheck it in the keyword list before applying. We did that here for the keywords shoulder and eye. You can use the input field at the bottom to add additional keywords manually, if needed.
The maximum number of suggested keywords can be controlled via a configuration option.
If you have defined keyword mappings, you can switch between the source keywords (as delivered by the service) and the resulting mapped keywords. Keywords without mappings show a small circle.
These features are only available when the Expert Mode is enabled.
Click on the icon next to a keyword to open a menu with additional commands. From there you can create mappings for the keyword or add it to the ignore list.
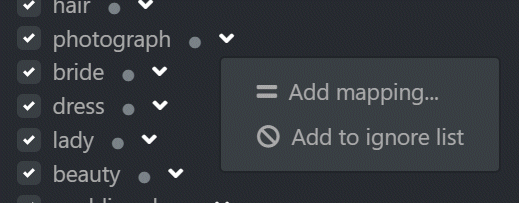
By default the keywords are sorted by the confidence/rating returned by the service. The 'best' keywords are shown on top. If you prefer an alphabetical sort order, enable the corresponding switch.
If you are satisfied with the keywords, click on the Apply Suggested Keywords button. This adds all checked keywords to the file. If one or more keywords are already assigned to the file, they are not added again (automatic de-duping).
Keywords assigned to the file are listed in the left column.
Keywords use the color-coding from the corresponding @Keyword categories.
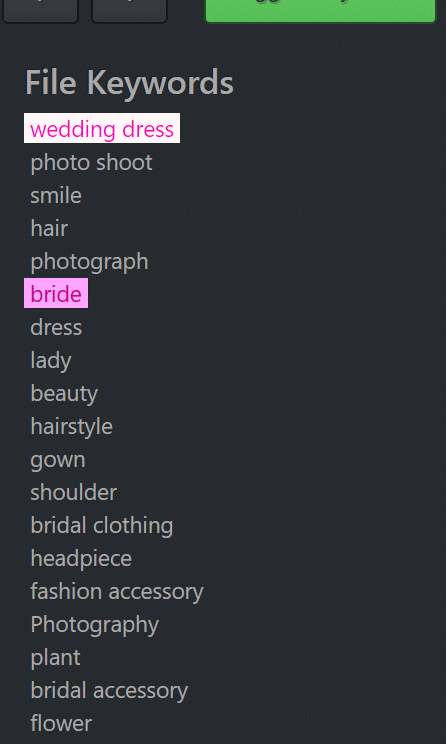
The keywords have been added to the file.
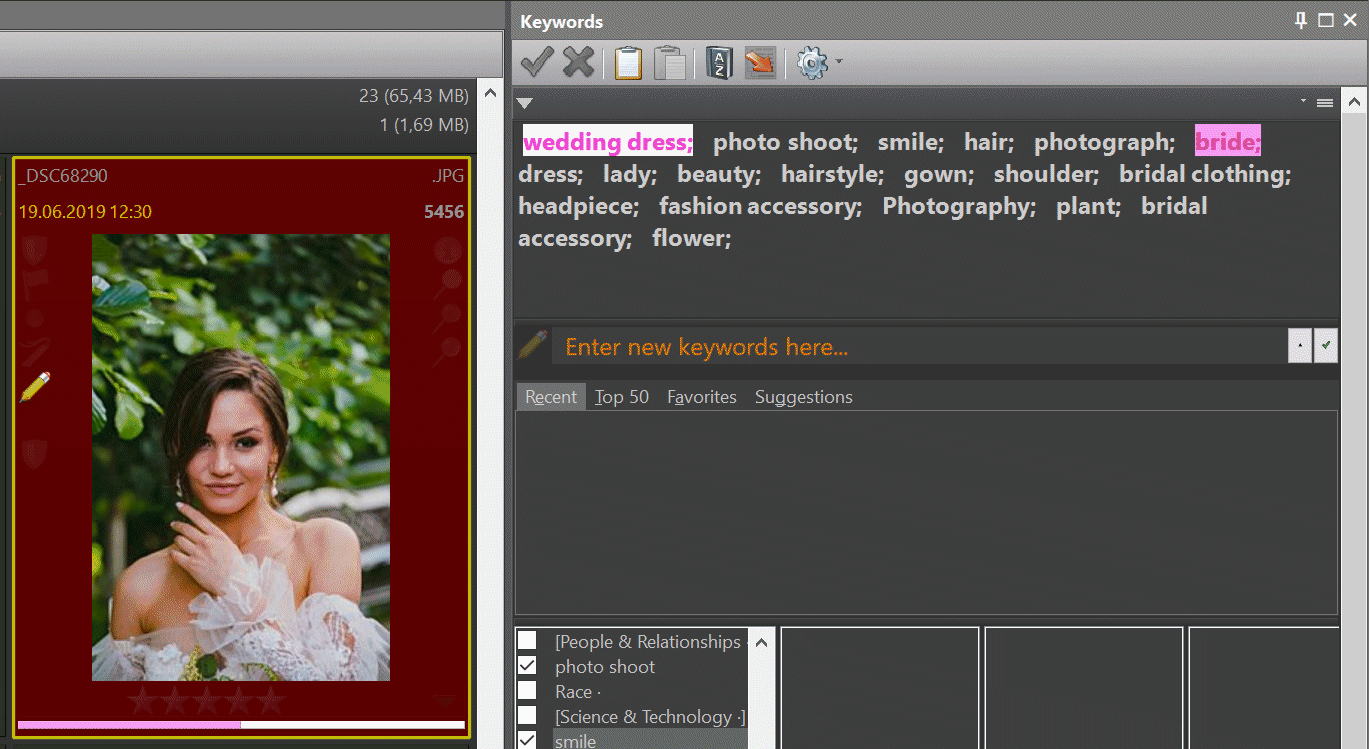
The image in the File Window, with the Keyword Panel showing the new keywords.
You can now click on another image in the film strip at the top to process another file. Or use the arrow buttons on the left to navigate between files.
This way you can retrieve suggested keywords for individual files and then review and edit the resulting keywords before applying them. If you have to process only a few files, this is a fairly efficient workflow. This is also a good workflow while you are still changing the AutoTagger configuration options and keyword mappings.
To process large sets of files, use the fully automatic batch mode instead.
Click on the button to return to the home page. From here you can, for example, automatically tag all selected files.
If you use versioning in IMatch and you make your masters propagate keywords to versions, you only need to use AutoTagger with the master files. IMatch copies the keywords from the masters to all versions during write-back automatically.
When you click in the AutoTag All Selected Files button at the home page, AutoTagger processes all selected files autonomously. While it processes the files, it displays a progress bar:

Automatically applying keywords to all selected files.
We recommend to process only a few hundred files per batch.
Depending on the service you use, there might be limits or thresholds to consider. Some services might throttle response times when too many requests are made within a given period of time. Consult the documentation and service level agreement for details.
The IMatch AI has no thresholds or limits.
AutoTagger automatically applies required restrictions like maximum number of requests per second automatically, if known for a service.
When the process has finished, AutoTagger displays some statistics.

All files have been processed and tagged with keywords.
If one or more files don't receive keywords, AutoTagger shows the number of files affected and allows you to open the files in a Result Window to review them.
We have used the option (see below for more info) to assign all processed files to a category (AUTO-TAGGER, in this case). This makes it easy to see files processed by AutoTagger in one place. You can also configure AutoTagger to use a special top-level (group) keyword for keywords added to differentiate them from manually assigned keywords.
Click on the Continue button to return to the home page.
This completes the walk-through. You have seen how to manually and automatically apply keywords to images. AutoTagger is easy to use but can save you a lot of time when you have to add keywords to many files.
Even if you usually manually add keywords to files, using AutoTagger makes it easy to add 10 or 20 other keywords to each file. And more keywords means better organization (e.g. via the @Keywords category hierarchy and easier finding by a wider range of terms.
AutoTagger counts and remembers the number of API requests it has made while processing files. It displays the number of requests since the last manual reset at the bottom of the AutoTagger window:

You can use this number as an approximate value for the cost caused by your AutoTagger usage. For example, if this lists 2,000 API requests and your provider charges 2 US$ per 1,000 requests, you bill is 4 US$.
This is just an indicator for your convenience. ALWAYS check the actual bill on the web site of your service provider for definite numbers. Your service provider may require additional service fees or the options you have chosen in AutoTagger cause higher charges per request.
For example, if you use Google as your service and you enable the option to deliver GPS coordinates for known landmarks/locations, Google will charge twice per request.
All providers explain costs and charges in detail on their web sites. All offer real-time feedback. This means you can see the number of requests made in the current period, and how much these requests will cost you. When you use AutoTagger to process images, these numbers will change accordingly.
AutoTagger offers options which allow you to customize how it transforms and maps keywords delivered by the external service.
To change the AutoTagger configuration and options, click on the Configure button on the home page. The configuration page has several tabs at the top. These tabs group the different settings available.

The Service page allows you to select and configure the IMatch AI or external service to use for tagging. Basically, all you need to do is to enter an API key or similar identification token you'll get from the service you choose.
AutoTagger has been designed to be flexible and to support several of today's popular computer vision services.
We believe in giving you the freedom of choice and don't want to lock you into one specific vendor. Which service to choose depends entirely on your personal preferences, your privacy requirements and budget.
The Services configuration page lists all supported services, their web site, instruction pages and privacy statements.
The image classification is provided by the IMatch AI, which is an integral part of IMatch.
The AI is able to support multiple models and currently provides keywords in both English and German.
Popular US based service. It is very easy to open an account and you'll get 1,000 processed images per months for free.
Popular European Company (Bulgaria). Very simple to open an account. 1,000 processed images per month free. Strong European privacy laws and regulations apply.
Imagga uses a two part key. You enter it in the form api_key:api_secret.
Google offers a very rich and precise image tagging. It is currently the only service which can also figure out GPS coordinates if your image shows a 'known' building or location.
If you already have a Google developer account for the IMatch Map Panel (Google Maps) you can add computer vision support with a few clicks in the Google Developer Console.
Microsoft provides computer vision services via their world-wide Azure cloud. The free trier gives you 1,000 images per month for free but has rather severe performance restrictions. Only 20 files can be processed per minute.
If you already have a Microsoft developer account for the IMatch Map Panel (Bing Maps) you can add computer vision support with a few clicks in the Microsoft Developer Console.
Some services offer additional features, like a language selection for the returned keywords, additional categorizations or AI models specialized for specific image domains like Wedding Photography or Food Photography. If such additional features are available and supported, AutoTagger lists them on the Service page after you have selected a service.
Google can not only return keywords, but also categories (not to be confused with IMatch categories) for your images. AutoTagger can use both keywords and categories to add keywords to your files. Make some tests with some of your images to see which keywords and categories Google returns.
If an image contains a known landmark or building, Google may be able to return GPS coordinates for the image (at extra cost).
AutoTagger can process these GPS coordinates and apply them to the image. If you have enabled reverse geocoding, AutoTagger will also fill location data like county, city and location!
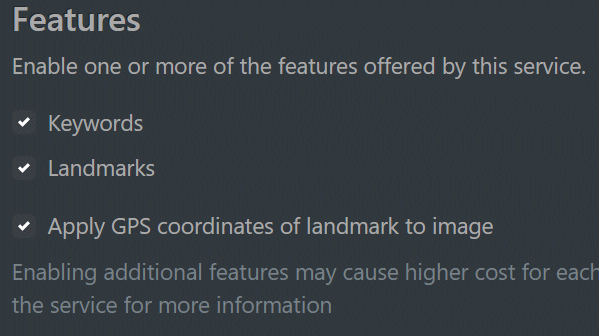
Additional options available for the Google service.
Clarifai supports additional, specialized, models on specific photographic topics like Wedding or Travel photography:
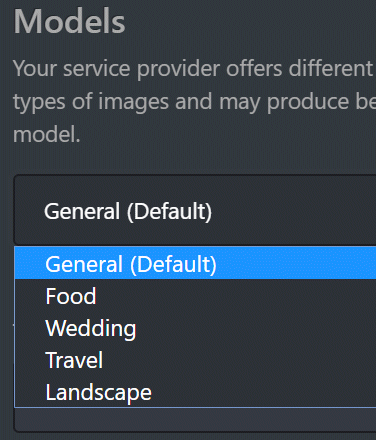
Additional options available for the Clarifai service.
Enabling extra services or models may cause higher cost per image. Check the documentation of the service to find out more.
On this page you configure how AutoTagger processes keywords returned by the service and general app behavior.
The default settings chosen by IMatch usually work just fine.
Enable the Expert Mode with the switch at the bottom to see all settings and enable all features.
| Setting | Description |
|---|---|
| Maximum number of keywords to request from service | The maximum number of images assigned in automatic mode. The maximum number of suggestions shown in manual mode. |
| Transform keywords delivered by the service to | This setting allows you to transform keywords delivered by the service into a specific case. Sometimes services deliver keywords in a mix of lower-case and upper-case, and this option allows you to unify the keywords before adding them to the image. |
| Case-sensitive comparison for mapping and ignore | When keywords need to be compared during processing, AutoTagger is not case-sensitive by default. Enable this option if you need to compare keywords case-sensitive. |
| Don't process files with keywords | Do not process files which already have keywords. Enable this to process only files without keywords. |
| Delete existing keywords before assigning new keywords | Enable this if you only want to keep keywords added by AutoTagger. If a file already has keywords, they are deleted before assigning the new keywords. If this is off, the AutoTagger keywords are added to the existing keywords. Duplicates are suppressed automatically. |
| Don't assign unmapped keywords | If a keyword without a mapping is delivered by the service, ignore it. This option gives you full control over which keywords are added. If you want to only allow specific keywords from a fixed set or controlled vocabulary, you can set up mappings for these keywords and then let AutoTagger reject all unmapped keywords. |
| Assign processed files to this category | This option allows you to assign all files processed to a category. Which is great for review purposes or quality control. |
| Empty category before assigning new files | Enable this to empty the category at the start of each AutoTagger run. |
| Setting | Description |
|---|---|
| Thumbnail size | The size of the thumbnails displayed at the top of the manual mode page. |
| Square thumbnails | Enable this if you prefer square thumbnails. |
| Synchronize focused file in active File Window | This setting is used while you process files in manual mode. If enabled, the currently active file in AutoTagger is made the focused file in the File Window. This allows you to use the Quick Preview Panel to see a larger version of the file. |
On this page you can configure keywords to always ignore.
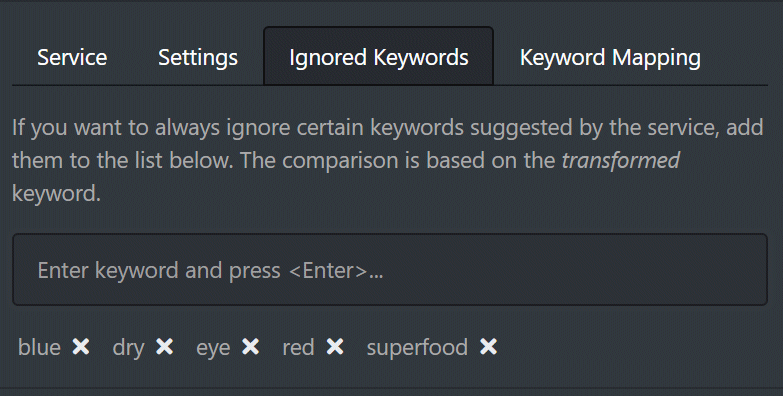
To add a keyword, enter it in the input field and press Enter. Ignored keywords are listed below the input field. To remove a keyword from the ignore list, click on the icon next to the keyword.
Keywords in this list are compared with the transformed keyword. If you let AutoTagger convert the case of suggested keywords or you use keyword mappings, the ignore list is matched with the result of these transformations.
These features are only available when the Expert Mode is enabled.
This is probably the most powerful function in AutoTagger. Mapping enables you to change keywords suggested by the external service, to transform them into hierarchical keywords, translate them, add synonyms, etc.
You can configure AutoTagger to look up flat keywords delivered by the service in your thesaurus. If a matching hierarchical keyword is found, it is applied instead of the original keyword.
You can achieve similar results by providing mappings for all keywords delivered by the service. Or combine mappings and thesaurus lookups. Whatever works best for you.
As an optional fallback you can instruct AutoTagger to map all otherwise unmapped keywords to a common parent keyword.
This would allow you to differentiate keywords added by AutoTagger from keywords added manually.
All currently mapped keywords are listed below the input field:

To edit an existing mapping, click on it. To delete the mapping, click on the .
The Show Mappings switch allows you to display the mappings in addition to the keywords:
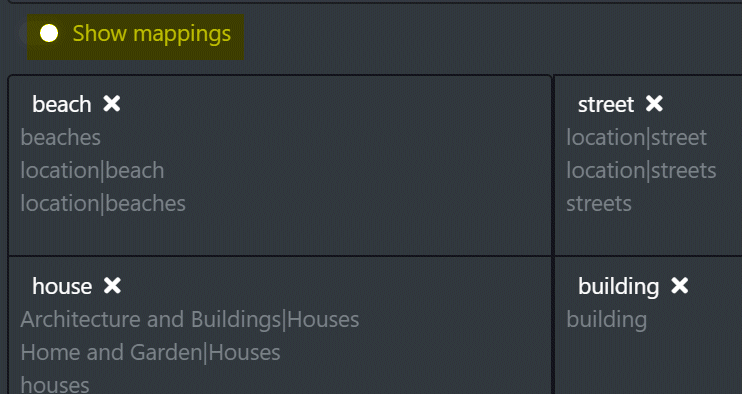
To add a mapping, type a keyword into the input field and press Enter. This creates the source keyword for the mapping and opens the mapping editor. Enter a mapping ('target keyword') and press Enter. You can add any number of mappings for a keyword.

Here we have added four mappings for the keyword beach. This means that when the service suggests the keyword beach, AutoTagger adds the keywords beach, beaches, strand and strände which are the singular and plurals forms in both English and German.
If you would configure the mapping instead like this:
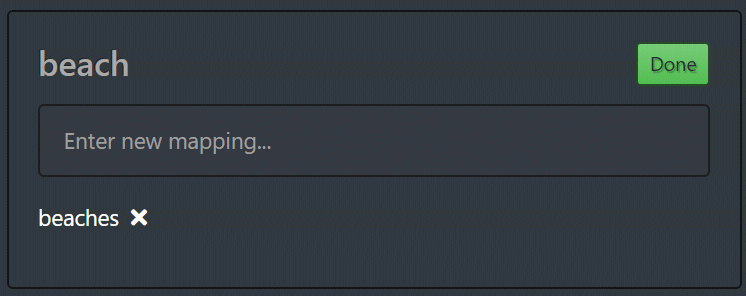
the keyword beach would be mapped to beaches only. beach itself would not be added!
If you want to add the original keyword of a mapping, make sure to include it in the mapping.
You can of course also map keywords to hierarchical keywords:
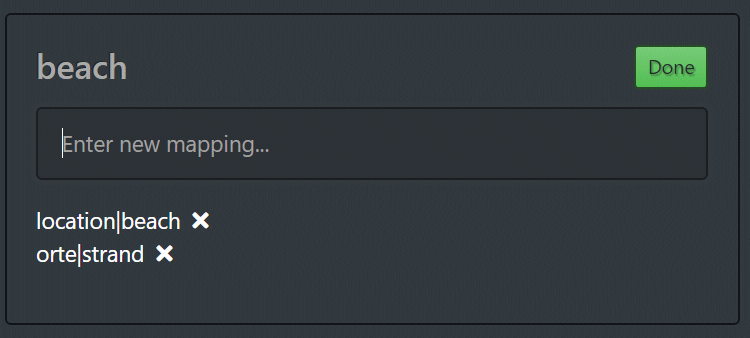
This adds the keywords location|beach and orte|strand whenever the service suggests the keyword beach.
To remove a mapping, click on the icon.