
In this view you work with physical entities like disk drives, media and folders. The Folders & Media tree displays all the folders you have indexed in your database.

If the Media & Folders View is not visible, click on the corresponding tab below the main menu bar.
In this view you perform operations related to the physical files you manage in your database:
See also the topic File Management for information about how to work with folders and files in IMatch.
IMatch only knows about folders and files you explicitly add to your database. This allows you to control easily, which files you manage with IMatch.
There are several ways to add folders to your database for indexing. You can use drag & drop from Windows Explorer, or you use the Commands menu > Add or Update Folders command. Please see the help topic Indexing Folders and Files for detailed information and examples.
| Term | Explanation |
|---|---|
Drive | A physical drive, like your SSD, a hard disk or a network share. A drive is displayed either using the drive letter (C:) or the UNC share (\\share\folder\...) if the drive is a network resource. Network drives mapped to drive letters show as such. |
Medium | In IMatch, a medium refers to a physical storage device such as a CD-ROM or DVD, or a USB stick. If you manage multiple USB sticks and configure Windows to assign the same drive letter to each stick in the Disk Manager, these sticks can be considered media. IMatch displays media using their label (if specified during formatting) and unique serial number. This allows you to easily distinguish between different media, even if they are stored on the same physical drive. Drives and Media AssociationsA single drive can be associated with multiple media. For example, if your DVD drive has the letter R:, all DVDs you add to your database will appear as medium nodes under the drive node R:. This makes it easy to organize and manage your media collections.Unique Identification of MediaIMatch keeps track of individual media by recording their unique serial number in the database. This ensures that each medium can be identified and managed independently, even if multiple media are stored on the same physical drive. |
| Folder | A medium can have one or more folders. Each folder can have any number of sub-folders. |
Indexing means adding a folder to your database. To include a folder in your database you index it using he commands provided by IMatch in the Media & Folders View.
IMatch does not necessarily show all folders contained on a drive or medium in the Media & Folders tree. IMatch only shows drives and folders you have indexed in your database. Usually it makes no sense to index entire hard disks in your IMatch database. Index only the folders containing the files you want to manage with IMatch. The other folders can be managed well with Windows Explorer.
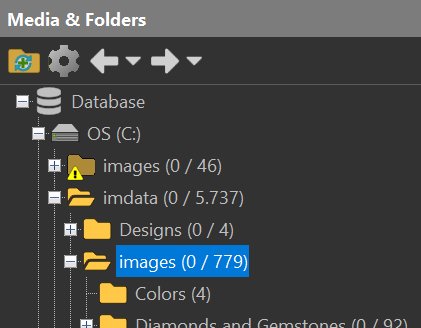
This tree displays all drives, media and folders contained in your database. The presentation is similar to what you know from Windows Explorer, but with a number of advanced features. At the very top you see the Database node, representing the entire database.
Below the database node you see Drive nodes. There is one Drive node for each of the drives you have indexed files from. In the screen shot, you see drive nodes for the drives C: E: and F:. Sometimes drives are referred to as volumes.
If the drive manages removable media (e.g., a DVD or BR-D drive), and you have indexed more than one medium (DVD or BR-D) on that drive, IMatch displays a medium node for each medium. This is also the case if you mount multiple USB sticks under the same drive letter. IMatch identifies them by their drive label / media serial number to keep them separate.
If a medium is currently off-line (not inserted), IMatch marks it with a small yellow warning triangle. In the image above, the 32-GB USB STICK medium is currently not inserted in drive F: a and shows as off-line. The F: drive has currently mounted the medium named Photo Disk WS Blue Label.
Each element in the tree has a right-click context menu which contains the commands available for this specific element. A drive node has a different menu than a folder.
When you click a folder, it becomes selected. The File Window shows the files in selected folders, optionally including the files in sub-folders recursively.
Only one drive or medium node can be selected at a time. You can select multiple folders on the same level (siblings) by Ctrl-clicking folders. If multiple folders are selected, one folder is considered as focused. The properties tab and a few other features work with the focused folder. Most commands and functions can be applied to multiple folders at once, including move, copy, rescan, delete etc.
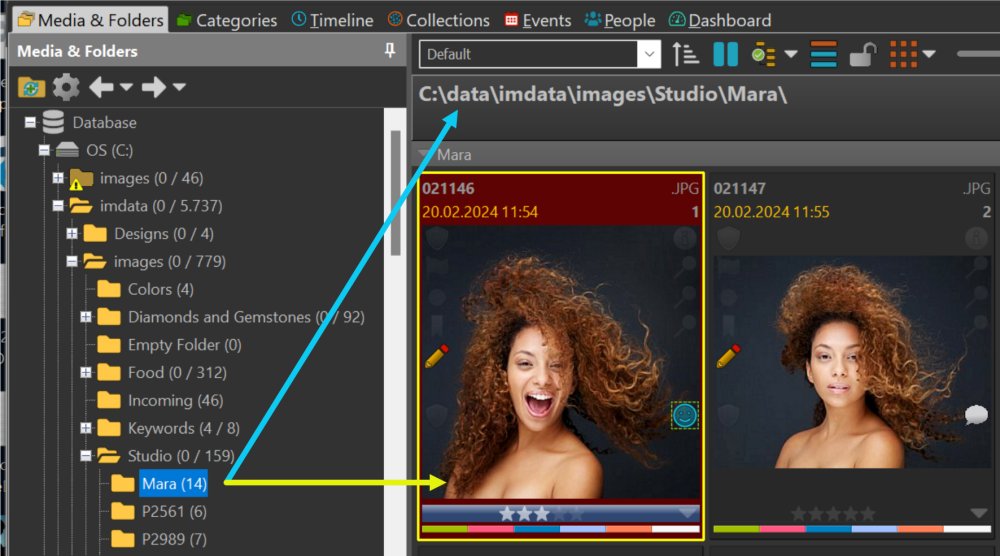
The File Window shows the files in the selected folder.
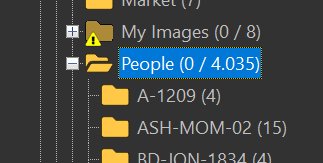
By default, the Media & Folders View lists the number of files contained in a folder and it's sub-folders. In this example, the folder People contains 0 images itself but has 4,035 images in its sub-folders. If a folder has no sub-folders, it shows only one count, e.g.: A-1209 (4).
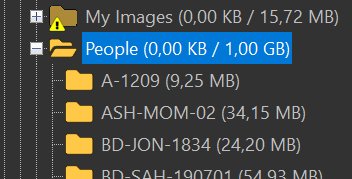
Via the Media & Folder configuration dialog (see below) you can configure IMatch to show combined size of the files folders and their sub-folders:
The Dashboard shows a chart for the largest folders in your database and the Statistics App (in the App Manager) shows the largest 50 folders.
The Media & Folders tree uses a variety of icons to indicate the state of folders, disks and media.
 | Folder needs refresh IMatch has detected that the folder has been modified on disk (e.g., by another application) and needs to rescan the folder to update it. During the rescan IMatch checks for new and updated files. See How IMatch Detects File System Changes for related information. See Adding and Updating Folders for more information |
 | Off-line This icon indicates that the folder (media, disk) cannot be found on disk. Either it was renamed, moved or deleted outside of IMatch (e.g., in Windows Explorer). If you have deleted the folder in another application, you can use the Remove folder from database command to remove the folder from your database as well (context menu of the folder). If you have moved or renamed the folder, use the Relocate command to show IMatch the new location of the folder. IMatch then updates the database to match. |
When you add a new folder to your database or a folder already in the database is rescanned, a small window below the folder tree opens:

List of recently added or updated folders.
This window lists all recently added or updated folders. You can quickly navigate to any of these folders by clicking on the corresponding folder name in the list.
Click on the X in the caption bar to close the window. It automatically reopens when you add or update folders later.
Below the tree IMatch displays multiple tabs in a dockable panel window. The Properties tab displays information about the currently selected item in the tree. Here you can input and edit information like a description or color-coding for folders.
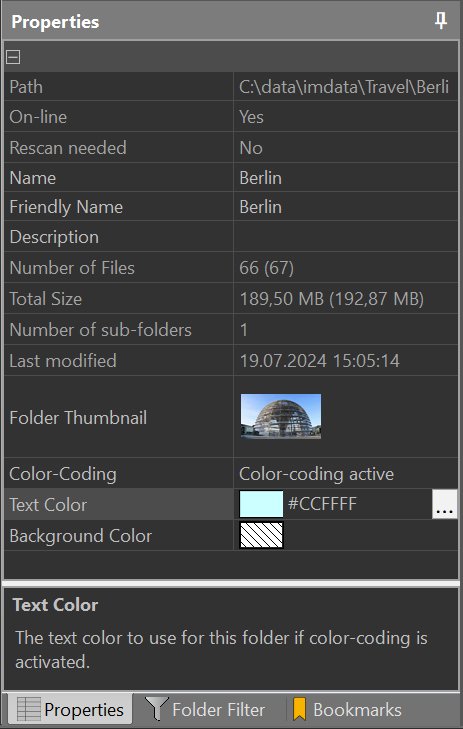
The folder properties tab
The number of properties displayed and the available options depend on the type of element currently selected in the tree. If you select a drive instead of a folder, the property grid changes to:
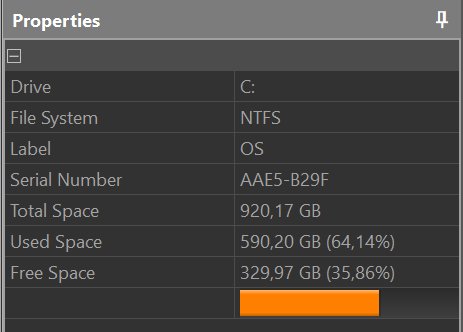
The drive/media properties tab
The help section at the bottom of the property grid displays details and explanations for the currently selected property.
By default IMatch displays items in the tree using small icons to display as much information as possible in the given screen space. If you prefer you can configure the tree to show thumbnails instead. The look then changes to this:

Tree with Folder Thumbnails
IMatch by default sets the first file found when indexing a folder as the folder thumbnail. You can configure the thumbnail to display via the folder properties panel or the corresponding command in the File Window context menu.
The folder thumbnail you set is used for the Album View in the File Window.
IMatch displays a thumbnail tooltip with up to 12 files contained in a folder when you point the mouse cursor at the folder name. See Thumbnail Tips for more information.
The thumbnail tip is not displayed if a more important tooltip is displayed, e.g. an off-line warning.
You can use drag & drop to copy or move a folder in IMatch. Hold down Ctrl while dragging to copy the folder, else it will be moved.
Alternatively, you can use the standard Ctrl + C (or Ctrl + X) to copy/cut a folder into the clipboard and then press Ctrl + V to insert it somewhere else.
Always use the powerful and flexible file management commands available in IMatch instead of using Windows Explorer or similar. This way IMatch can automatically keep your database synchronized with the file system.
IMatch allows you to drag folders to Windows Explorer or other applications. The default mode is copy (indicated by a little red + next to the drag icon). Avoid holding down Shift while dragging folders, because this would move the folder out of the database and all associated data would be lost.
If a disk or media indexed in your database is currently not connected, IMatch recognizes this and marks the folders (and files in the File Window) with a yellow warning icon:
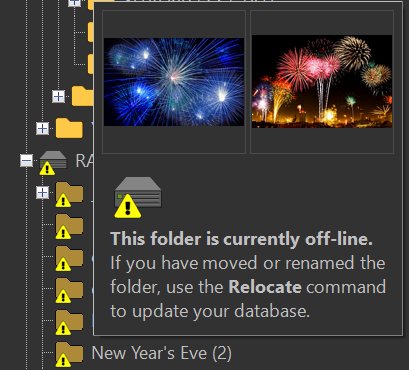
An off-line folder in the Media & Folders View.
When you point the mouse at an off-line folder, the Thumbnail Tip also contains information about the off-line state of the folder.
When you rename or move a folder outside of IMatch (e.g., in Windows Explorer), IMatch will be unable to find the folder afterwards. it will show as off-line.
To fix this, you need to use the Relocate command to inform IMatch about the new name and location of the folder.
See Offline Folders and Files for detailed information.
Press Del to delete the selected folder(s). IMatch displays a confirmation dialog box before deleting the folders. You can alternatively use the Delete... command from the context menu of folders. To delete folders immediately without separate confirmation press Ctrl + Del.
This command cannot be undone.
If you no longer want to manage a folder in IMatch, you can use the Remove Folder from Database... command available in the context menu of each folder.
If the folder to be removed has child folders, you have the option to keep these child folders in the database. This might be helpful if you want to cull the hierarchy of folders in your database or if you want to manage only lower levels.
Removing a folder from the database does not delete the folder from the media.
IMatch allows you to display folder names with individual background and text colors. This gives you another tool to highlight some of your folders, e.g., folders you are still working on, folders which have been taken off-line, etc. If you use color codes for your CDs or DVDs, you can match the folder colors to your medium. Or use different colors for folders containing RAW files and edited files. There are many good uses for color-coding folders.
By default, folders use the standard colors you set via the configuration dialog. To enable color-coding for a folder, select the corresponding option from the drop-down list:
This property and the text and background color properties are applied to all selected folders.
If enabled, the File Window displays the folder color-code in the File Window Caption.
The Filter tab allows you to search for folder names and descriptions and to apply a filter to show only folders matching your filter criteria. This is great when you work with large folder hierarchies.
To show only folders containing a certain word, e.g, beach, type beach into the Filter field. IMatch then removes all folders with names not containing beach from the tree.
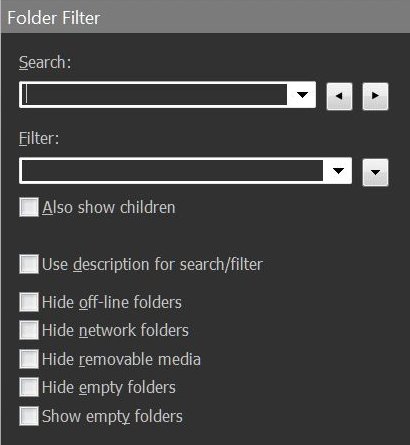
On this tab you can also toggle the display of remote, off-line, empty, non-empty and removable folders. These options are useful to hide all folders you're not currently interested in.
The option to show only empty folders (or folders containing at least on child folder which is empty) can be useful to clean up your folder structure.
The Bookmarks tab contains a list of personal folder bookmarks. Basically these bookmarks work like bookmarks in your web browser. They allow you to quickly locate favorite folders without the need to manually look them up in the tree. This feature is especially helpful if you work with many folders and you have to jump between folders often.
To add bookmarks, just drag folders from the tree into this tab. To remove a bookmark, select it and press Del or use the commands in the context menu.
The Folder & Media view keeps track of the folders you have recently visited.

You can move quickly to the most recently visited folders via the history buttons in the toolbar.
IMatch usually automatically rescans a folder when it detects changes in the file system. This process adds new files to the database, updates existing files as needed and removes files from the database which no longer exist on the medium or disk. The behavior of this function is controlled by the settings you make under Edit > Preferences > Indexing.
By default, the option to process sub-folders recursively is active. If you disable this option, rescanning a folder will no longer add new folders to the database. The function only updates folders already in the database, adding new files, updating modified files etc. If new sub-folders were created outside of IMatch, these will not be added to your database by a simple rescan.
In most scenarios, automatic processing of sub-folders should be enabled.
If you disable it, you can add new folders via the Add or Update Folders command from the Commands menu. This dialog allows you to override the include sub-folder setting. Or you just drop the new folders to the Media & Folders View.
See the Adding and Updating Folders topic for detailed information.
The right-click context menu displays the commands available for the currently selected folder. Different sets of commands are available for drive, media and folder nodes.
This table lists the most frequently used commands for folders:
| Command | Description |
|---|---|
| Ins | Create a new folder below the currently selected folder. |
| Ctrl+Shift+Ins | Create multiple folders at once. This command allows you to create entire folder hierarchies with any number of sub-folders. For example, if you enter
|- images
  |- beach
    |- daytona
    |- hawaii
This can be very useful if you often need to setup the same folder hierarchies, e.g. for project work. Create the folder list once and store it somewhere, e.g. in the IMatch Notepad. Then just copy & paste it into the Create New Folders... dialog to create any number of folders in one go under the currently selected folder. |
| F2 | Rename the focused folder. |
| Del | Delete all selected folders. |
| Shift+F5 | Rescan the folder and all sub-folders. See the Adding and Updating Folders topic for detailed information. |
| Ctrl+Shift+F5 | Rescan the folder, but open the Advanced Options dialog where you can choose how the rescan processes new and updated files. |
| Ctrl+F | Switches to the Folder Filter tab. |
| Expanding and Collapsing | |
| NumPad + | Expand the currently selected folder. |
| NumPad - | Collapse the currently selected folder. |
| NumPad * | Expand the currently selected folder, including all sub-folders, recursively. |
| NumPad Ctrl+* | Collapse all sub-folders of the currently selected folder. |
| Cursor right | Expands the currently selected folder if not expanded, else goes to the first sub-folder. |
| Cursor left | Collapses the currently selected folder if expanded, else goes to the parent. |
IMatch offers additional commands for expanding and collapsing elements in trees.
See also the topic File Management for information about how to work with folders and files in IMatch.
Click on the Configure button in the ribbon to open the configuration dialog. In this dialog you can configure sll aspects of the Media & Folders view.
Click on any property to see a detailed description at the bottom of the dialog.