 The Keyboard Cheat Sheet lists all frequently used File Window keyboard shortcuts.
File Windows display files based on a specific sort order and can be viewed in either thumbnail mode (small preview images) or tabular mode (detailed...
File Windows display files based on a specific sort order and can be viewed in either thumbnail mode (small preview images) or tabular mode (detailed lists). You have control over many aspects of the File Window's appearance and functionality. For example, you can customize colors, choose which information to display (such as file names, sizes, ratings, descriptions, headlines, or categories), and adjust how files are organized within the window.
The Keyboard Cheat Sheet lists all frequently used File Window keyboard shortcuts.
Every View in IMatch (such as Media & Folders, Categories, Timeline, etc.) has its own File Window that displays the contents of the currently selected object (folder, category, timeline node, and so on). If you select a folder, the File Window shows all files in that folder. Similarly, if you choose a category, it displays the files contained within that category.
You perform most of your tasks in IMatch while working inside File Windows. Here, you can browse files, execute actions like copy, move, delete, rate, label, and more. The Viewer uses the current File Window as its source, filters apply to File Window contents, Import & Export modules use File Windows as input, and you can drag and drop files from the File Window within IMatch or to other applications to open them (see Drag & Drop in File Management).
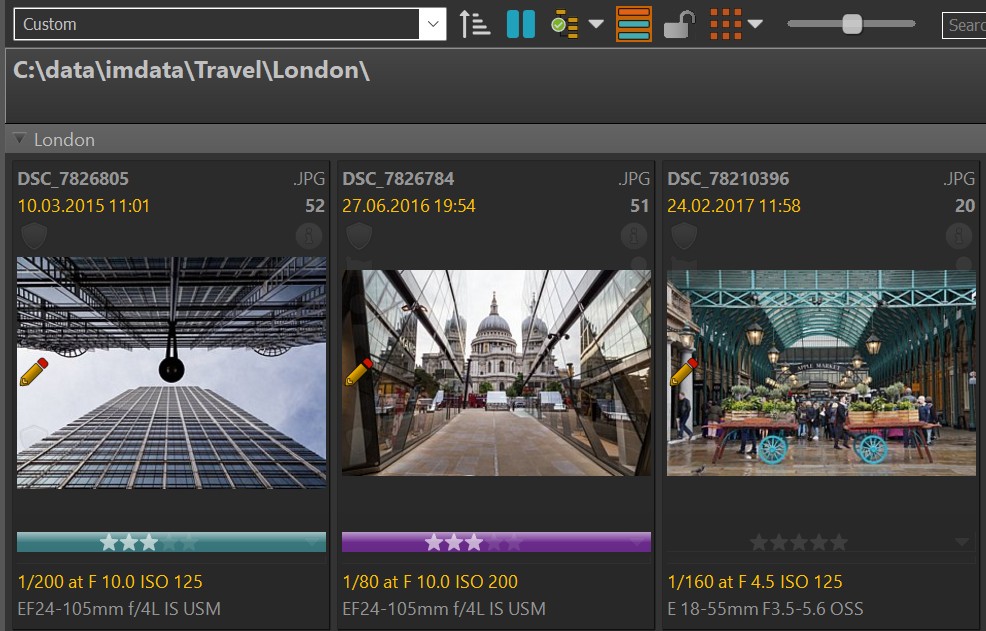
A File Window in thumbnail mode.
File Windows are central to many functions and likely the feature you'll spend most of your time using. This is why they offer extensive customization options so you can tailor them to fit your workflow and preferences perfectly.
For more details about panels, see the Panels help topic, which explains how to use panels for displaying and editing metadata, categories, history, filters, and more.
At the top of the File Window is a toolbar that provides quick access to frequently used commands.
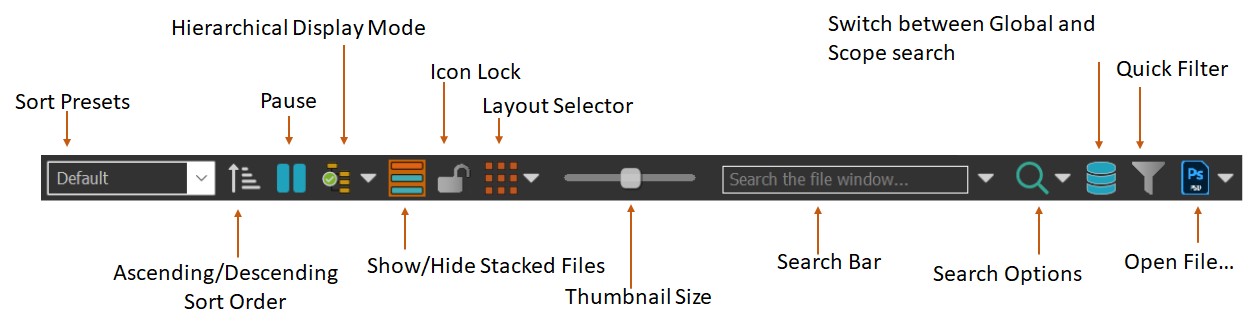
For a detailed explanation of all buttons and controls available in the toolbar, please refer to the rest of this topic.
Right-click a thumbnail panel in the File Window to open the context menu. The menu lists all available commands, and their keyboard shortcuts for fast access.

The context menu in the File Window.
Note that all menu entries list their corresponding keyboard shortcuts.
The File Window supports a wide range of keyboard shortcuts for quick navigation and running commands.
See the Keyboard Cheat Sheet for a full list of frequently used keyboard shortcuts.
Middle-click a thumbnail in the File Window to open a full-screen preview for that file. The Peek View remains open as long as you keep the middle mouse button pressed.
Using the middle mouse button does not change the focused or selected files.
Alternatively, you can press and hold SPACE and then left-click a thumbnail to open the Peek View for that file. If you want to use the keyboard only, press Shift + SPACE to open the Peek View. Releasing SPACE closes the Peek View.
By default, Peek View does not enlarge images smaller than the screen. You can change this behavior in the File Window settings under Edit > Preferences > File Window: Peek View
Hold down Alt when middle-clicking to see smaller images at their regular size, even if this option is enabled.
If an image is displayed at a zoom ratio larger than 100%, the Peek View displays an indicator in the bottom-right corner:

You can disable this 100%+ icon overlay via Edit menu > Preferences > Application: Show 100%+ indicator. (Search for 100%+ to find it quickly).
If you use the experimental Gallery layout, press Shift + SPACE to activate the Peek View.
IMatch offers several ways to open files in other (external) applications. The Open File toolbar button displays the icon of the application associated with the file format of the currently focused file. If you click the small arrow on the right side of the button, IMatch displays related commands:
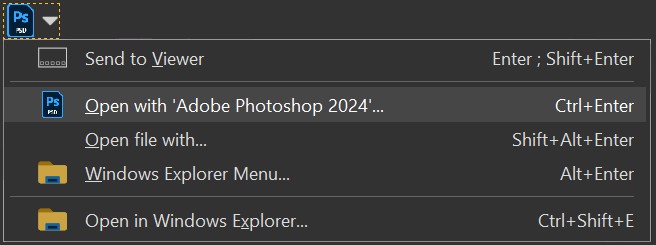
For details about the functions and commands available to open files in other applications, see the File Management topic.
Use the slider in the toolbar or Ctrl + Mouse Wheel while the mouse cursor is inside the File Window to change the size of the thumbnail panels in the File Window.
Click into the slider control and use the left and right cursor keys for fine-grained sizing.
The slider controls the number of thumbnails displayed per row. Here are some examples:
When IMatch indexes a file, it creates a thumbnail from it and stores it in the database. The default thumbnail size is 300 x 300 pixels, which is a good compromise between storage size and display size. You can control the thumbnail size in the Database Options
If you make the thumbnail panels larger than the available thumbnail size, IMatch upscales the thumbnails, which may cause some softening or blur.
At the top of the File Window, IMatch displays the caption bar:
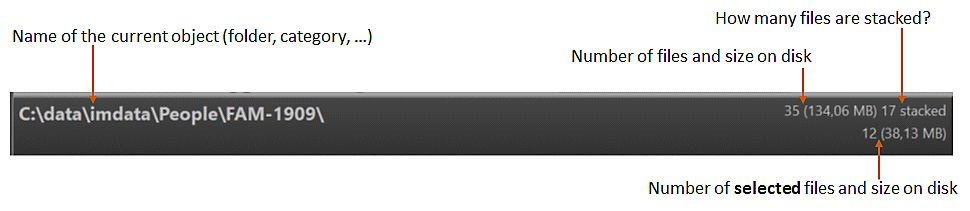
The number of files shown in the caption bar reflects the number of files displayed in the File Window, and not the number of unique files.
If you work in hierarchical mode in the Categories View or in a Result Window, the same file can be included in multiple groups and will be counted for each appearance. If you show two categories with 10 files each, the count will be 20, even if one or more files appear in both categories.
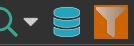
If the Filter Panel is enabled, the color of the caption bar changes and it also displays a filter icon.

To disable/pause the Filter, click the funnel icon or click the Pause button in the Filter Panel.
When the Quick Filter is active, the caption bar indicates this with a special color and icon:

Click the funnel icon to pause the Quick Filter.
Left-click into the caption bar to bring the current folder / category into view in the tree on the left. This is useful when you have scrolled the tree and now want to see the currently selected folder / category again.
The Additional Functions sub-menu offers direct access to the Windows Explorer menu. Keyboard shortcut: Alt+Enter.
This is the same menu you get in Windows Explorer when you right-click a file. From here you have access to functionality like Send to, Backup Functions, Version Control systems (if you use those) and other tools and utilities which link themselves into the Windows Explorer menus.
Much of the data managed in IMatch is of hierarchical nature. Folders are hierarchical (parent and sub-folders), categories are hierarchical and this also applies to most collections and the timeline as well.
By default, File Windows display the files in the currently selected folder, category, timeline node or collection.
For example, if you select a folder, you see only the files in that folder, but not the files in its sub-folders.
You can optionally include files in one, two or all lower levels by switching to a hierarchical display mode via the corresponding toolbar button in the File Window toolbar:
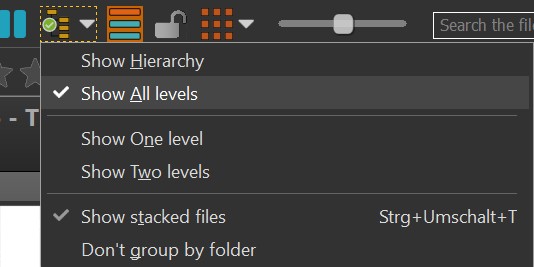
This button toggles whether or not the File Window displays hierarchical data (sub-folders, child categories,...).
You can control how many levels to display. Especially if you work with deep folder or category hierarchies you may want to include only the next one or the two next levels.
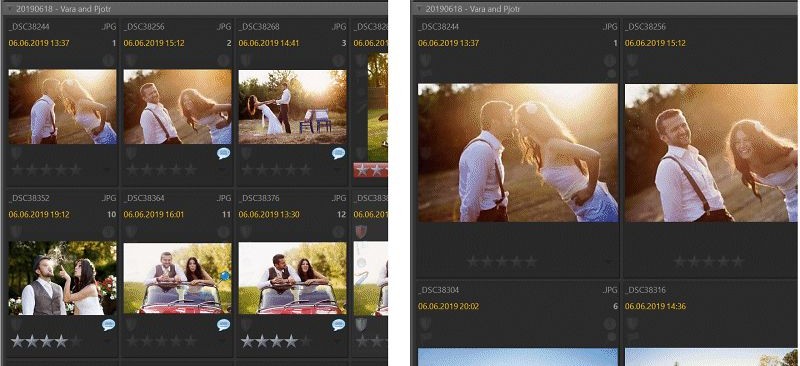
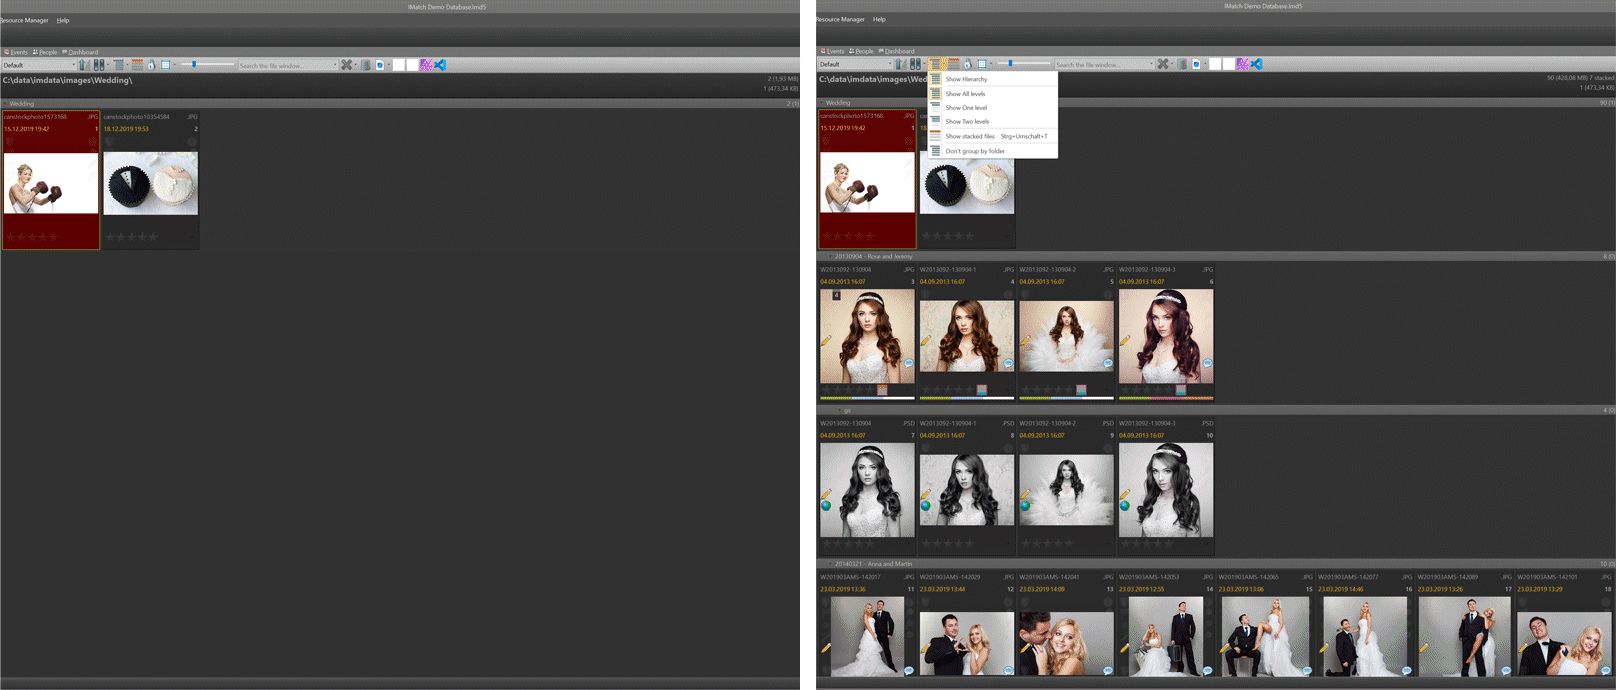
The following image shows the File Window displaying a folder.
On the left, only the files in the folder itself are shown. The image on the right shows the File Window with enabled hierarchical display mode, displaying the folder and all its sub-folders, recursively.
The hierarchy display works a bit differently, depending on the View you are in:
| View | Functionality |
|---|---|
| Media & Folders | If you select a folder, IMatch displays all files in that folder in the File Window. If the hierarchical display is on, IMatch also displays all files in sub-folders of the selected folder, grouped by folder, up to the number of levels chosen in the hierarchy menu. The Don't group by folder Option By default, IMatch inserts a group for each sub-folder when you enable the hierarchical display. If you also set the option Don't group by folder, IMatch flattens the files in the selected folder and its sub-folders into one set of files. This option is only available (and needed) in the Media & Folders view. If this option is enabled, the order of the files is only controlled by the current sort profile. It no longer matters in which folder the files are. This allows you, for example, to display masters and versions next to each other, even if they are distributed over multiple folders. If you select a media or drive node, IMatch displays all folders on that drive/media, independent from the state of the Hierarchy button. |
| Category View | If you select a category, IMatch calculates the result of that category (formulas, child categories) and displays the result as one set of files. If hierarchical display is on, IMatch displays the contents of the selected category and its child categories, grouped by category. Except for the bottom level, categories without assigned files or formulas will be displayed as empty. |
| Timeline View | By default, IMatch displays the combined set of files for the selected timeline node. For example, if you select a year, IMatch displays all images taken in that year. If hierarchical display is on, IMatch groups the items in the timeline node by their respective sub-groups, e.g., months or weeks. Files will be shown on the lowest levels. |
| Collections View | If hierarchical display is off, the File Window displays only the contents of the selected collection. The parent nodes of most collections (e.g., the "Pins" or "Recently Viewed" nodes do not display any content in the File Window. If hierarchical display is on, these parent nodes display their contents, grouped by child-collections. |
| Result Windows | Result Windows are special. It makes no sense to just merge the results without showing the originals. If you are in a Result Window, IMatch instead offers the option to Include originals in the results. This means that IMatch still shows one group for each original file, but also includes the original as part of the result. You can click on the original image to see the metadata, or to move, copy, or delete it. The original uses a special red border so you can always tell which of the files is the original. If this mode is enabled, the group header bar no longer shows a separate thumbnail. This produces a very compact layout. |
In this sample database, we have a folder named d:\imdata\wedding which contains three sub-folders. The wedding folder itself is empty. When we select this folder in the Media & Folders View, the File Window shows no files:

When the hierarchical display mode is off, the File Window shows only the files in the currently selected folder, but not the files contained in sub-folders.
By enabling the hierarchical mode via the drop-down menu in the File Window toolbar:
we can instruct IMatch to display one, two or all sub-folders of the currently selected folder.
We use a thumbnail-only File Window layout with small thumbnails here for demonstration purposes. This allows us to see multiple folders in one screen shot.
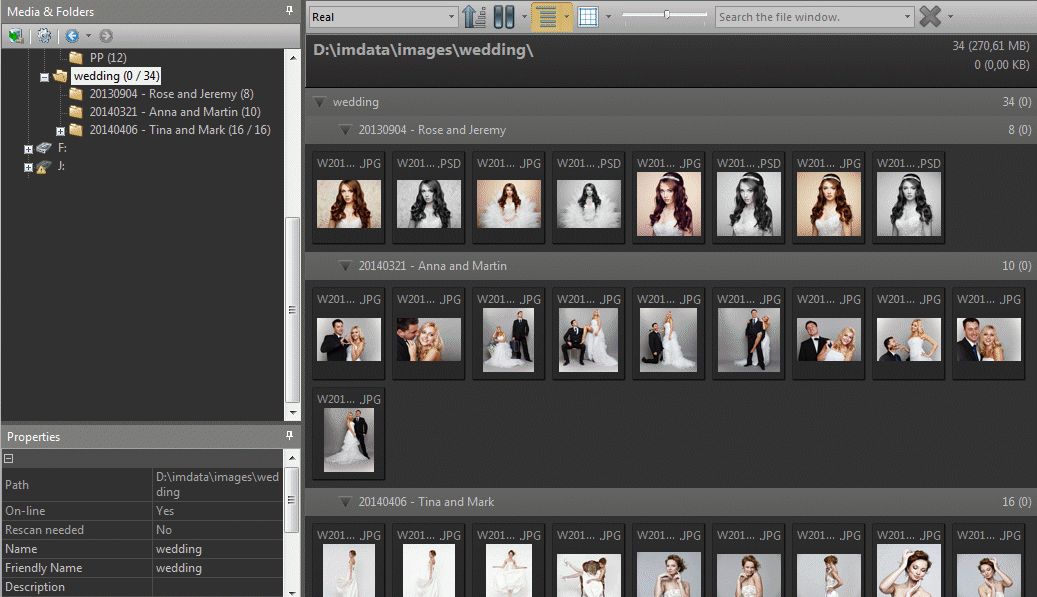
The same folder, but this time displayed in hierarchical mode.
IMatch shows the files in the selected folder (none) and the files in each of its sub-folders.
All that was said above is also true for viewing categories in the File Window. The hierarchical display mode works exactly the same. In addition, you can control whether you see all files 'in' the selected category, or only directly assigned files.
By definition, a category always contains all files assigned to it and all files in its child categories, recursively. See the Categories help topic for detailed information. Consider this category hierarchy:
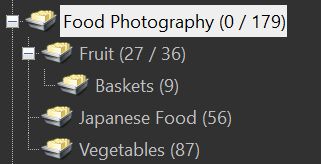
A category hierarchy
The Food Photography parent category has the child categories Fruit, Japanese and Vegetables. 0 files are assigned to Food Photography directly, but it contains 179 files in total. The Fruit child category has 27 directly assigned files, and 36 files in total (9 files coming from the Baskets child category).
When you click on the Fruit category, the File Window shows all 36 files. This is because a category virtually contains all files assigned to any of its child categories. If you want to see only the files directly assigned to Fruit, you can enable the Show only directly assigned files option in the Hierarchy drop-down menu:
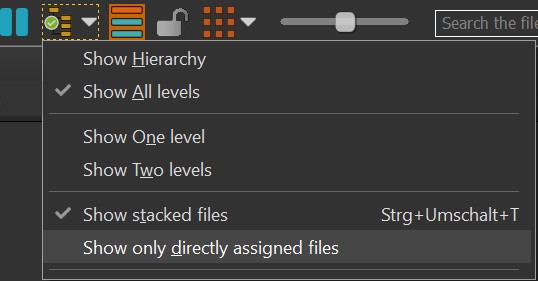
When this option is enabled, the File Window only shows the files directly assigned to the selected category - filtering out files from its child categories. This makes it very easy to see which files the parent category inherits from its children.
When you look at folders, categories etc. in hierarchical mode, IMatch displays each level of the hierarchy as a separate group. Each group has a header with the name of the group (e.g., the folder name or the category name) and below that, IMatch displays the files in that group.
By clicking on the arrow shown to the left of the group name, you can expand or collapse the entire group. Right-click on the group header for additional commands.

Collapsing groups and the context menu with additional commands.
To select a file in the File Window, left-click it. This will also make the file the focused file, indicated by a yellow border.
To select multiple files, use left-click to select the first file you want to select. Then hold down Shift and left-click the last file you want to select. The File Window selects all files between the currently selected file and the file you click last.
When you Ctrl+click a file, it becomes the selected and focused file. When you do that while multiple files are selected, you can unselect individual files as follows: Ctrl+click the file you want to unselect to make it the focused file. Then Ctrl+click another file.
To select multiple ranges of files, Ctrl+left-click the first file and then Ctrl+Shift+left-click the last file you want to select. This works similarly to Windows Explorer. Using Ctrl+Shift also allows you to deselect one or more files in a selected range of files.
When you click the File Window while another window or panel has the input focus, the File Window just becomes activated but does not change the selection. This allows you to set the input focus back on the File Window (to use keyboard commands), without accidentally changing the selection.
You can also make the File Window the active window by pressing F9, F9 or by clicking the File Window Caption Bar.
The following table lists all icons displayed on the File Window panel or in the File Window column in tabular view. Not all of these icons are visible at all times; some of them work like toggles. See also File Window: Collections for more information about some of these icons.

When you hover the mouse cursor over the Info Icon, IMatch displays the File Window Tip. This is a user-customizable tooltip window which displays detailed information about the file. See the sample layouts above for a screen shot.
To configure the File Window Info Tip, go to Edit > Preferences > File Window Tip.
The yellow triangle icon is displayed when IMatch encountered an error while reading or writing metadata. Point the mouse cursor at the icon to see a tooltip with additional information.
The Dashboard lists the number of problem files showing the yellow warning icon.
From there, you can open these files in a Result Window.
The Metadata Tag Extra\Error contains errors reported by ExifTool when reading or writing metadata. You can display the value of this tag e.g. in the Metadata Panel, or use it in the Filter Panel (with a Metadata Value filter) to find all files with errors.
This icon indicates that the file has GPS data. Click the icon to open the Map Panel.
When you enable the icon lock in the File Window toolbar, clicking the icons in the thumbnail panel no longer executes the associated action. This can be used as a safety measure if you often accidentally click an icon instead of selecting an image.

Hold down the Alt key when clicking an icon overrides the Icon Lock.
Alternatively, you can also set the File Window layout to not display icons at all.
After selecting one or more files, press Ctrl + C to copy the files and their fully-qualified file names into the Windows clipboard.
This way you can paste (copy) the files into another folder or use the file names in another application. Use Ctrl + X to cut files into the clipboard if you want to move them.
You can paste files into other folders or categories, events, or collections to assign them or add them to a collection or event.
See File Management for information about how to move, copy, rename etc. files and folders.
You can optionally show a bar which displays the colors of the categories to which the image is assigned. The bar can display up to 10 category colors. If you color-code your categories, this bar allows you to see the categories to which an image is assigned directly in the File Window.
A thumbnail panel with category color bar
For data-driven categories and the special @Keyword category and its child categories, IMatch performs an optimization. When allocating segments in the category color bar, it checks for unique colors and folds identical colors. If all your @Keyword categories are color-coded as blue, only one blue segment will be shown in the color bar, independent from how many keywords a file has. If you use different colors for different keywords, the category color bar will show these different colors of course. The logic is the same for other data-driven categories. This prevents data-driven categories from allocating all available segments in the color bar.
You can hide the colors of a category by using the ...hide from File Window setting for the category color. This may be useful if you use color-coding for @Keywords and this produces a large number of different colors.
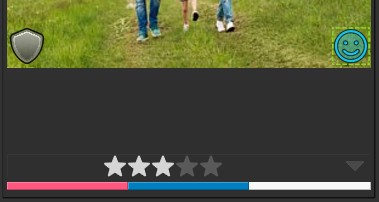
This bar shows the rating and label color of the file.
The Rating and Label Bar showing the 3 star rating and the color associated with the label of the image
You can control the intensity of the label color under Edit > Preferences > File Window: Window. If the label colors are too dominant, use a lower value for the corresponding setting.
See The File Window: Manipulating Collections for details about how you can work with ratings and label.
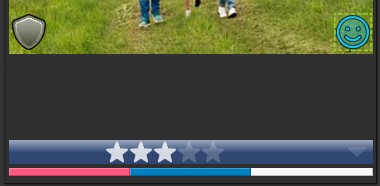
When you reject a file, the File Window displays a special icon on top of the thumbnail (for thumbnail panels) and the same icon in the rating and label bar.

Rejected files
If you have changed the metadata for a file, but these changes have not yet been written back to the file, the File Window displays a yellow Pen icon. By clicking on this icon, you can write-back the metadata for this file (or all selected files). Point the mouse cursor at the file to see which metadata tags need to be written.
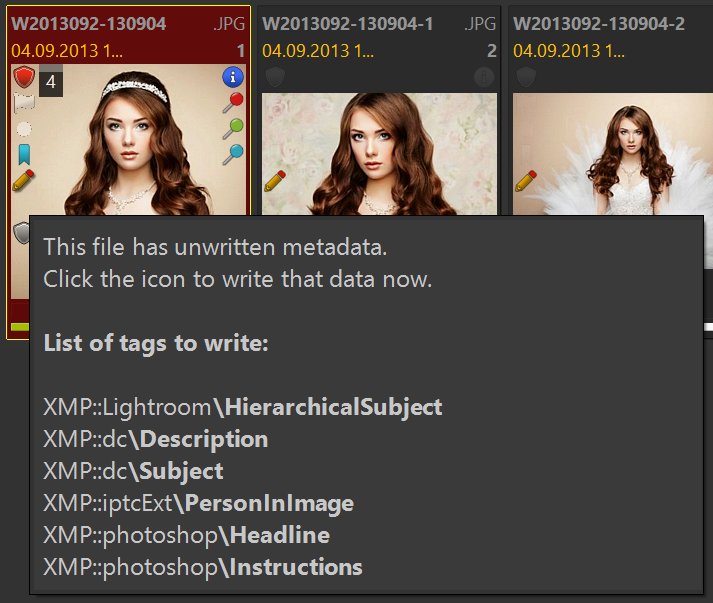
A file with pending metadata write-back. The pen icon is visible.
The tooltip of the pen icon lists the first 10 tags to write.
See Metadata Write-back for more information about how IMatch writes metadata.
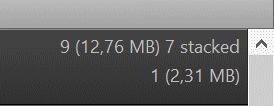
When you use regular or version stacks, the number of files loaded into the File Window may be less than the number of files in the current folder or category. For example, a folder contains 100 files. Among these files are 5 collapsed stacks which in total cover 30 files. Since the File Window does not load files hidden in a collapsed stack, the File Window shows only 75 files (70 files not in a stack and the five stack tops).
You can tell if and how many stacked files are hidden by looking at the caption bar. If files are hidden by a stack, the caption bar indicates that:
Via the Stack button in the File Window toolbar you can temporarily show all files which are usually hidden inside collapsed stacks (version and regular stacks):
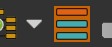
Click this button to reveal all files hidden by stacks. This does not change the collapsed state of the stacks in the current scope. It just shows all files as if the stacks were expanded. Click the button again to hide stacked files.
See Stacking for more information.
Depending on the options you have configured under Edit > Preferences > Database, IMatch produces multiple thumbnails for video files. When you hover with the mouse over a video file, IMatch displays a time-lapse preview of the video:
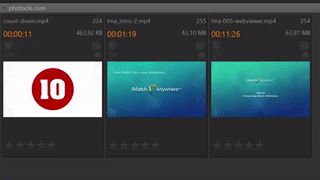
Thumbnails for video files display animations.
By default, IMatch picks the first video thumbnail to present the file in the File Window, the Quick View Panel, the Viewer and the Slide Show. You can change the default thumbnail by selecting one or more files in a File Window and then pressing Shift+Ctrl+Page Up or Page Down.
If you have created more than one bookmark for a video file in the Media Player, the File Window uses the video frames of these bookmarks to preview the video's contents. Otherwise it uses the automatically generated previews.
Using bookmarks gives you detailed control over which scenes are used for the animated preview in File Windows.
You can configure all video options under Edit > Preferences > File Window.
The ability to sort files by a wide range of criteria is an important feature. Sorting files by name, shooting date, last modified or viewed date, ISO, lens or artist can help solve certain tasks or just enables you to see your files in the exact order you want.
IMatch implements sorting via so-called sort profiles. A sort profile defines which metadata fields and attributes are used for sorting, and how these define the resulting order in the File Window. IMatch ships with a number of predefined sort profiles you can choose from a drop-down box in the File Window toolbar. You can add additional sort profiles via Edit > Preferences > Sort Profiles.
See the corresponding topic on sort profiles for details.
To apply a sort profile to the File Window, select it from the drop-down list in the File Window toolbar.

IMatch allows you to manually arrange the files in the File Window to create a custom sort order (light table sort).
To reorder files manually, choose the Custom sort profile in the sort profile drop-down list. Now you can select one or more files and drag them with the mouse into another position within the File Window. While you are dragging the selected files, IMatch displays a yellow insert marker which designates the new position of the dragged file(s).
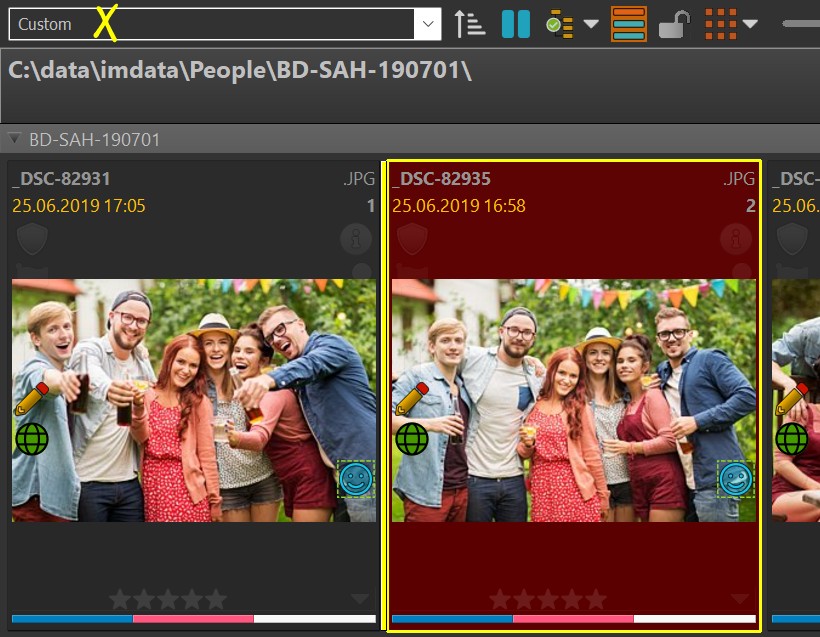
Dragging files to reorder while the Custom sort profile is active. The yellow bar is the insert marker.
IMatch supports a custom sort order for folders, categories, timeline nodes, events and people. You can recall the custom sort order anytime by switching to the Custom sort profile again.
When you move the insert marker near the top or bottom of the File Window, it starts to scroll automatically. If you move the mouse cursor within about two text heights near the bottom/top, IMatch scrolls the File Window at a speed of 1 to 2 rows per second (depending on how many rows are currently shown). If you move the mouse cursor within about one text height near the bottom/top, IMatch scrolls faster.
Hold down Shift to scroll a full page at a time.
Select a File Window layout that displays more rows for easier reordering, e.g. the default thumbs only layout.
See File Management for information on how to use drag & drop to open files in other applications.
To reset the custom sort order, or to set a custom sort order initially, use the Reset Custom Sort command from the File Window context menu (Additional Functions). This command resets the custom sort order to the order currently displayed. You can use this command only when the Custom sort profile is not active.
This behavior makes it possible to keep the general custom sort order, while changing the custom order for a selection of files to whatever sort profile is currently active.
You have established a custom sort order for several hundred files in a folder or category. Now you want to reset the custom sort order for some of these files to, say, an alphabetical sort order. Instead of manually moving the files around, you select them and switch the sort profile from custom to 'Default'. The File Window now sorts all files alphabetically. Keeping the selection, you now choose Additional Functions > Reset Custom Sort from the File Window context menu.
IMatch changes the custom sort order for the selected files to the current (alphabetical) sequence. The custom sort order of other files is not affected. When you switch back to the 'Custom' sort profile, all files are sorted as before, except the selected files, which are now in alphabetical order.
By choosing the appropriate sort profile before issuing this command you can pre-fill your custom sort profile with a specific order, and then start to manually change the order of the files.
With this command you can reset the sort order for the currently selected files back to the Default sort order.
This may be useful to partially reset a custom sort order created by you to a known state, aka the sort order created by the Default sort profile.
The sort order of the currently selected sort profile can be reversed temporarily via the reverse sort order button in the file window toolbar. This button just reverts whatever sort order is currently applied, without changing the sort profile itself.
A File Window layout may set a specific sort profile which overrides the sort profile currently set in the drop-down control. See File Window layouts for more details.
Under some circumstances you may need to manually reload the File Window in order to re-apply the current sort. For this, just press F5.
An example for such a situation would be that you sort by file rating and you change the rating of one or more files in the File Window. This does not cause the File Window to reload automatically. By pressing F5 you can force it to reload and to apply the new sort order.
Via the Pause button in the toolbar (or Ctrl + SPACE) you can switch the File Window into a special mode. If Pause is enabled, the File Window becomes blank and no longer loads or displays files.
Especially if your categories/collections/etc. contain thousands of files, switching between these may be slow - because the File Window has to load all the data from the database whenever you switch to another category or folder. If the File Window is paused, switching between even large categories becomes immediate.
Pause the File Window when you do some serious work with large categories, collections, timeline nodes, etc.
When the File Window is paused, all File Window panels are disabled.
The search bar in the File Window toolbar is one of the search features in IMatch. It can be used standalone or in combination with the Filter Panel. Despite its simple look, the search bar packs a lot of functionality.
Click into the search bar or press Ctrl+F to activate the search bar. Then just enter the word you're looking for and press Enter to start the search:
The search bar searches all files currently loaded in the File Window and removes all files from the window that do not match the search pattern.
Click on the Cancel Search button (X) to clear the search. The File Window then shows all files in the current scope again.
By default, the search bar searches all files currently loaded into the File Window (the "scope").
This allows you to easily control where to search. For example:
When searching the scope, pay attention to the hierarchical display mode and stacks. Remember that files hidden by a stack are not included in the search (they are not part of the scope). If required, temporarily show all stacked files by clicking on the corresponding toolbar button.
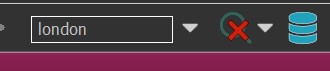
Sometimes you just want to search for something in the entire database, independent from the folder or category you are currently working with. The search bar supports this via the database search mode. You enable this mode via the corresponding toolbar button:

The prompt in the search bar changes to Search the database... and when you now type in a search term and press Enter, IMatch searches the entire database. All other Search Bar options work the same as for scope searches.
When the search is complete, IMatch opens a Result Window to show the results of your search. The original File Window is not modified by database-wide searches.
The titles of the Result Windows include the search string used for easier identification:

When you perform a database search in this Result Window, it updates to show the new result. It does not create a new Result Window. When you disable the database search mode in this Result Window, you can search within the results of the previous database search (drill-down search).
You can create multiple Result Windows for database searches by running a database search from any View (Media & Folders, Categories, ...).
You control the tags used for searching and other search options via the drop-down menu that opens when you click the down arrow next to the cancel search button:
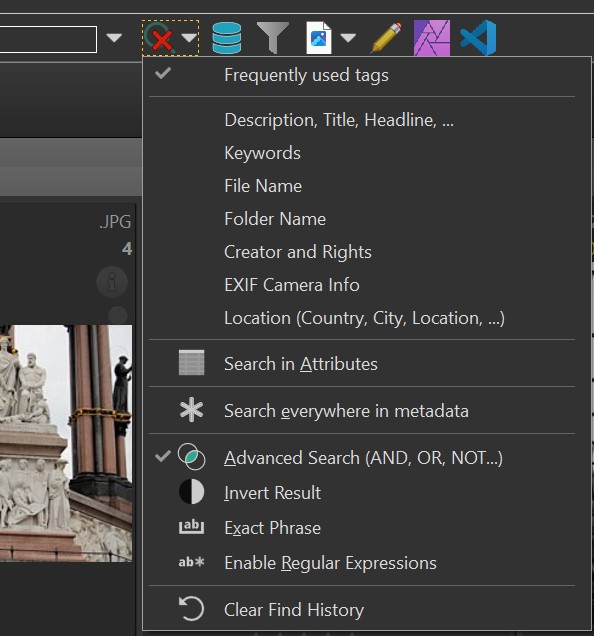
The search bar can search all tags in your database (which can be slow) or limit the search to a specific set of tags.
For example, you can search only in keywords or the file name. Or in both. Or maybe you want to limit the search to data contained in the title, headline and description tag. The search bar provides multiple tag sets which cover the most frequently searched tags. You can use them individually or in combination.
| Menu Command | Description |
|---|---|
Frequently used tags | This searches all the tags from the individual sets below. This is the best search mode for most use cases, unless your database is very big or you want to limit the search to specific tags for other reasons. |
Title, Description, Headline, ... | Searches these tags: XMP::dc\title\Title XMP::dc\description\Description XMP::photoshop\Headline\Headline XMP::iptcExt\Headline\Headline XMP::photoshop\TransmissionReference\TransmissionReference |
Keywords | XMP::Lightroom\hierarchicalSubject\HierarchicalSubject (Hierarchical Keywords) |
File Name | File Name |
Folder Name | Folder Name |
Creator and Rights | XMP::dc\creator\Creator XMP::dc\rights\Rights XMP::xmpRights\WebStatement\WebStatement XMP::xmpRights\UsageTerms\UsageTerms XMP::photoshop\Credit\Credit XMP::photoshop\AuthorsPosition\AuthorsPosition XMP::photoshop\CaptionWriter\CaptionWriter XMP::photoshop\Instructions\Instructions |
EXIF Camera Info | XMP::tiff\Make\Make XMP::tiff\Model\Model XMP::tiff\Software\Software photools.com::IMatch\2900\lens photools.com::IMatch\1501\cameraserialnumbercomp Exif::Main\42033\SerialNumber Exif::Main\50735\CameraSerialNumber Microsoft::XMP\CameraSerialNumber\CameraSerialNumber XMP::GettyImages\CameraSerialNumber\CameraSerialNumber XMP::aux\SerialNumber\SerialNumber XMP::exifEX\BodySerialNumber\SerialNumber |
Location | XMP::iptcExt\LocationShownCity\LocationShownCity XMP::iptcExt\LocationShownProvinceState\LocationShownProvinceState XMP::iptcExt\LocationShownCountryName\LocationShownCountryName XMP::iptcExt\LocationShownCountryCode\LocationShownCountryCode XMP::iptcExt\LocationShownSublocation\LocationShownSublocation XMP::iptcExt\LocationShownLocationName\LocationShownLocationName XMP::iptcExt\LocationCreatedCity\LocationCreatedCity XMP::iptcExt\LocationCreatedProvinceState\LocationCreatedProvinceState XMP::iptcExt\LocationCreatedCountryName\LocationCreatedCountryName XMP::iptcExt\LocationCreatedCountryCode\LocationCreatedCountryCode XMP::iptcExt\LocationCreatedSublocation\LocationCreatedSublocation XMP::iptcExt\LocationCreatedLocationName\LocationCreatedLocationName IMatch searches a wider range of tags for this tag set to accommodate for the fact that software (and users) sometimes don't fill the 'right' tags or don't take care to synchronize data between tags in different XMP namespaces that basically hold the same information. |
AI Tags | This is a dynamic search set that searches in the standard AI tags AI.description, AI.keywords and AI.landmarks and in AI trait tags you have created for AutoTagger.If you use AutoTagger and you store the results in AI tags and traits, this set allows you to focus your search on these tags. |
Search in Attributes | Searches IMatch Attributes. |
Search everywhere | Searches all metadata tags, including EXIF maker notes and other data usually not designed to be used by humans. This mode can be slow, especially when your database or scope are huge. It usually also yields many irrelevant results, especially when you search for numbers. This option works as a switch. While it is enabled, the other metadata options are disabled. |
The search bar allows for four custom tag sets, each containing any number of tags. Use this feature if you regularly have to search certain combinations of tags, e.g. camera-specific maker notes or groups of tags not already covered by one of the standard Tag Sets listed above.
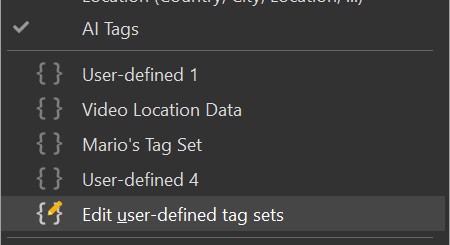
Custom Tag Sets for the File Window search bar.
A tag set consists of a name and one or more tags. To edit Tag Sets, select the corresponding menu command. This opens the Tag Sets editor:
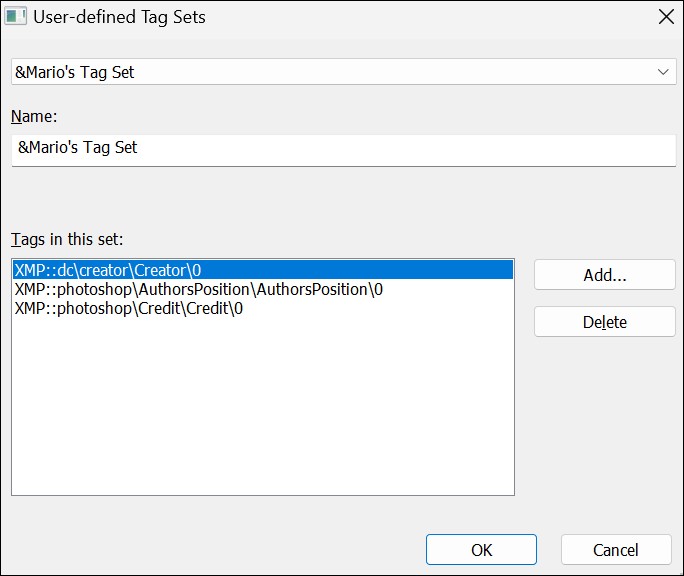
Specify a name of your liking and select the tags to include in the set. That's it. Once defined, you can instruct the search bar to search in one or more of your custom Tag Sets by enabling the corresponding entry in the menu (check box).
If you include a & in the name of your tag set (as we did above) you can enable/disable the Tag Set after opening the menu using the character after the &. Pressing M toggles the Mario's Tag Set. The & is not visible in the menu.
| Option | Description |
|---|---|
Advanced Search | Enables the advanced search mode which supports Boolean expressions like AND or OR. See below for more info. When this option is enabled, ( ) AND OR NOT have special meanings. Keep that in mind when you also enable regular expressions, where ( and ) are also treated special. |
Invert Result | Inverts the search result. If this is enabled, the File Window shows all files not matching the search bar. Use this to quickly find files not containing the search term you have entered into the search bar. Example: Searching for |
Exact Phrase | The default search mode is contains, which tells IMatch to find all tags containing the search term somewhere. If you enable the Exact Phrase mode, the tag value must match your search term exactly. If you search for file names in this mode, you have to include the file extension, too. This option has no meaning when you enable regular expressions (see below). |
Enable Regular Expressions | For complex searches. This tells IMatch to interpret your search term as a standard IMatch Regular Expression. Advanced search etc. are not available when regular expressions are used. |
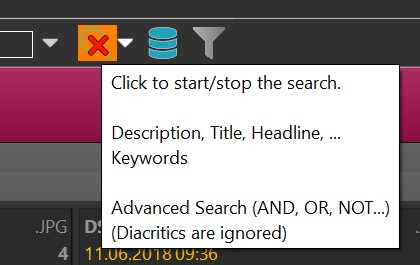
Tip: When you hover the mouse cursor over the Cancel Search button, IMatch displays the currently active search bar options:
When you type:
tender
the search bar searches for all files containing the word tender somewhere. This will find tender, bartender, Love me tender, etc.
If you enable the exact phrase option, only tags containing exactly the phrase tender will be found.
The search is not case-sensitive.
daytona beach
searches all files for the term daytona beach.
apples AND oranges
Finds all tags containing the literal text apples and oranges somewhere in a tag ("Peter likes apples and oranges."). The AND has no special meaning unless you activate the Advanced Search mode.
If you enable the Advanced Search mode via the drop-down menu you can use Boolean Expressions and parentheses to perform more complex searches:
apples OR oranges
returns all files which contain either the word apples or the word oranges. "There are some oranges". "Taken at the local apple harvest". "I like oranges and apples".
apples AND oranges
returns all files containing both apples and oranges in the same tag: "Here is a box of oranges and there is a bucket full with apples".
See the IMatch Search Engine documentation for more information.
If you enable search everywhere IMatch searches in all tags, including date and time tags. To search for a specific date, use the standard YYYY:MM:DD format, e.g., 2021:07:15 for July 15, 2021. If you also want to search for time, use the YYYY:MM:DD HH:MM:SS format.
The dedicated Date Filter in the Filter Panel is quicker and more convenient.
See The IMatch Search Engine for more information and examples.
A neat trick is to perform a search, then mark all files with Ctrl+A and then open these files in a new Result Window using Ctrl+G, R. Then you can search again, in the previous search results!
When you use the search bar, the File Window caption bar changes color and displays a special search icon. You can click on this icon to clear the search bar.
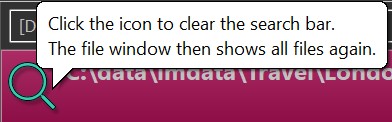
Click the icon to clear the search bar.
Note: If a Filter is active in the Filter Panel, it takes precedence and the caption bar indicates an active filter.
The Filter Panel provides more options to search and filter by all kinds of data. You can combine it with the search bar to perform complex searches.
Please see The IMatch Search Engine for more information and examples.
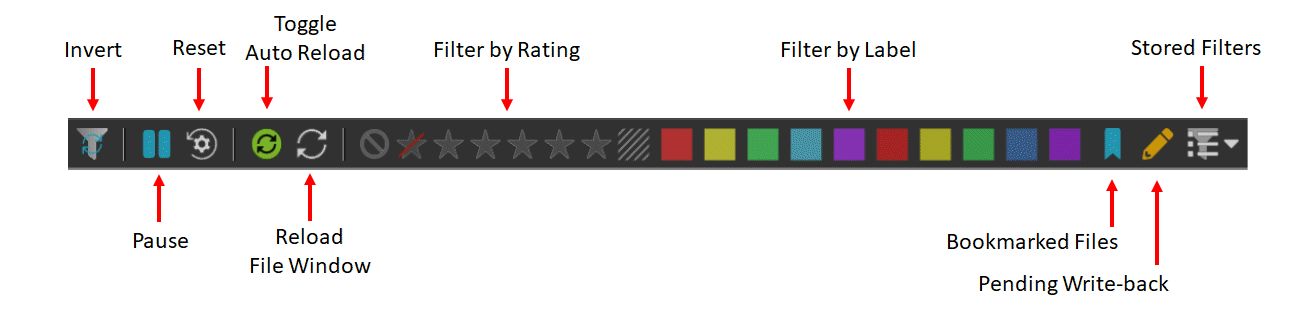
The Quick Filter ribbon allows you to filter the File Window using frequently used criteria like rating, label, bookmarks or files with pending write-back.
Open and close the Quick Filter with Shift + Ctrl + Q or the corresponding button in the File Window ribbon:
The Quick Filter is intuitive to use and gives you direct access to the most frequently used filters in File Windows.
While the Quick Filter is enabled, the Filter Panel is automatically disabled.
If you enable multiple filters (e.g. for rating and label), these filters are combined with the Boolean AND operation.
Only files matching all enabled filters remain visible in the File Window.
Use the invert button to reverse the result of the Quick Filter. The File Window then shows only files not matching the Quick Filter. For example, if the Quick Filter is set to show bookmarked files, inverting it means you see only files without a bookmark.
Click the pause button to temporarily disable the Quick Filter. The File Window shows all files again. All settings are retained and you can re-enable the Quick Filter by clicking pause again.
Click the reset button to clear all filters in the Quick Filter ribbon.
By default, the File Window automatically reloads when you make changes to the database that might affect the contents of File Window. For example, you set the Quick Filter to show only files with a red label. Now you assign one of the files a green label. The File Window reloads and the file no longer shows, since it no longer matches the Quick Filter.
In some situations, it might be useful to not automatically reload the File Window. For example, if you also plan to change the rating of the file after giving it a green label. This requires that the file remains in the File Window, albeit it actually no longer matches the Quick Filter.
Use the green button in the Quick Filter ribbon to toggle between automatic and manual File Window reload. If you disable the automatic reload, you can reload the File Window using F5 or the reload button in the Quick Filter ribbon.
 | Automatic File Window Reload enabled. |
 | Automatic File Window Reload disabled. Use the reload button on the right to reload the File Window when needed. |
 | The File Window needs to reload to reflect recent changes in the database, but automatic reload is off. The reload button changes color to indicate this. Click it to reload the File Window. |
The Filter Panel allows you to store and apply combinations of filters. This is a very powerful feature for creating frequently used filters and recalling them later with a single mouse click. The Quick Filter ribbon gives you access to all stored filters you have created via this button:
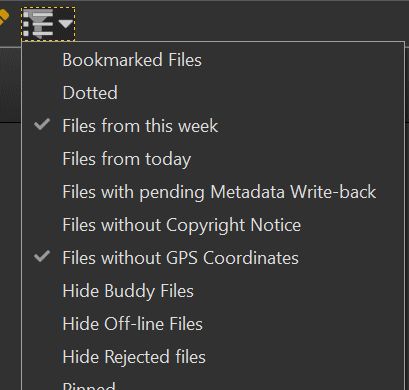
This makes it very easy to access stored filters, without even opening the Filter Panel. If you see that you use a specific filter often, store it in the Filter Panel and then just apply it from the Quick Filter ribbon when needed.
If at least one stored filter is enabled in this menu, the color of the ribbon button changes to give you a visual clue.
The File Window Tip is a small customizable window, very similar to a tooltip. The File Window displays the tip window when you point the mouse at the Information icon in the upper right of the File Window panel, or the icon in the row in tabular view.
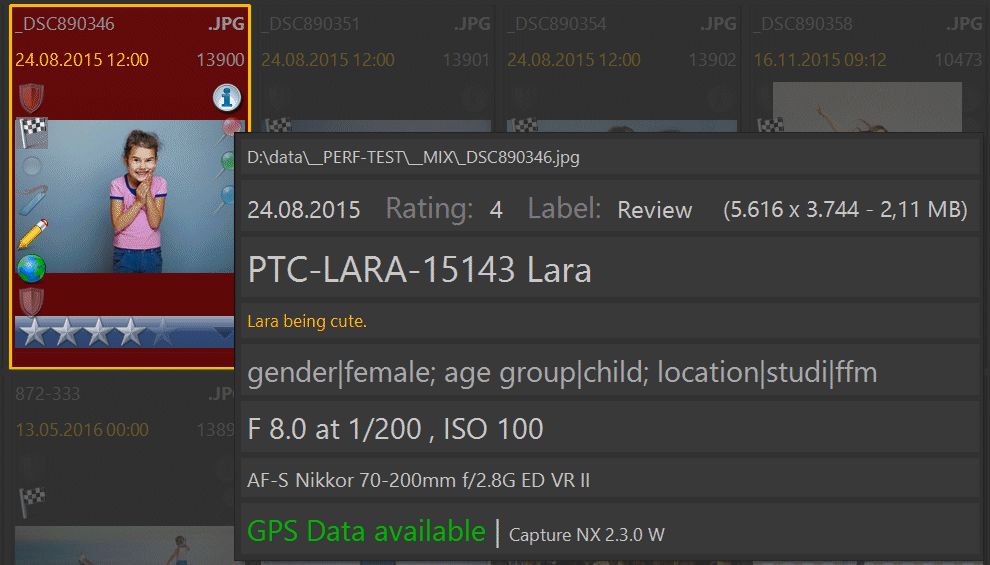
If your layout does not show icons (and hence no information icon) the File Window Tip is displayed automatically when you move the mouse cursor into the upper right corner of the thumbnail.
The contents of the File Window Tip are freely customizable via Edit > Preferences > File Window Tip.
See the corresponding help topic for details. The tip window is a great way to display additional information for each file, or longer text like captions or comments.
Bookmarks can be used to quickly mark files in a File Window. The Bookmarks collection contains all bookmarked files.
With the Goto next bookmark (Shift+Ctrl+B) and Goto previous bookmark (Alt+Ctrl+B) commands you can quickly navigate between bookmarked files in the File Window. This can be very useful if you compare images or need to look at images in different places.
The Additional Functions sub-menu offers additional commands to directly go to the first or last selected file or to the focused file. These commands can be real time-savers when you have scrolled the File Window and you want to go back to the focused file. Or when you work with huge selections of files and you want to see the first or last selected file.
IMatch includes a selection of pre-made layouts you can choose from. Each of these layouts can be customized and you can also create your own layouts to match your specific requirements and preferences.
See File Window Layouts for detailed information.
When you select a folder or category without files but sub-folders or child categories, the File Window switches to the Album View. In this view, the File Window represents sub-folders or child categories as thumbnails. The thumbnails use the folder or category thumbnail defined by you.
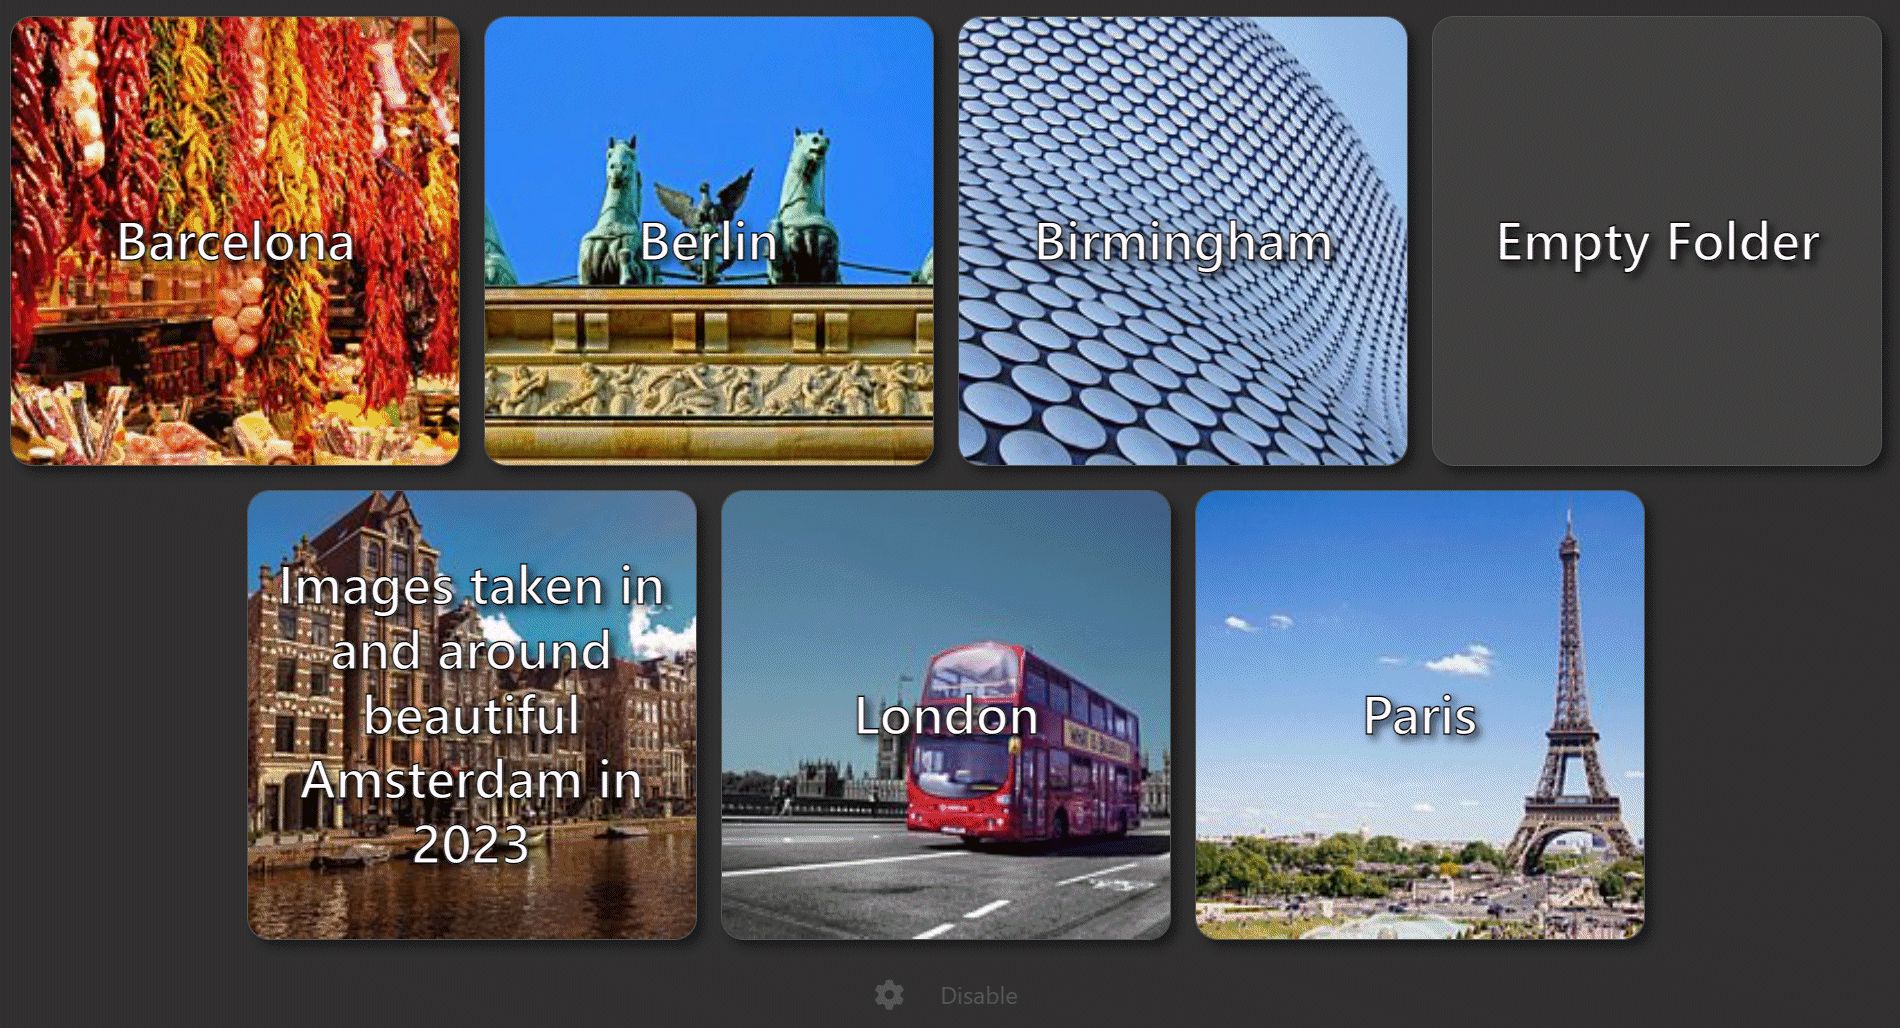
An example for the Album View: a folder without files but with 15 sub-folders is selected.
To set a folder or category thumbnail, select the folder/category for which you want to set the thumbnail and then select a file in the File Window.
Press Ctrl + T, T to make the selected file the folder/category thumbnail. Alternatively, use the Set folder thumbnail or Set category thumbnail from the File Window context menu (Additional Functions).
The Album View is only used when the hierarchical display mode is off.
Click the button at the bottom of the Album View to open the configuration. Here you can choose a layout and options like thumbnail size, font and colors. The configuration is applied to all Album Views.
When a folder or category has no thumbnail and no files, the Album View by default dives down and fetches a suitable thumbnail from a sub-folder or child category. When such a proxy thumbnail is used, the album tile renders the image with a lower opacity:
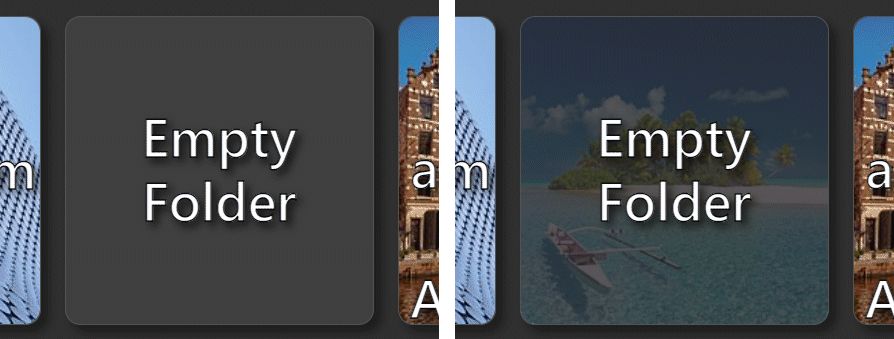
Right: proxy images disabled. Left: proxy image used.
If you find it confusing to see images in tiles for empty folders or categories, disable the proxy image option.
Use Ctrl + mouse wheel to make the Album View thumbnails smaller or larger.
Consider a folder hierarchy like this:
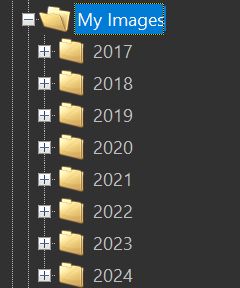
The My Images folder contains no files, but has several sub-folders. Clicking on it shows these sub-folders as albums:
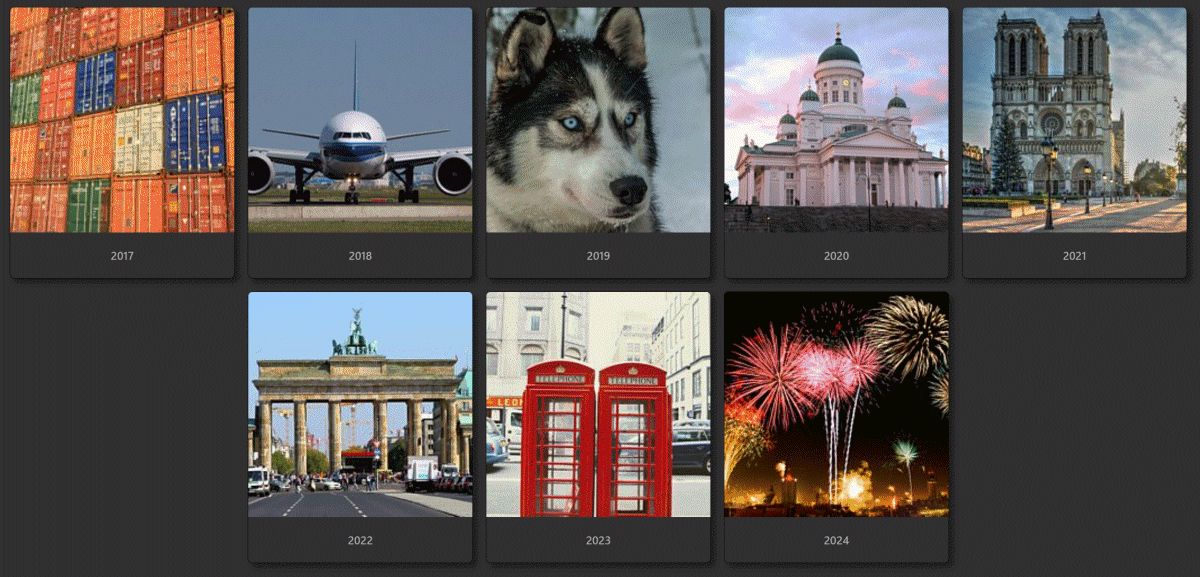
Providing you with a neat visual overview of the folder contents. Clicking an album thumbnail opens the corresponding folder in a regular File Window.
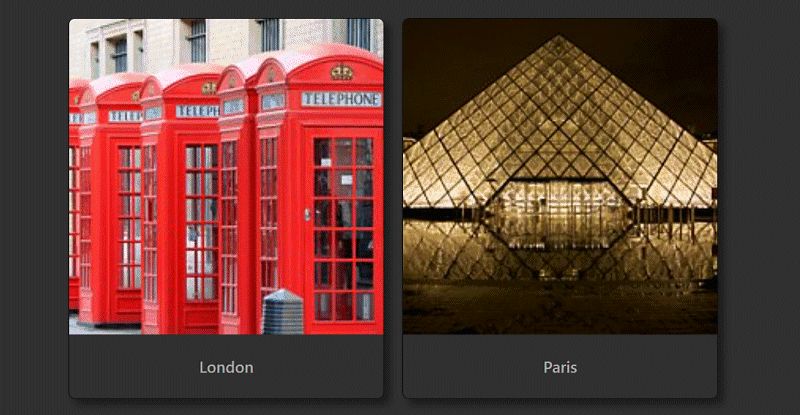
You can also set up categories to form albums, utilizing the Album View feature. For example:
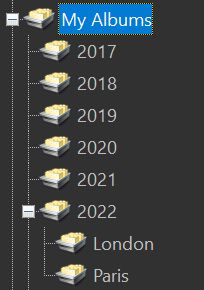
Clicking on My Albums produces this Album View:
And clicking on 2022 shows this:
In order to make this work, the parent category must be configured to show only directly assigned files via the category properties.
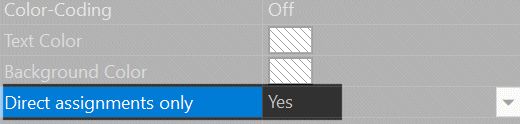
By default, parent categories virtually contain all files in their child categories, so they are never empty if there is at least one file directly assigned to it or to one of its child categories. By setting this option to Yes, you tell IMatch to show only files directly assigned to the category. And if it has no directly assigned files, the Album View is used automatically.
The Album View also works for data-driven categories. The data-driven category must have the "Show only directly assigned files" option set to Yes.
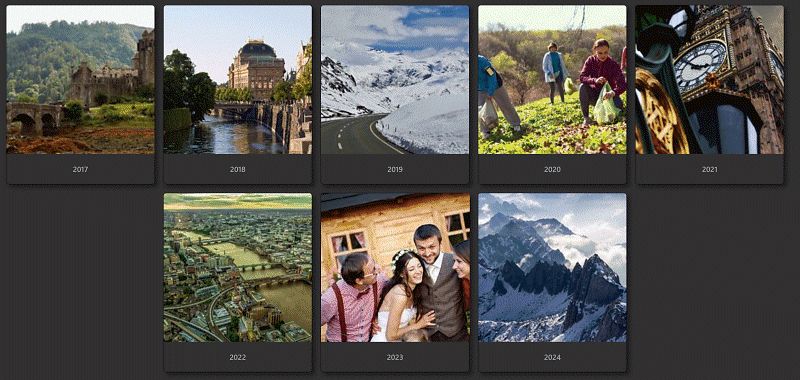
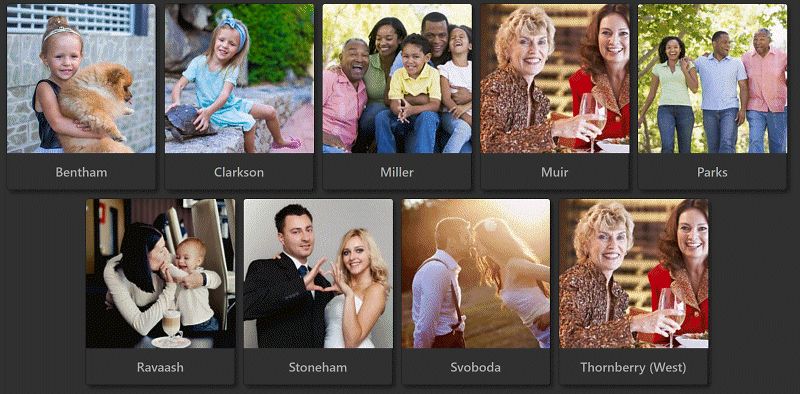
Here is an example of a data-driven category based on the Family a person is assigned to. The data-driven category is based on the variable {File.Persons.Families.Name} and automatically groups images by the families of the persons shown in the image:
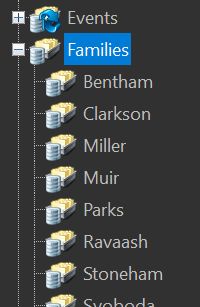
The Album View shows one Album for each family:
To temporarily disable the Album View, click on the Disable button at the bottom.
This disables the Album View for the current scope (folder or category). This can be useful, e.g. to perform a file drop or Paste operation into an empty folder or to reach the ribbon to change options.
The Album View automatically re-enables when you switch to another scope. The next time you select an empty folder or category with sub-elements, the File Window switches to the Album View again.
To permanently disable the Album View, open Edit menu > Preferences > File Window and set the corresponding option to No.
To configure global File Window colors and global settings, go to Edit > Preferences > File Window.