The View tabs in the IMatch window.
The IMatch application window displays the contents of your database using various screen elements, such as Views and Panels. This setup is referred to as the IMatch workspace.
You can customize the workspace to display precisely the information you need in a format that suits your preferences. Multiple workspaces can be configured, allowing you to switch between them effortlessly to support different stages of your workflow.
IMatch presents different aspects of your database using different views. A view is usually split into two vertical sections. The left section allows you to navigate the view; the right section contains a File Window, displaying the contents of the currently selected item in the view.
You switch between the different views by clicking on the corresponding tab at the top of the IMatch workspace:

The View tabs in the IMatch window.
There are seven main views in IMatch. Click on the view name in the table below for detailed information about each view.
| Media & Folders View | This view represents the physical view of the contents of your database. Here you work with files, folders, and media. |
| Category View | This view allows you to see, work with, and manage the categories you have created. |
| Timeline View | The timeline view arranges your files on a timeline, allowing you to quickly find images and other files by the date and time they were created. |
| Collections View | IMatch maintains a set of automatic collections which cluster and group the files in your database by a wide range of attributes. |
| Events View | In this view, you work with IMatch Events and the files associated with these events. |
| People View | In this view, you manage the persons in your database and view the images for each person. |
| Dashboard View | The Dashboard shows you everything that's important about your files and database in one place. |
IMatch uses freely resizable and movable panels to display information and for data input and modification. There are panels which show you the metadata or keywords of the currently selected files, the history, or statistical information. You can show and hide these panels individually, depending on the current phase in your workflow.
See Panel Basics for detailed information about all available panels in IMatch.
IMatch stores the panel layout and the current folder, category, etc., in a workspace. You can configure different workspaces for different phases in your workflow, e.g., one workspace for convenient metadata editing and another for reviewing files.
IMatch always operates with an active workspace. This workspace works behind the scenes and remembers the IMatch window layout, panel settings, the active View, folder, category, and over 200 other settings. When you close and reopen IMatch, this workspace is automatically restored, and your settings are as when you closed IMatch. Workspaces are stored on a per-user basis so that each IMatch user has their own workspace(s).
When you transfer your settings to another computer, e.g., using Pack & Go, your workspaces are transferred with the settings automatically. See also Traveling with IMatch for additional info.
When you have configured a combination of view and panel layouts by opening, resizing, and adjusting panels, you can use the View menu > Workspaces > Save Workspace... command to save these settings under a name. In the dialog that opens, you can either add a new name or choose one of the existing workspaces to update it with the current settings.
Saving a workspace freezes all current workspace settings, window positions and sizes, panel layouts, etc. You can later return to these settings at any time by loading the workspace.
You may want to create different workspaces e.g., for image review, metadata editing, working with attributes... If you work on systems with a varying number of monitors, you can create workspaces for one, two, or three monitors and switch between them as needed.
To update a saved workspace with the current settings from the active workspace, just select the name of the saved workspace from the list in the save dialog. This copies the settings from the active workspace into the saved workspace. You can later recall the workspace at any time.
You can load and save workspaces via the corresponding commands available in the View menu. When you load a workspace, IMatch copies the settings from this workspace into the active workspace. Changes you make afterward to the active workspace are not mirrored or copied back into the saved workspace. Saved workspaces remain unchanged until you replace them or delete them.

The Workspaces menu allows you to open existing workspaces and save or delete workspaces.
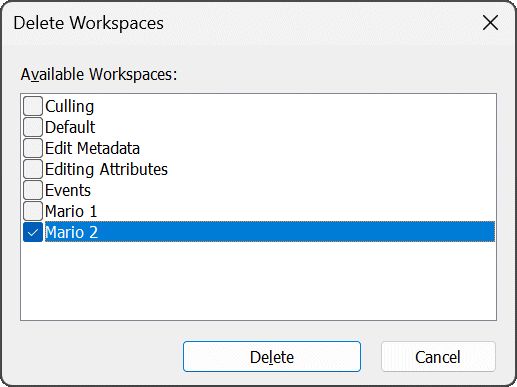
With the Delete Workspace... command, you can delete one or more of the existing workspaces.

If you delete all workspaces, IMatch automatically creates a new Default workspace for you.
When you work with different monitor configurations, e.g., sometimes adding a second monitor, create a workspace for each setup. This allows you to switch to the workspace matching your current screen configuration.